Timesheets
The Timesheets module allows you to manage and track the time spent on your projects individually or by teams in just a few clicks.
The Timesheets module contains the following sections:
Home
This is the landing page for the Timesheets module. You will have a reminder of how many hours you have added and how many days are missing.
Additionally, you have a table with the total hours worked on activities and projects over the past 3 months.
There is always a button that connects the software with the documentation in the top right.
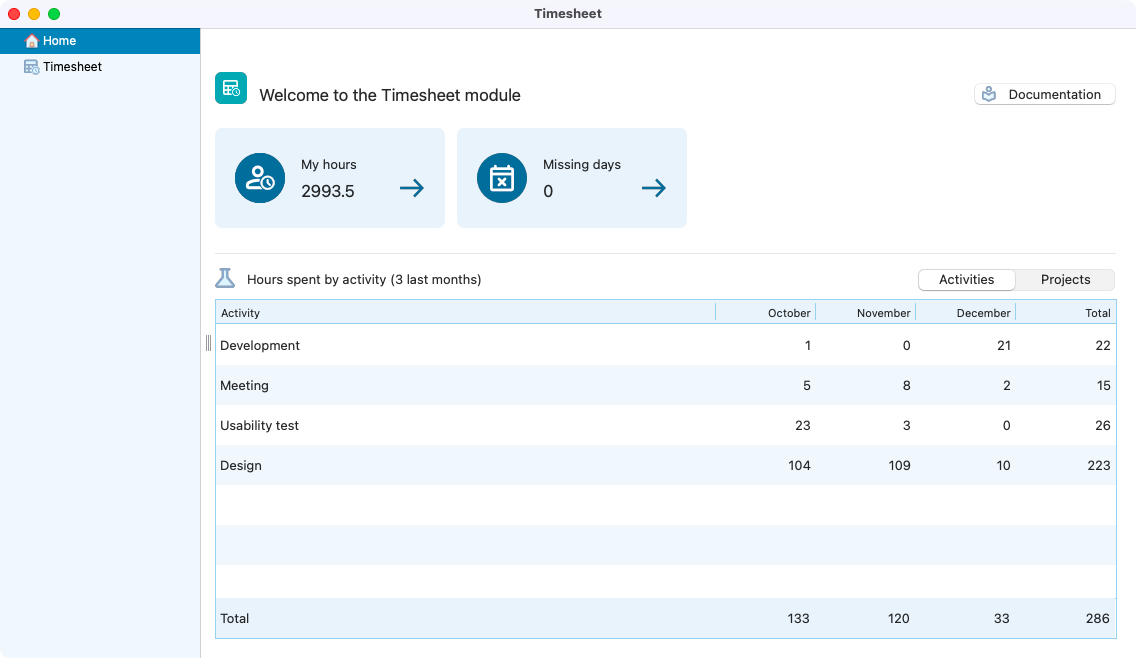
View of the module’s homepage, with the activities worked in the past 3 months.
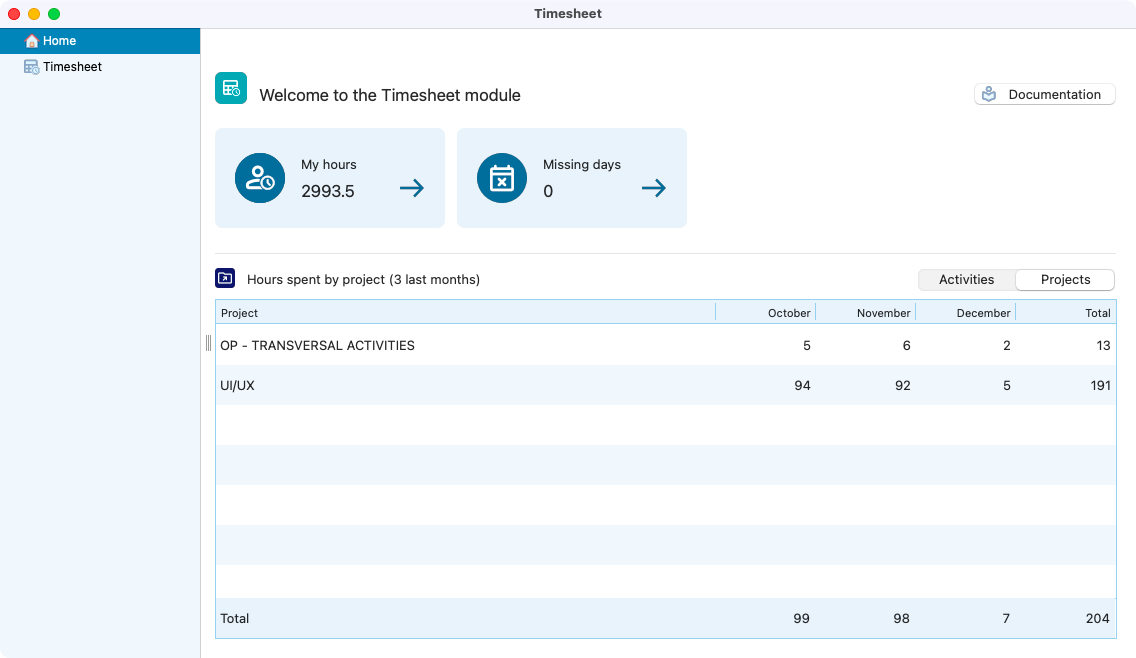
View of the module’s homepage, with the projects worked in the past 3 months.
Functionalities
The following sections will describe the content of each tab inside the timesheets module.
Timesheets
This is where you fill in the Timesheets. The minimum incremental time, maximum hours per day and per weeks can be managed in the settings by the administrators. Here is some key actions that can be seen on the module:
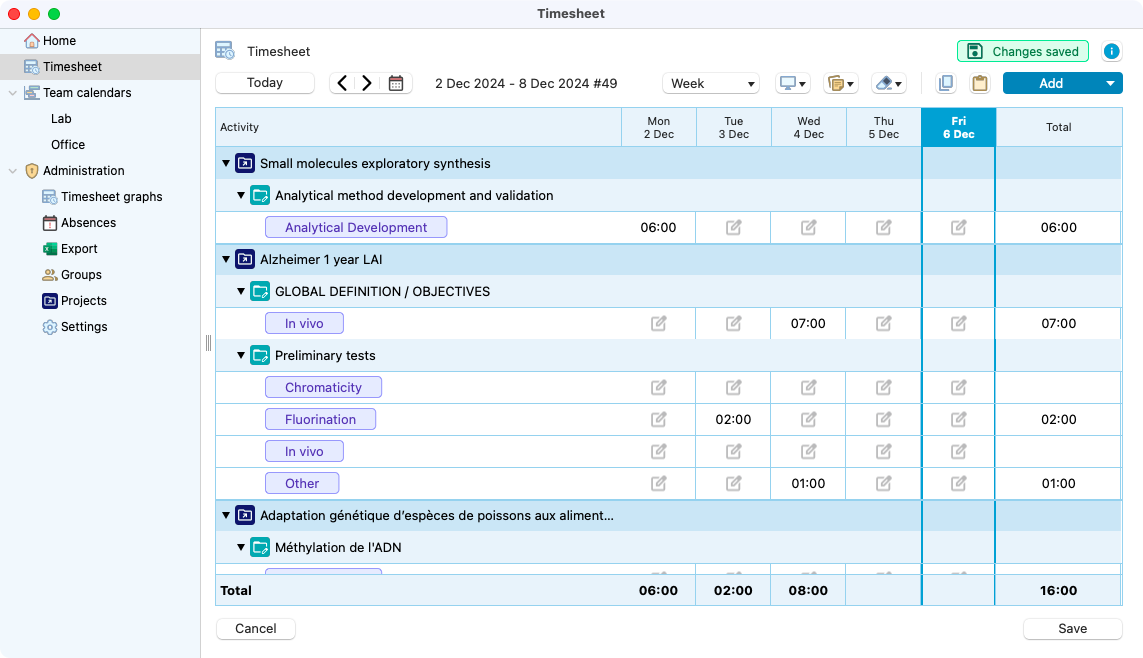
Timesheets home, where you can see all the hours worked.
The main button to add activities is located in the top right, after clicking on it, it will be displayed 3 options:
Activities: It will open a panel to select project, study and then activity.
Activities in this study: It is only available after selecting a study, it will open a panel with the project and study already selected.
Absence: It will open a list of all the absences defined by your company.
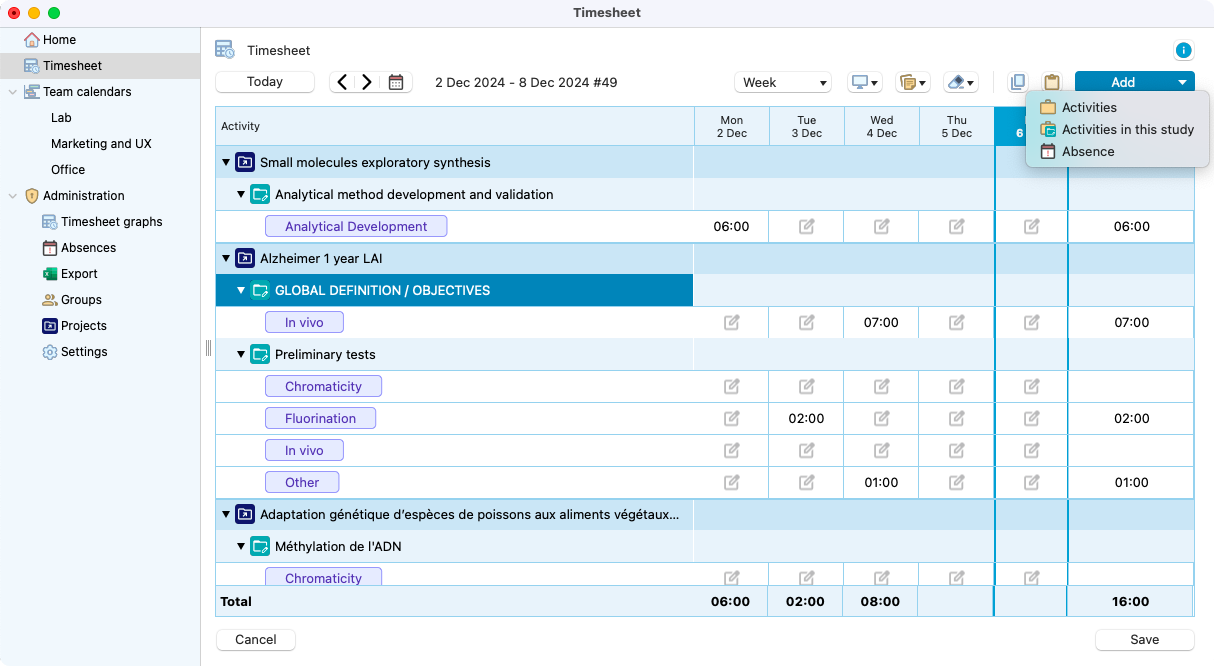
Timesheets view, with add button selected.
You can add a new activity by selecting the project, the study, and the type of activity. The duration of the work will be automatically displayed in the projects graphs (inside timesheets graphs) and in the table located in the homepage.

Process of add a new activity on your timesheet.
A new functionality added is the possibility to copy and paste weeks that were filled. Which means that if you have a similar routine of work you can copy the previous week and paste in the next one.
When pasting you have the option to include comments, select one, some or all projects, studies and activities. Another option is to modify the quantity of hours before confirming the pasting.

View of pasting a week in the timesheets.
For additional informations, you can click on the “i” button. It will contain several information on how to correclty fill the timesheets and the meaning of each button.
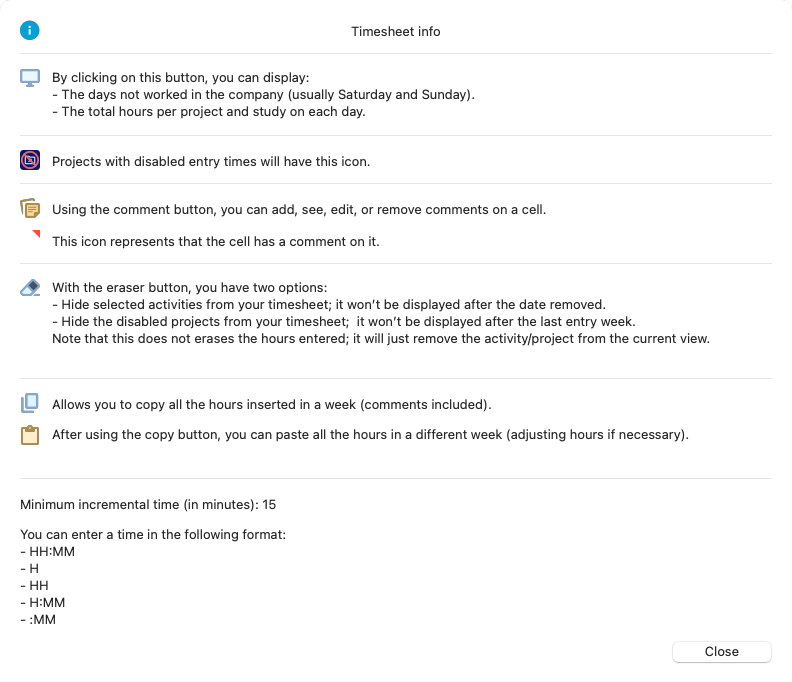
View of the information panel open.
Teams calendars
You can manage your teams, create new ones, or edit the name and users inside.
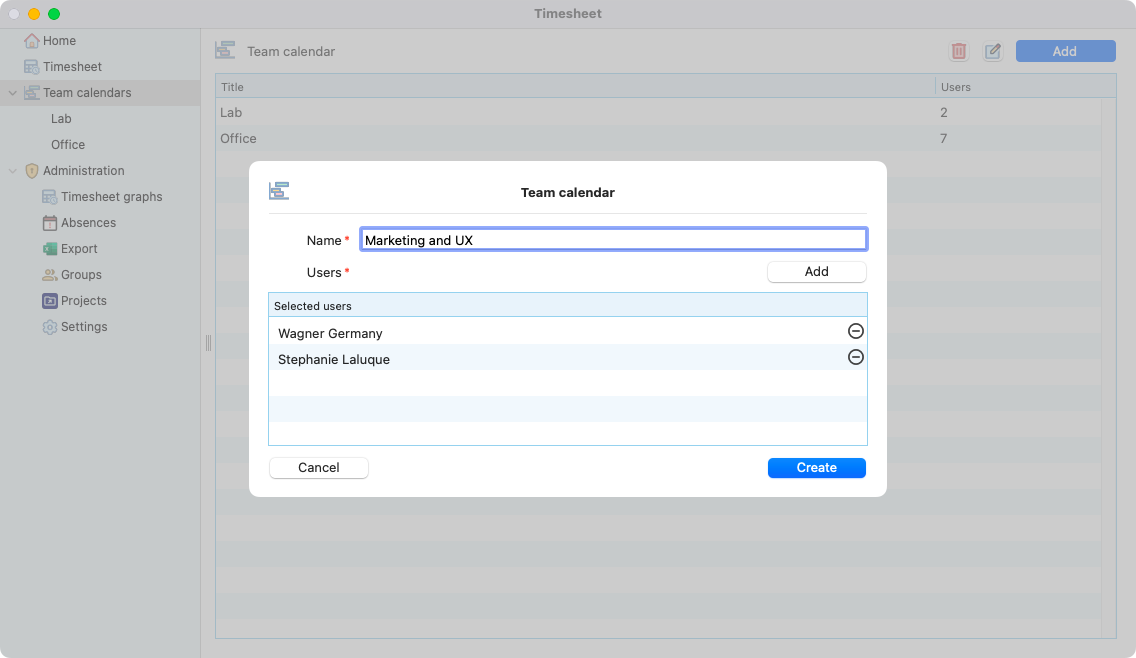
Adding a new team inside team calendars.
On your teams, you have a view of the total hours worked by week or month. There is also the possibility to see the hours worked by project and absences. The red cells mean that the user included more hours than the max limit specified inside settings.
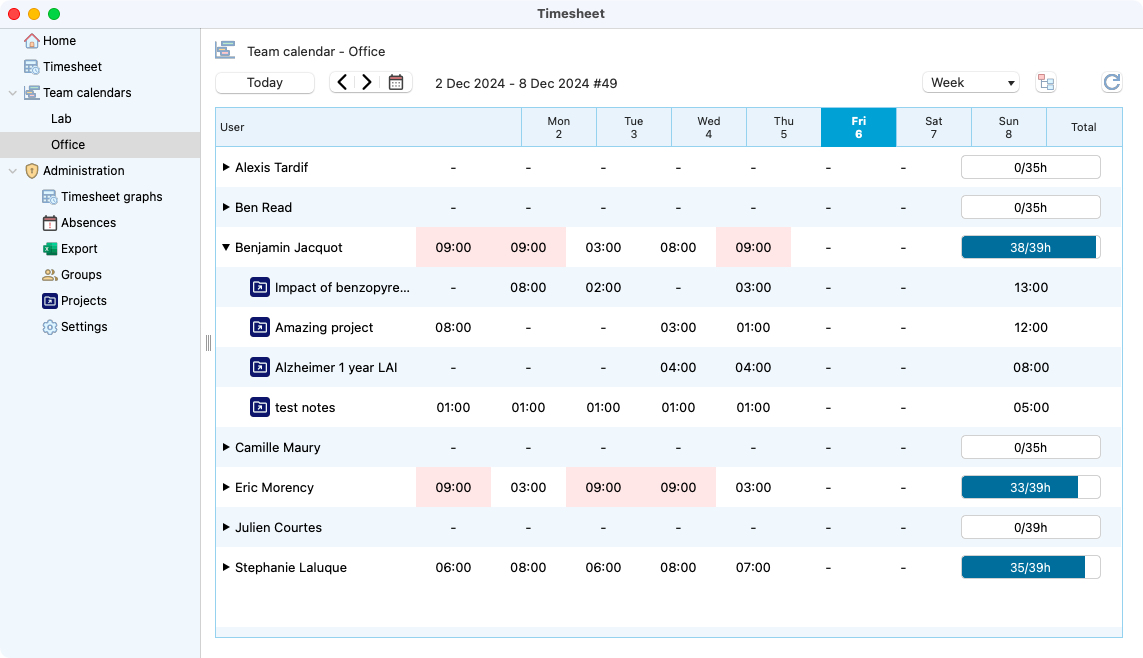
Team calendar in the weekly view.
The absences are represented by ![]() . When there is this icon in the cell, it means there are absences added on this day, to check exaclty how many hours, you need to click/deploy the user.
. When there is this icon in the cell, it means there are absences added on this day, to check exaclty how many hours, you need to click/deploy the user.
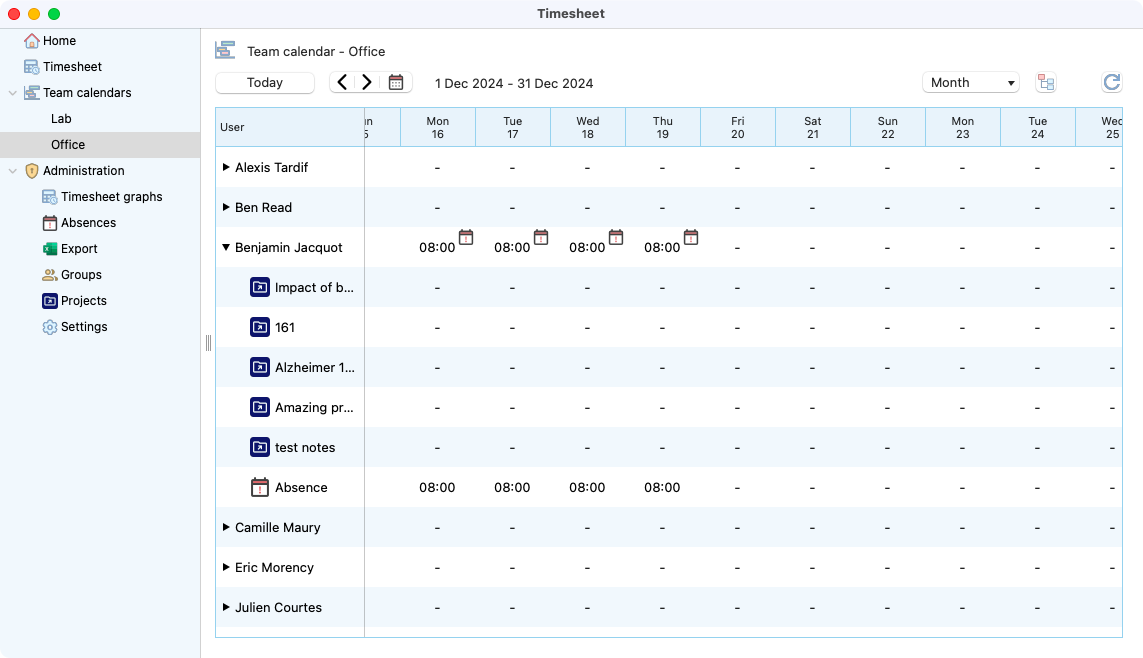
Team calendar in the month view, with some hours absences added.
Graphs
Here you have different types of graph and views. You can select a different type and a project on top.
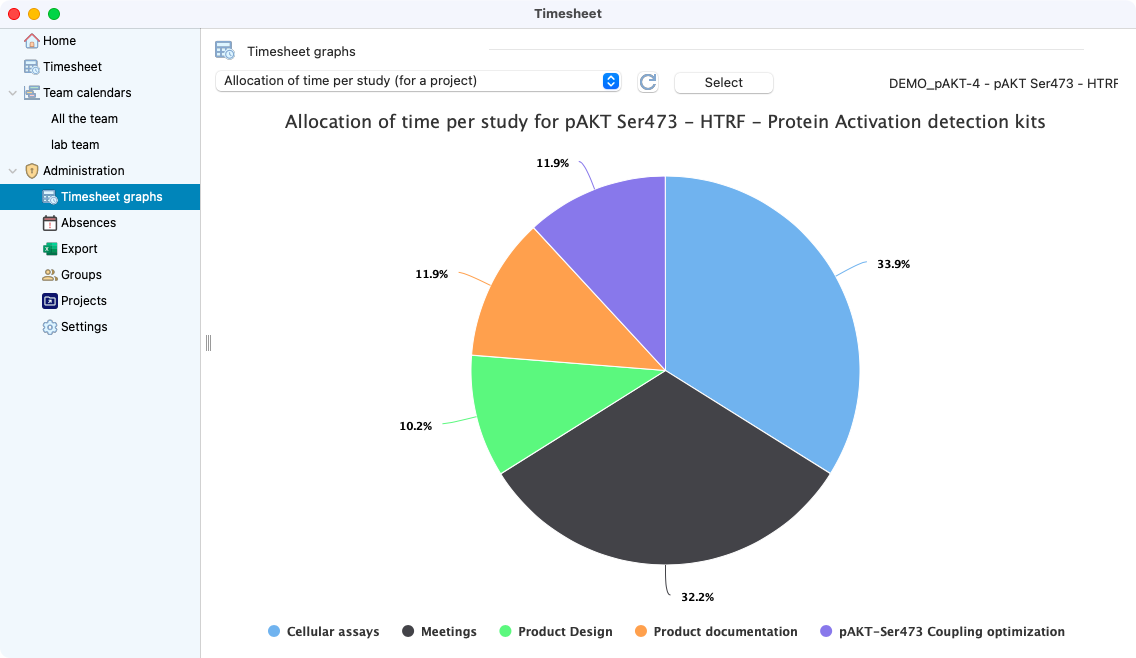
View of graphs section, with buttons to change type and project.
Abscences
On that section you can add or remove abscences types. Such as holiday, sickday, public day off and others.
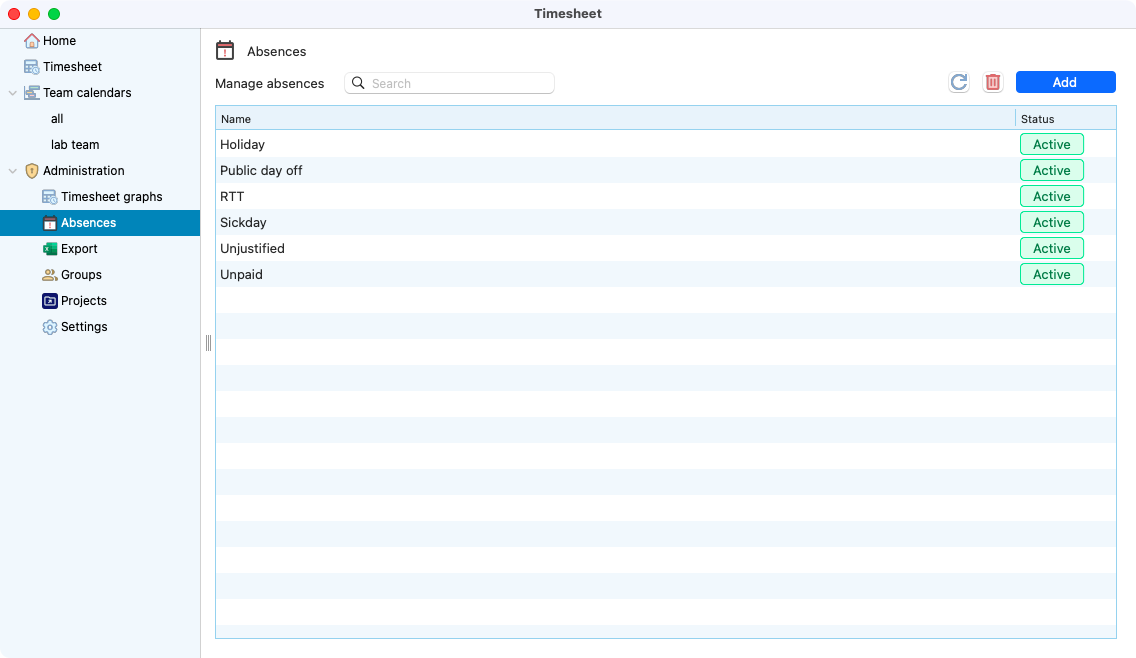
Absences section, with all the active options displayed.
Export
You can also export the summary of your Timesheets in .xslx format, filtering by:
Projects.
Date.
With or without absences.
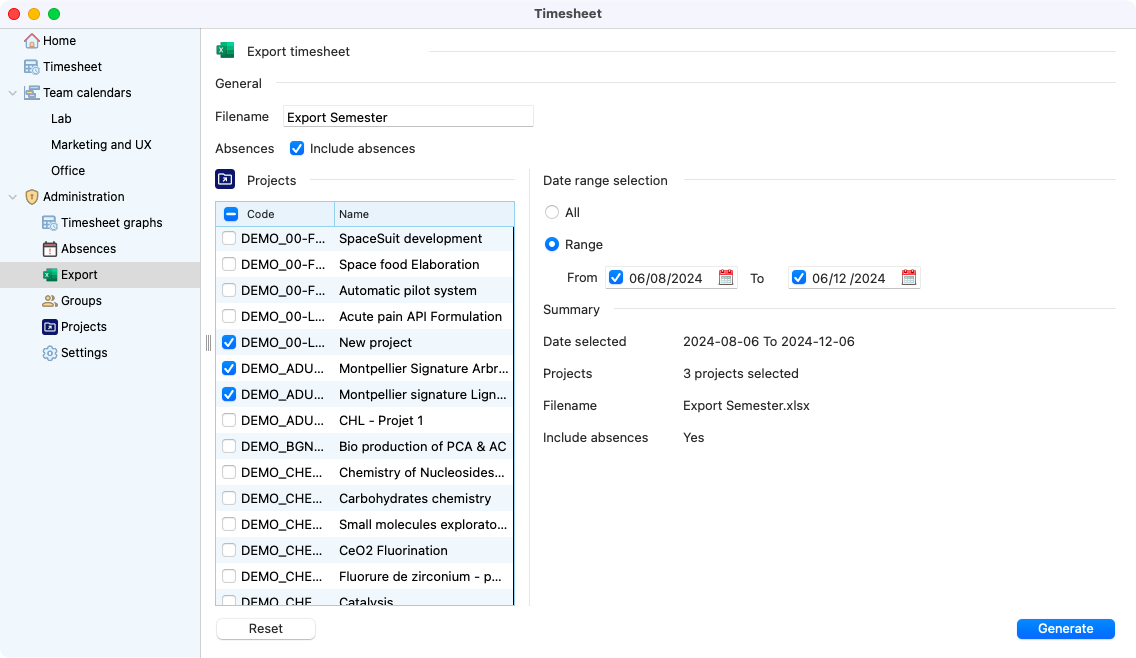
View of the export tab, with a range date set and 3 projects selected.
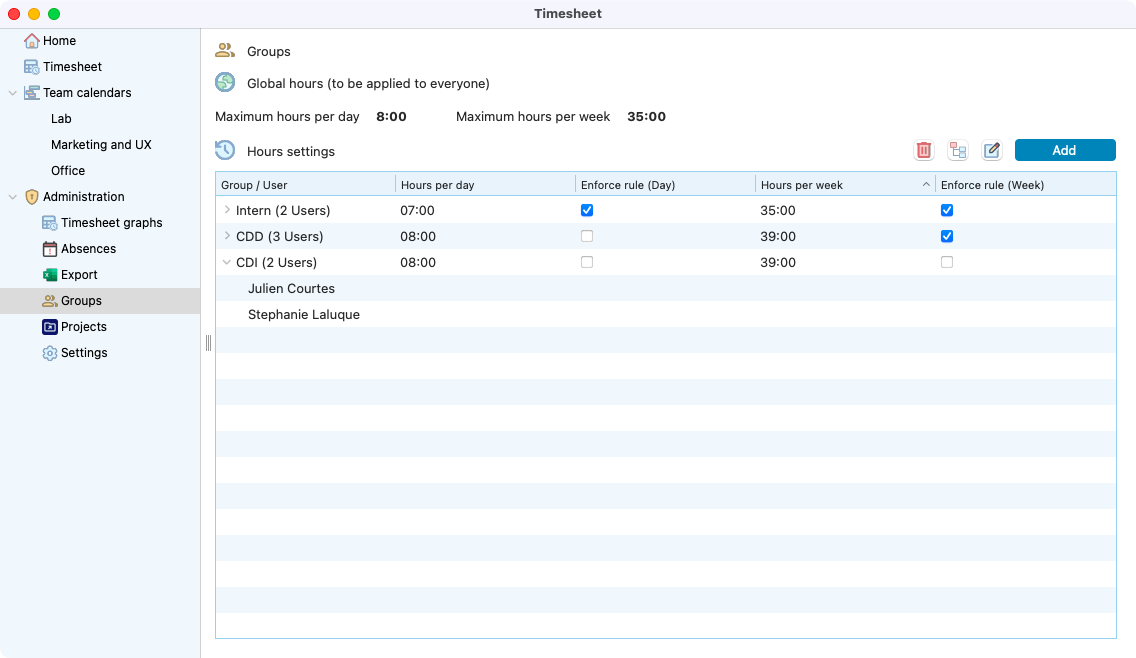
Groups
If you need to set different max hours per week/day for different group of workers, this is the place to configurate them.
You can create groups, add employees and set the max hours per day and per week. If you don’t want to allow more hours than the limit, you can check the options enforce rule.
View of the export tab, with a range date set and 3 projects selected.
Projects
Here you can disbale timesheets starting for a specific date. This is useful if you want to disable the project, which means that no one woulld be able to include worked hours after the day you set here.
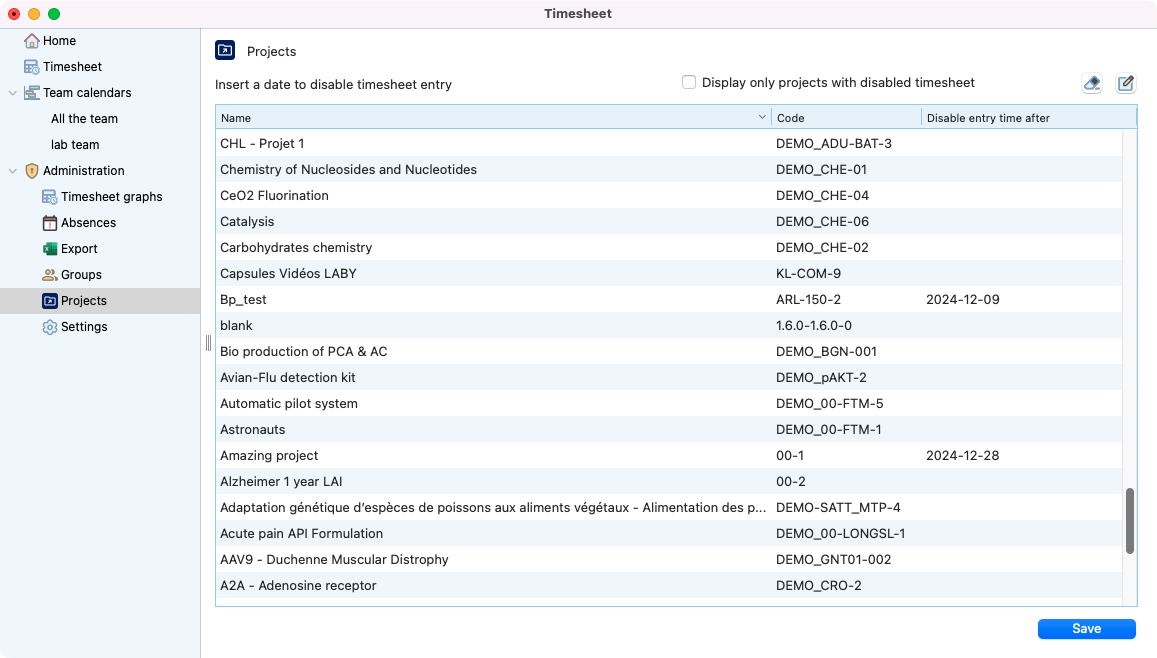
View of the projects with enabled and disabled timesheets.
To disable the project, double click in the line corresponding to the project to disable. This will open a panel to select the day and it’s all done.
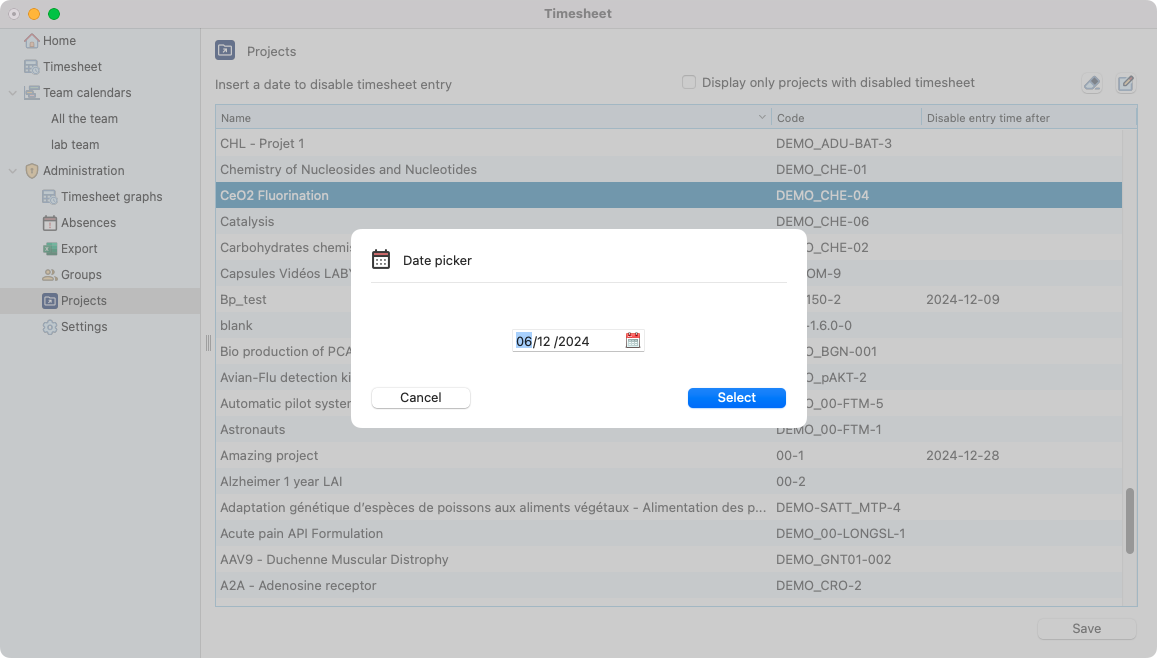
Date picker to select the date when the timesheed will be disabled for a project.
Settings
There is some customizable options in the settings section:
Minimum incremental time: The minimum acceptable time in a cell (15min, 30min, 60min) depending on the precision needed.
Disable time entry: Before the date set here, the timesheets will be locked. Which means that the users won’t be able to make more modifications, ensuring data integrity.
Hours per day and week: Maximum hours authorized. You can also force the rule, by checking the checkbox. This will ensure that the user cannot add more hours than the speficfied here.
Non-working days: You can choose the days that will not be possible to work during the week (applied to all users).
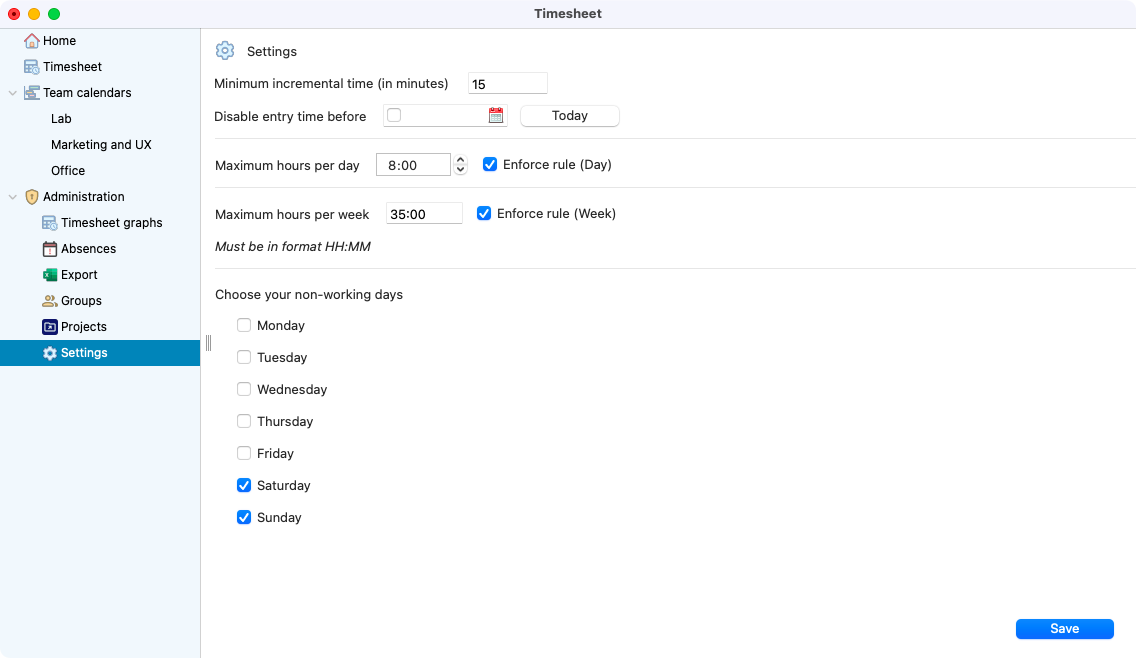
View of the settings page.