
Lock process
First, your data have to be locked before processing the digital signature. The lock of your data aims to disable the edition of your test(s) and experiment(s). The read only mode is then activated.
The lock can be performed test by test, or directly from the experiment.
Remember
The hierarchy follows this order:
Program > Project > Step > Study > Experiment > Test
Test Lock
The lock of your data takes place in the test detailed window, through the lock menu.
Note
Condition to lock a test:
Not be in read only mode.
All data must be saved previously.
The dates from start and end must be informed.

Date Inputs for start and end of the action.
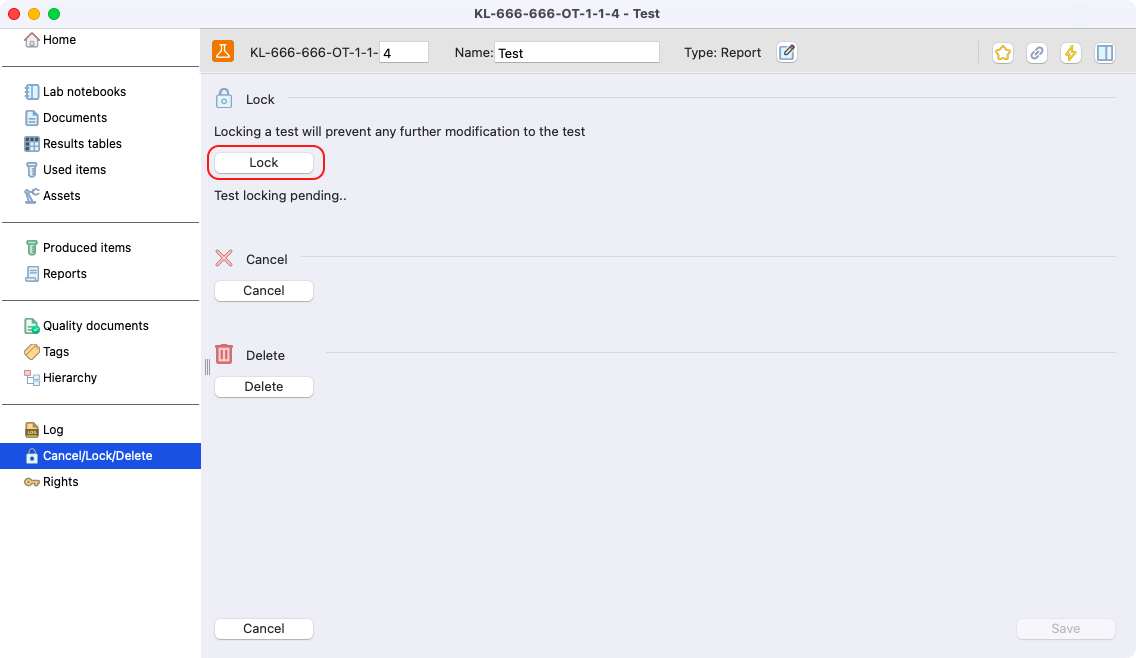
Lock button location on a test detailed window.

View of a test locked (displaying the Read Only message on top)
Tip
You can lock several tests from the “experiment” details window. Take a look on the section below.
Experiment lock
You can lock your experiment and all the tests inside at once. The process to lock is the same as the test one, but from the experiment detail window.
Note
Condition to lock an experiment with all the tests:
Not be in read only mode.
All data must be saved previously.
No one should be editing a test of your experiment in that moment.
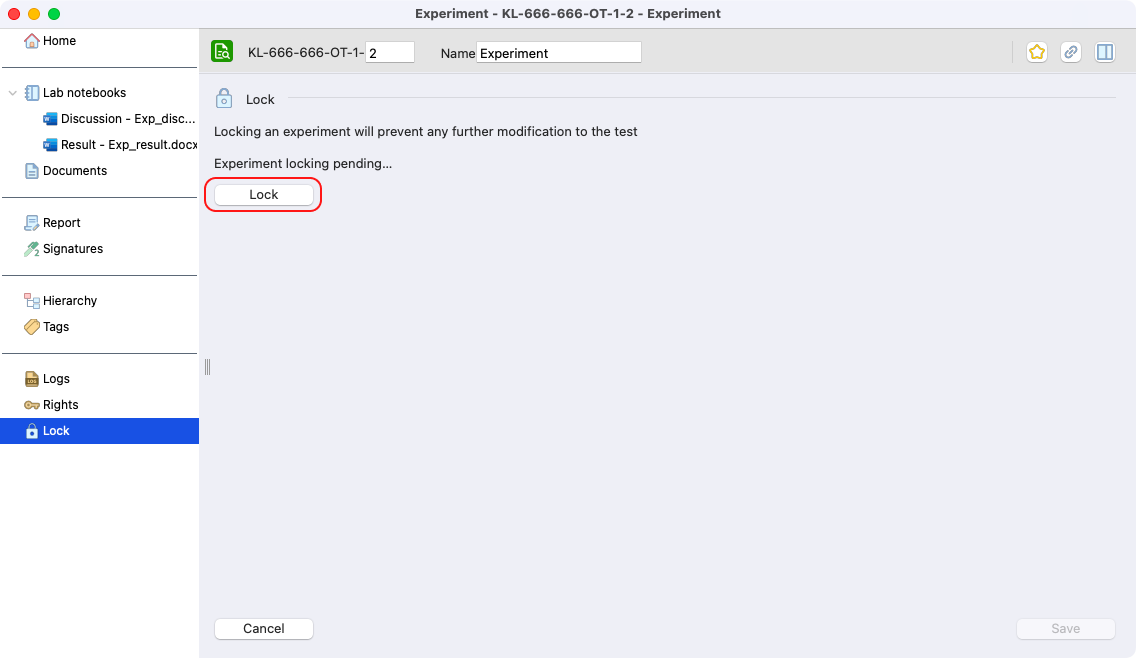
Lock button location on an experiment detailed window.
List of action/data disabled after the lock
After the lock of your entity (test or experiment), these actions are disabled:
Entity edition (data + documents).
Entity deletion.
Entity movement to another entity.
New test creation in a locked experiment.
Note
Unlock a test or an experiment is possible. For that, you need to perform the inverse action. As seen below.
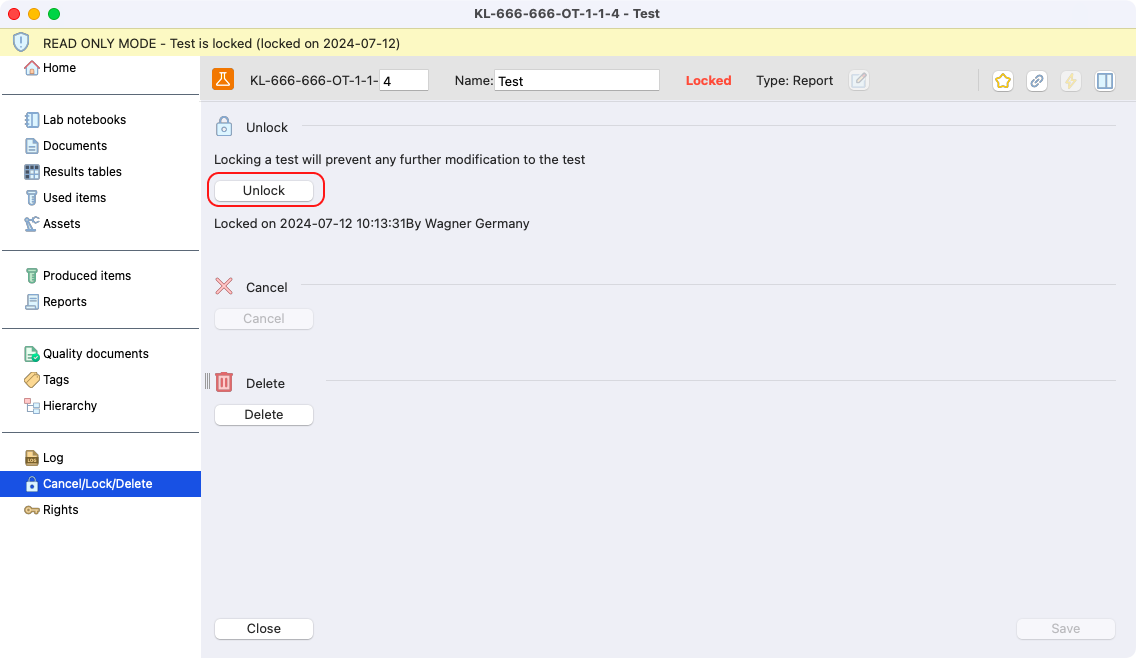
Unlock button location on a test detailed window.