
Hierarchy creation
General
The program browser is available from the home of Laby. It contains a central list of all programs you have access to. You can create and delete programs from the browser.
On the left, a side panel displays your usage history, showing recently opened entities and favorites.
Program
Only users with creation rights can create a new program. Click “explore programs” to manage the program list.
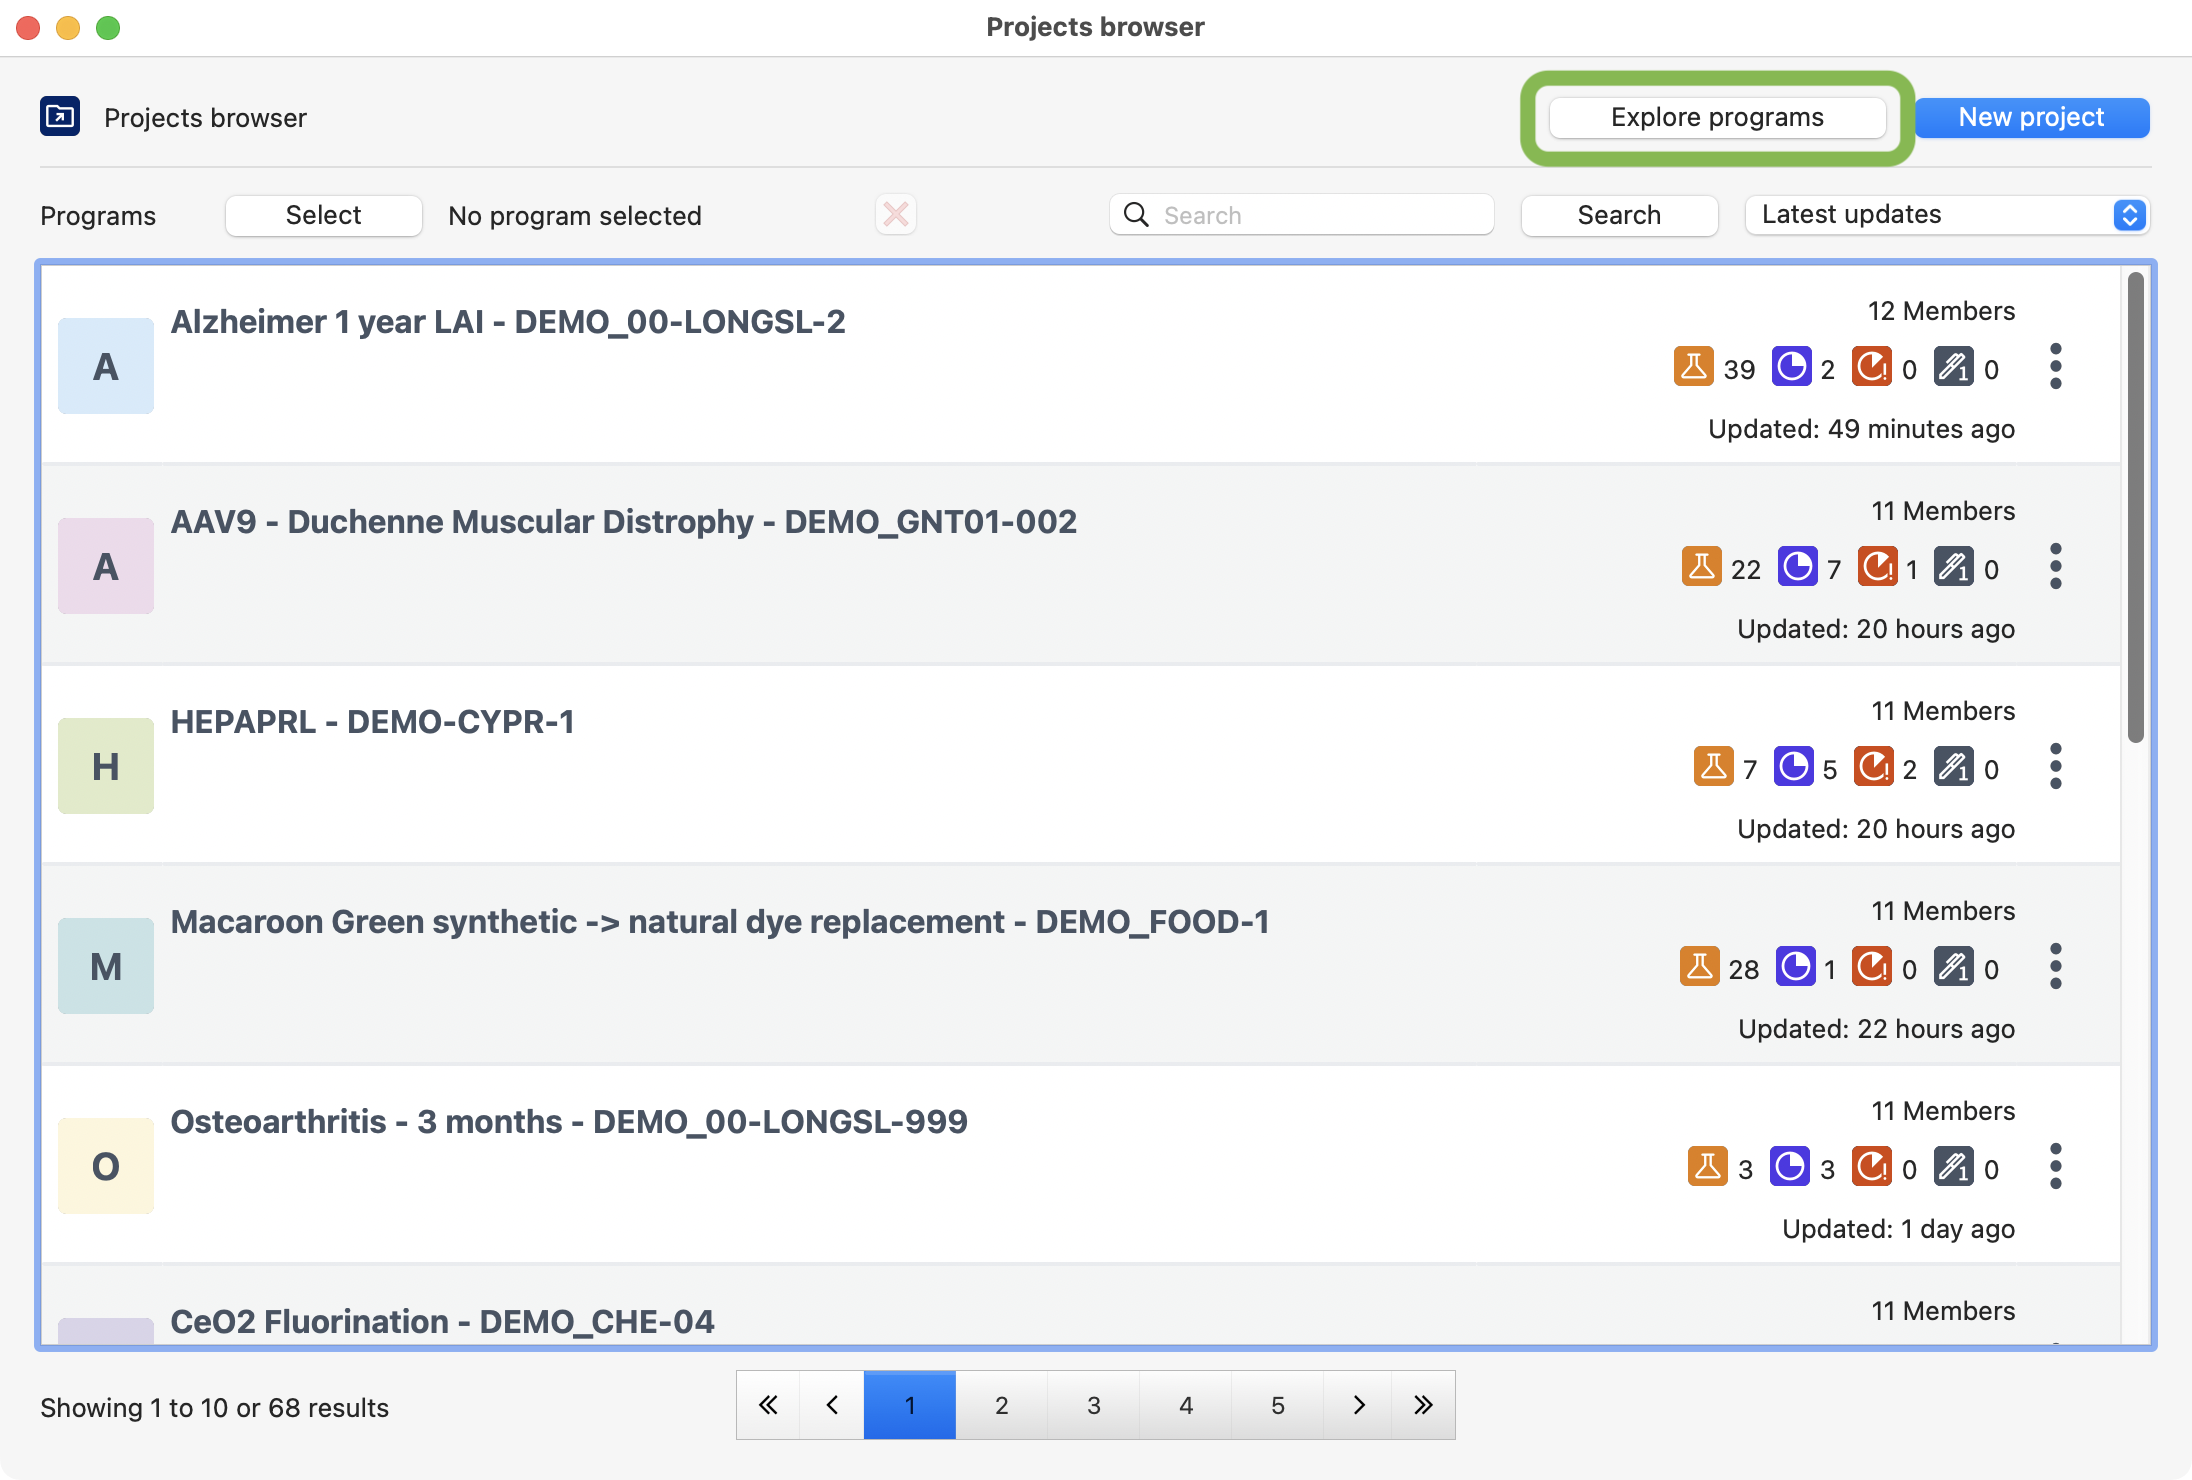
Project browser view explaining how to find all programs.
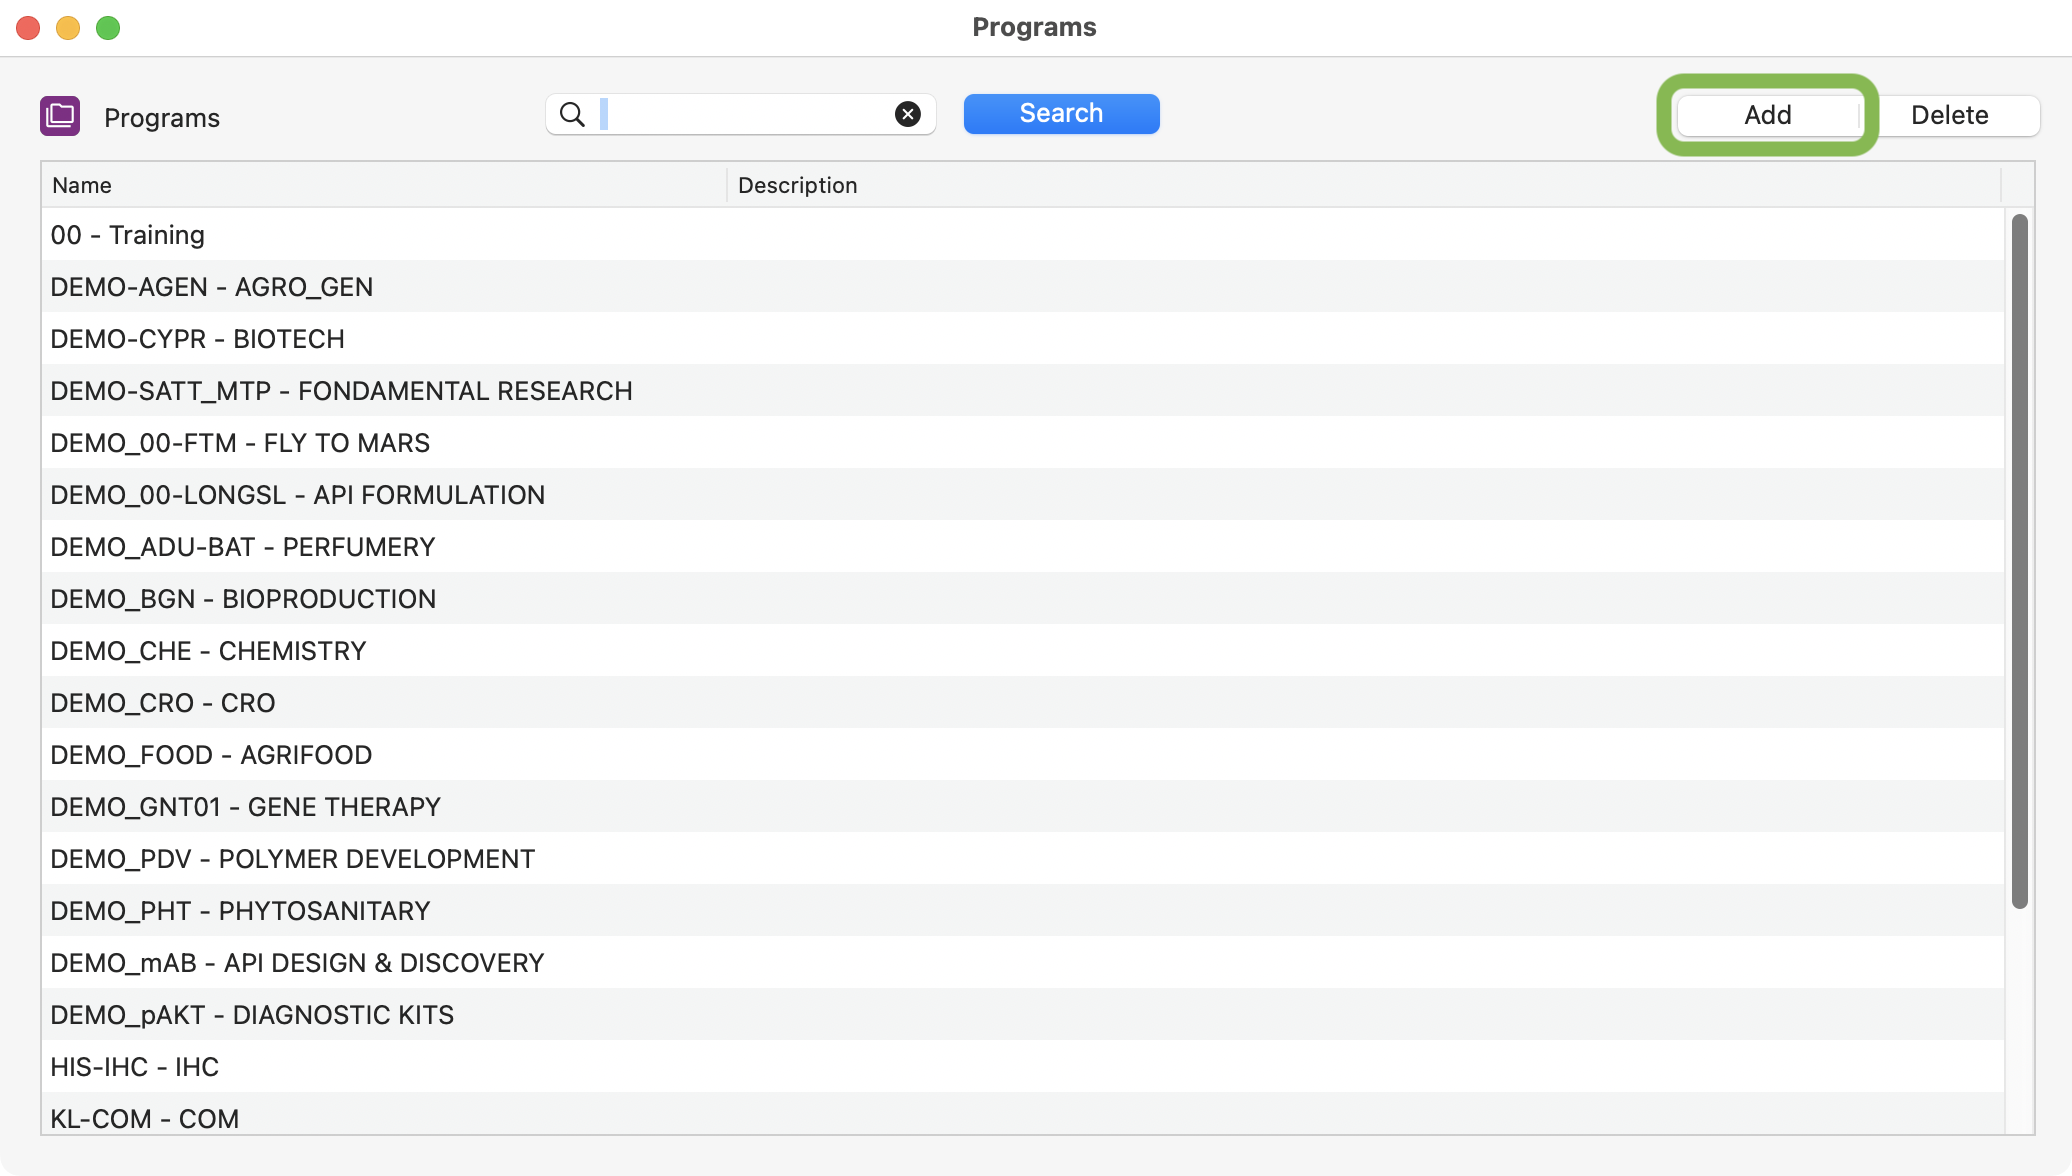
All available programs in your company.
Creation
Follow these three steps to create a program:
Fill in the program information.

Program creation: enter mandatory information.
Note
Mandatory fields:
Program name.
Partner.
Program code.
Optionally grant access to specific users.

Program creation: add members (optional).
Validate the summary.
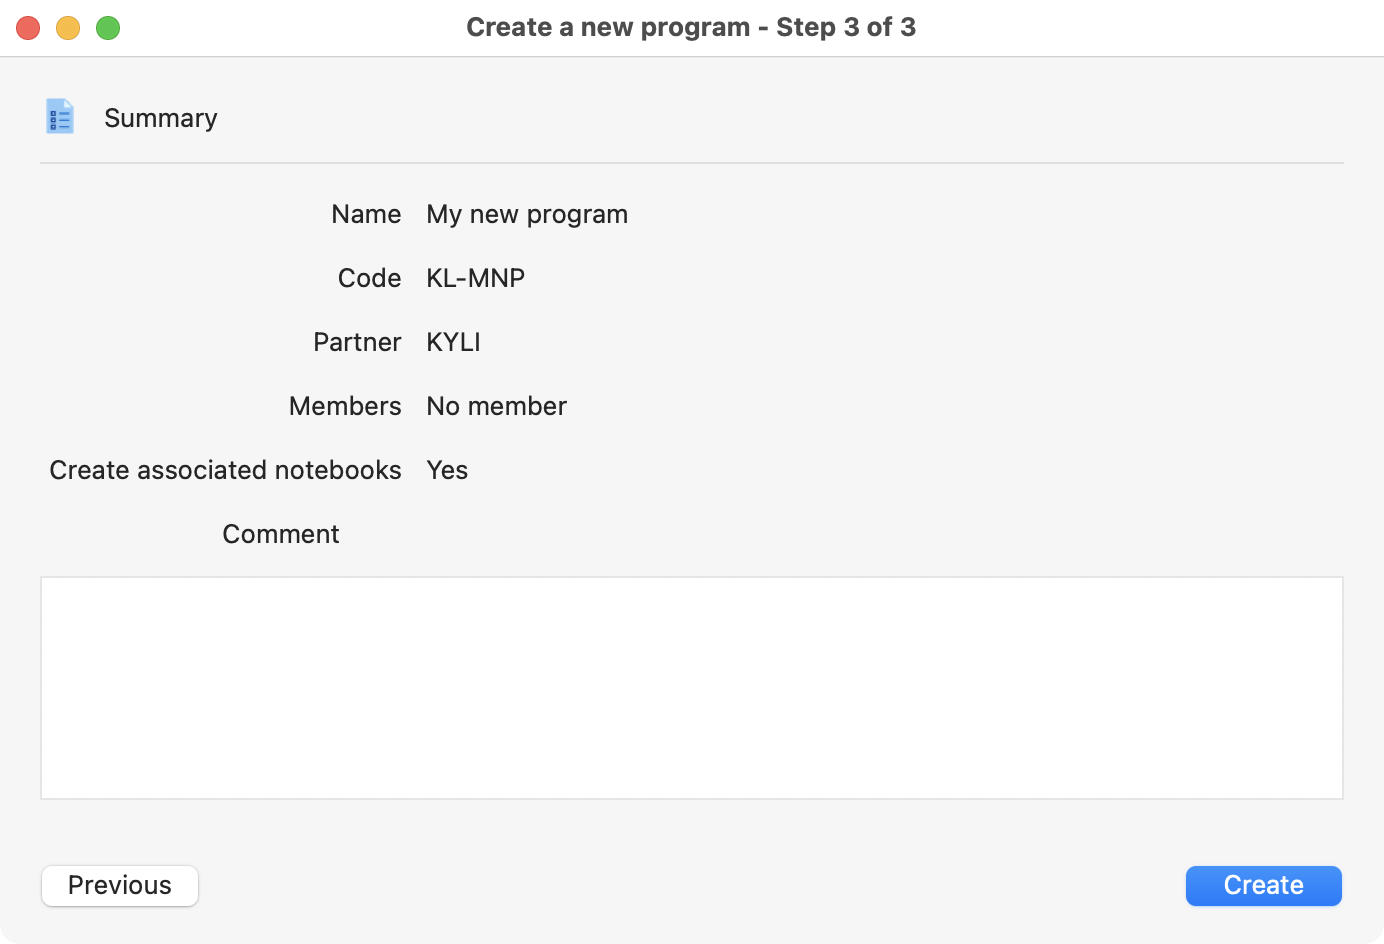
Program creation: review and validate.
Warning
A program can be deleted only if it does not contain any projects.
Project
Creation
Only those who have the right on the program are able to create a project. To create a new one, all you need to do is follow these steps:
Click on “New project”.
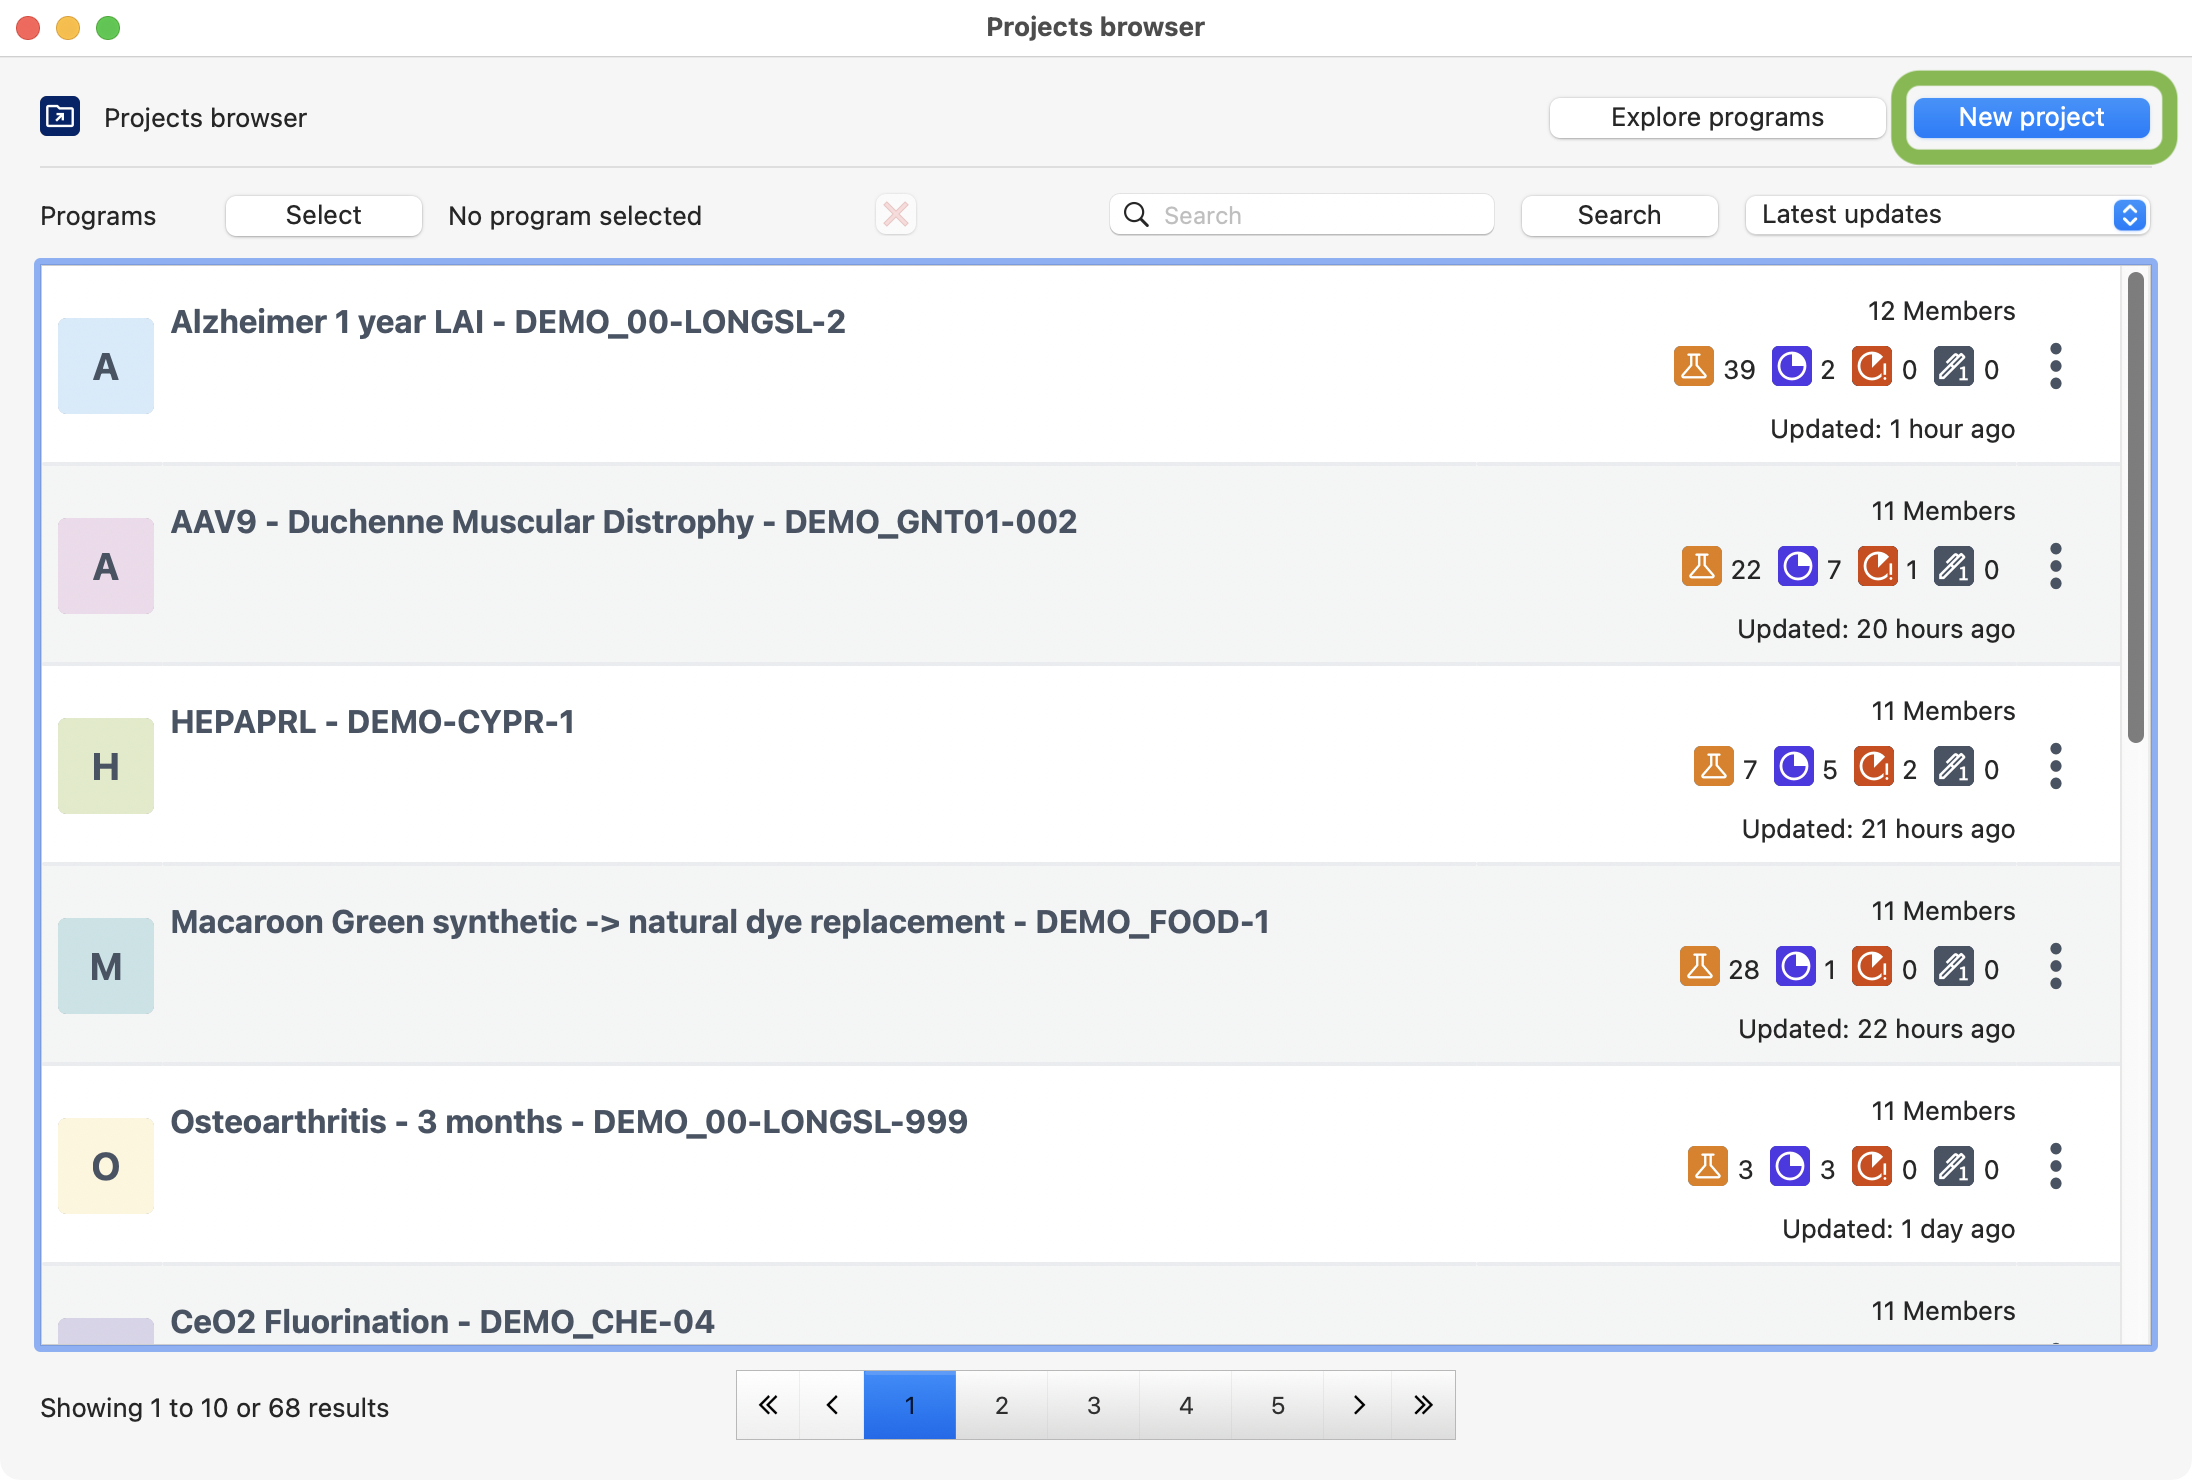
View of the project browser, showing where to click to create a new project.
There are more than one way to create a project. You can choose between the options below:
Blank project: create the hierarchy from scratch.
Template: reuse the preconfigured hierarchy of a project from your templates.
Duplicate: reuse the structure of an existing project.
Note
With the duplicate project option, the links with notebooks templates, quality documents are automatically updated. The status, date, edited notebook, items, equipments are not duplicated.
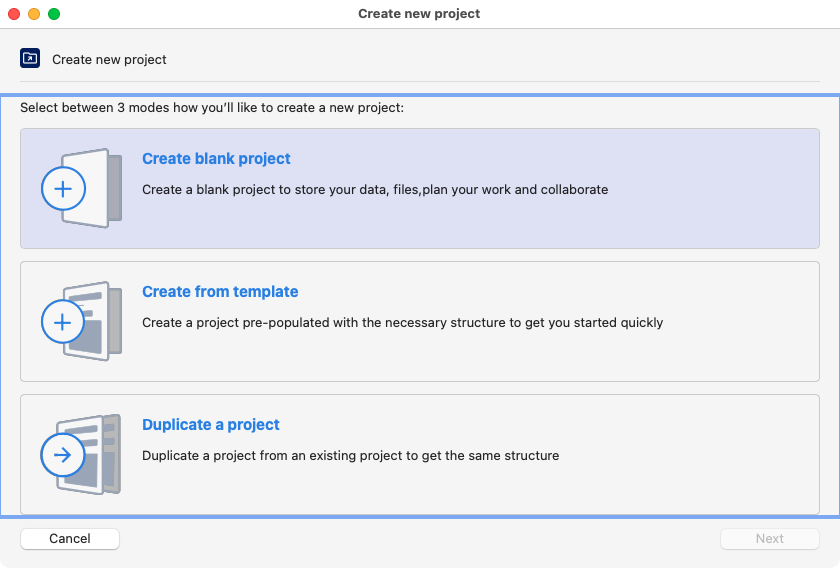
View of all the options available to create a project.
On option b: Select the template you want to use.
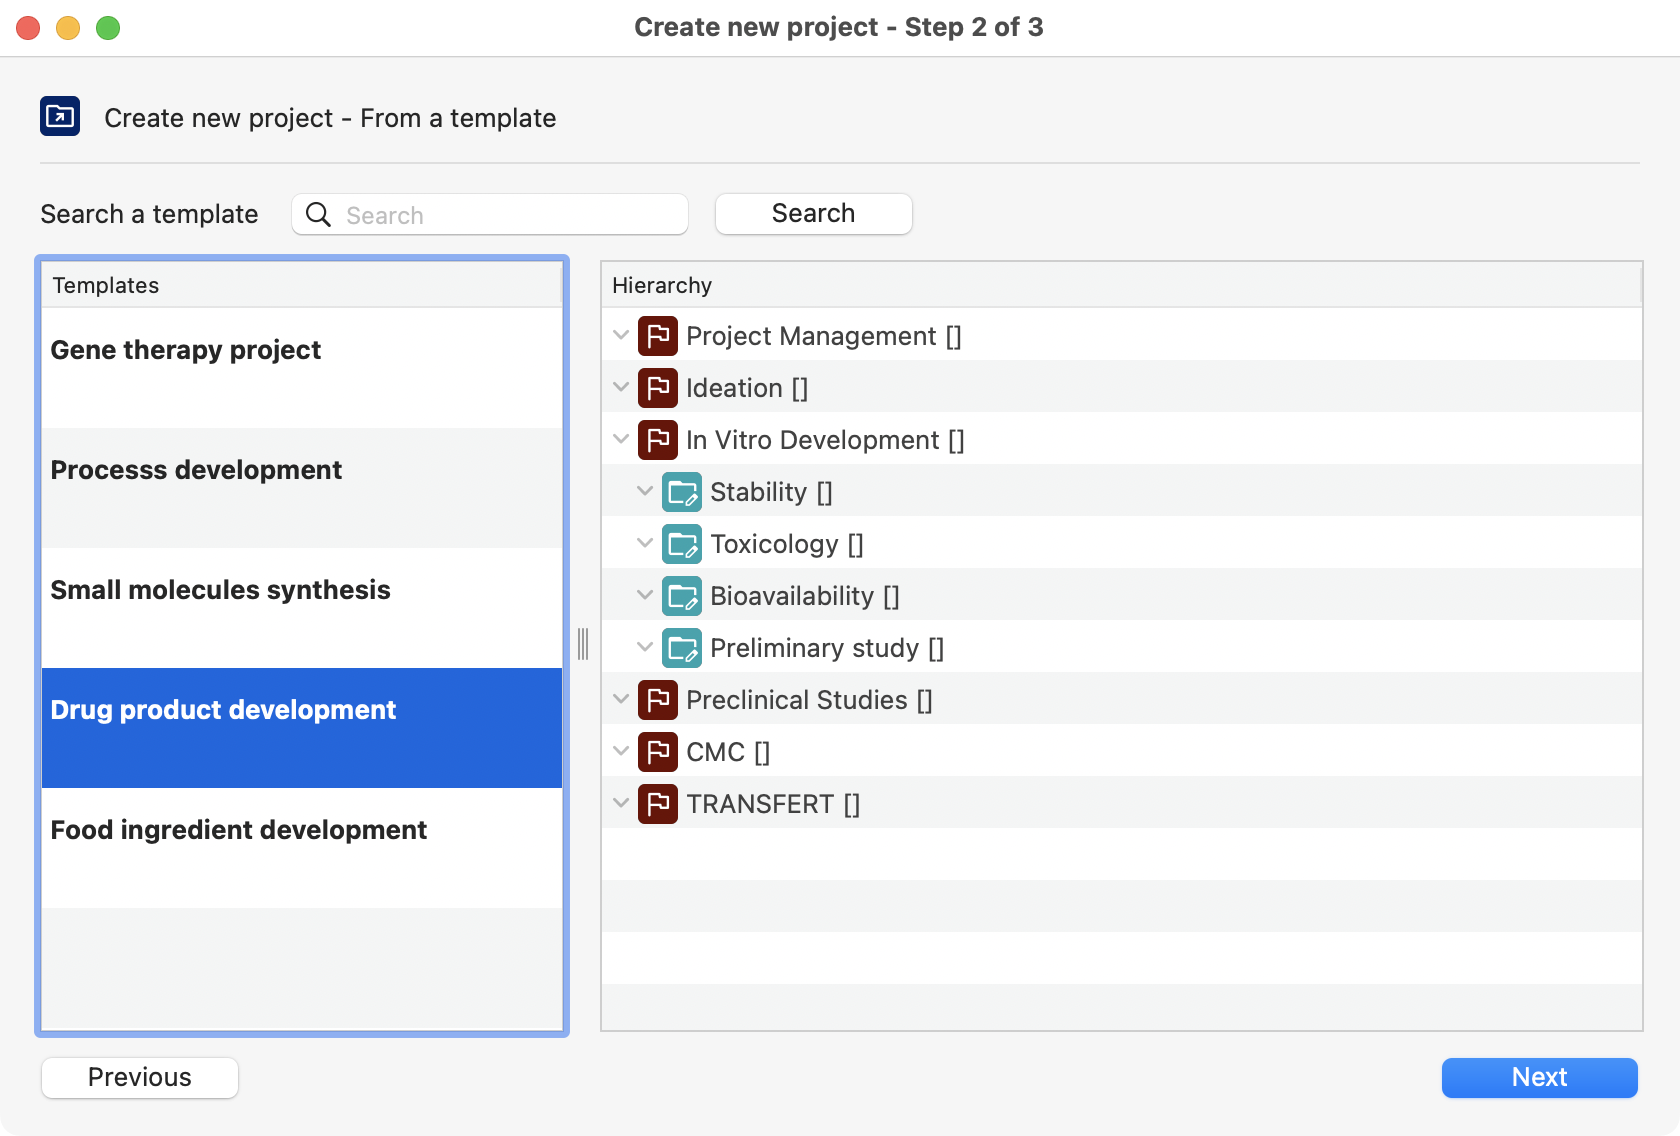
View of the template selection, where you can choose one from a list of templates.
On option c: Select the project you want duplicate.
Tip
You can modify the projects by excluding tests and/or experiments.
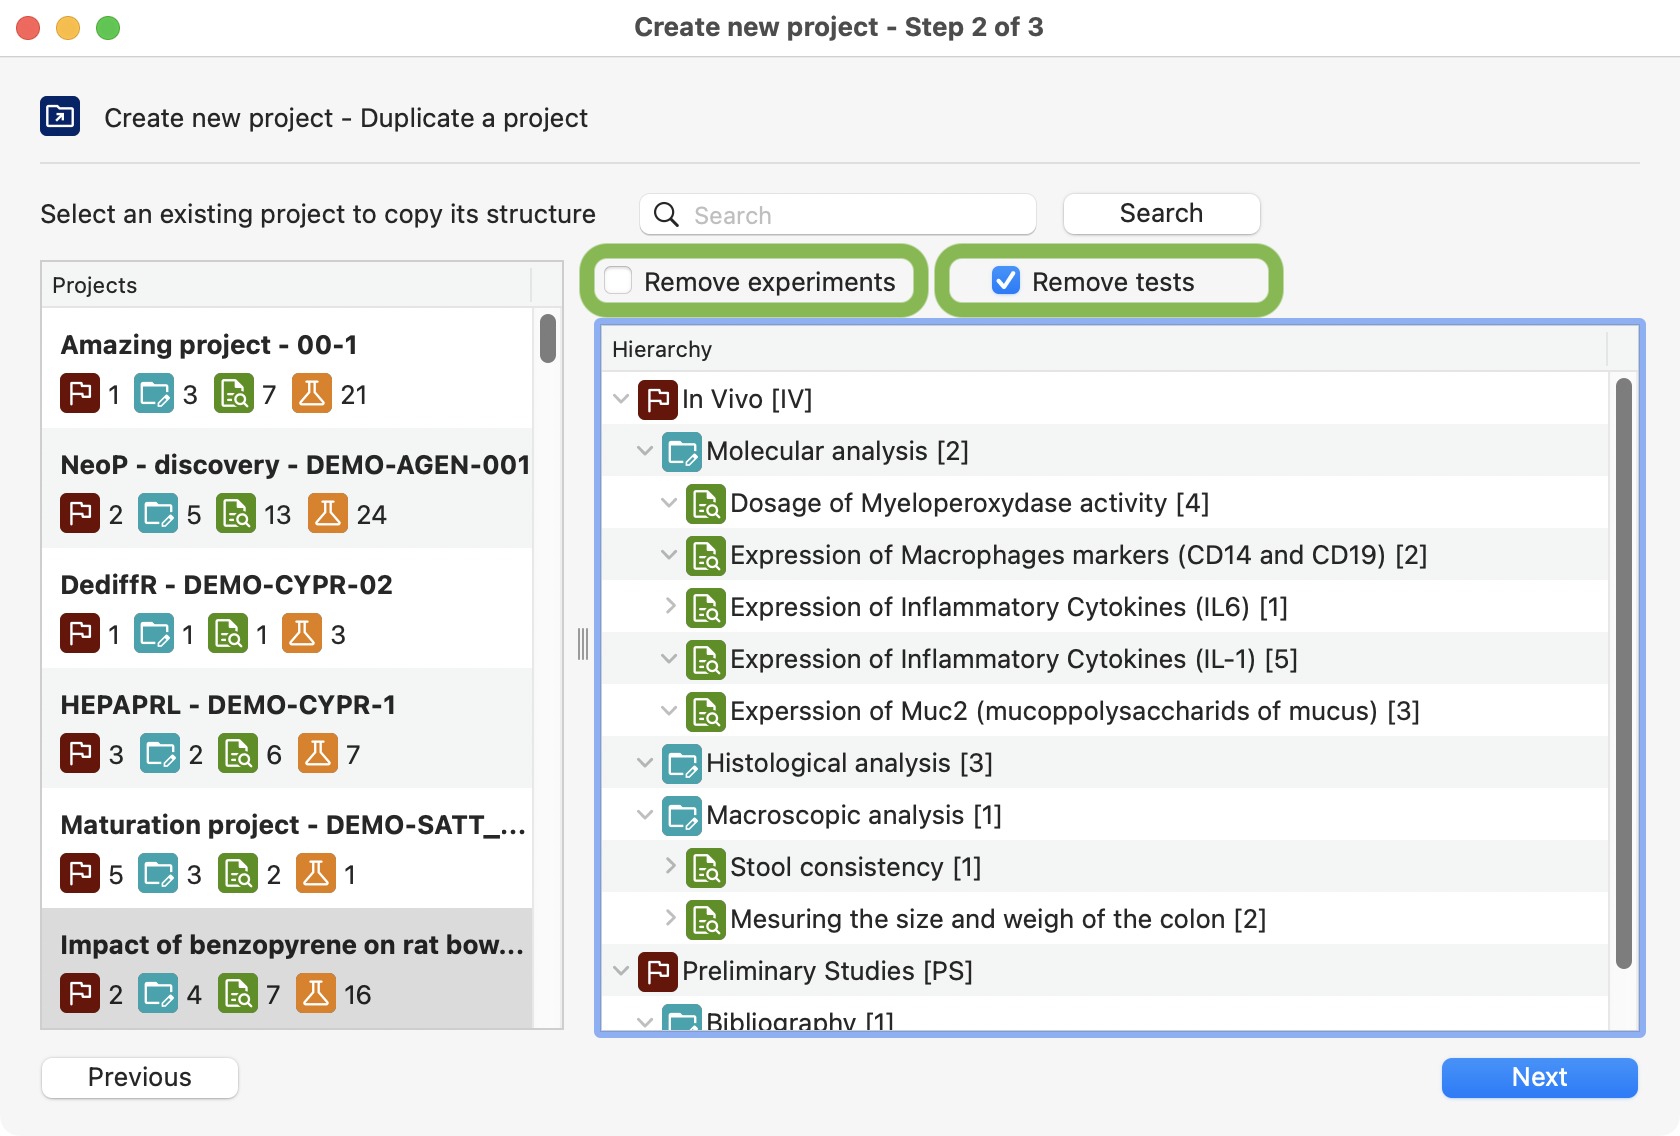
View of the project selection, where you can select from a list of existing projects.
On options a, b, c (all options): Complete the informations.
Info
The long project code is automatically generated using the program long code and the project code (ex: 00-001-01).
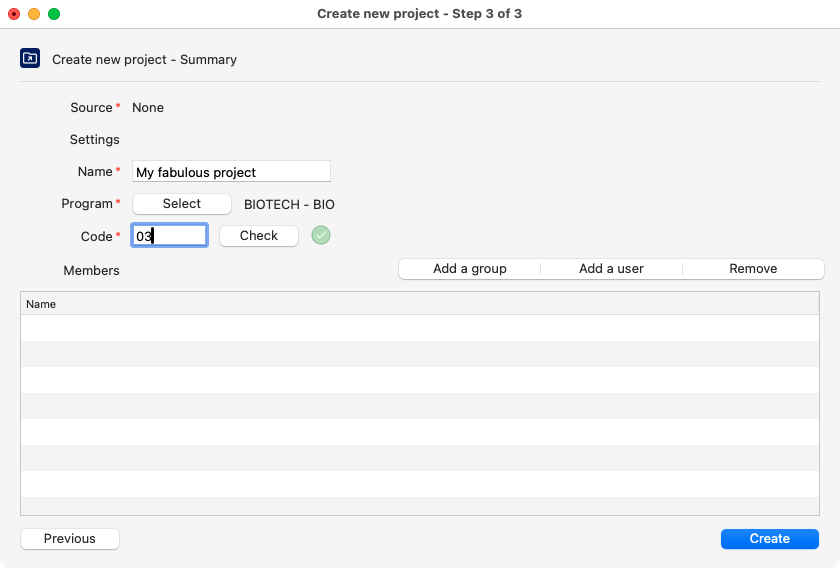
Last step to create a new project.
Note
A project can be deleted only if there is no entities inside.
Visualization
Open the details window of the projet with a right-click or by clicking on the 3-dots button.

Project browser, highlighting how to open the project detailed window.
You can retrieve all the project-level information including:
Documents.
Automatically created Gantt.
Timesheet overview.
Reserved stock batch(es).
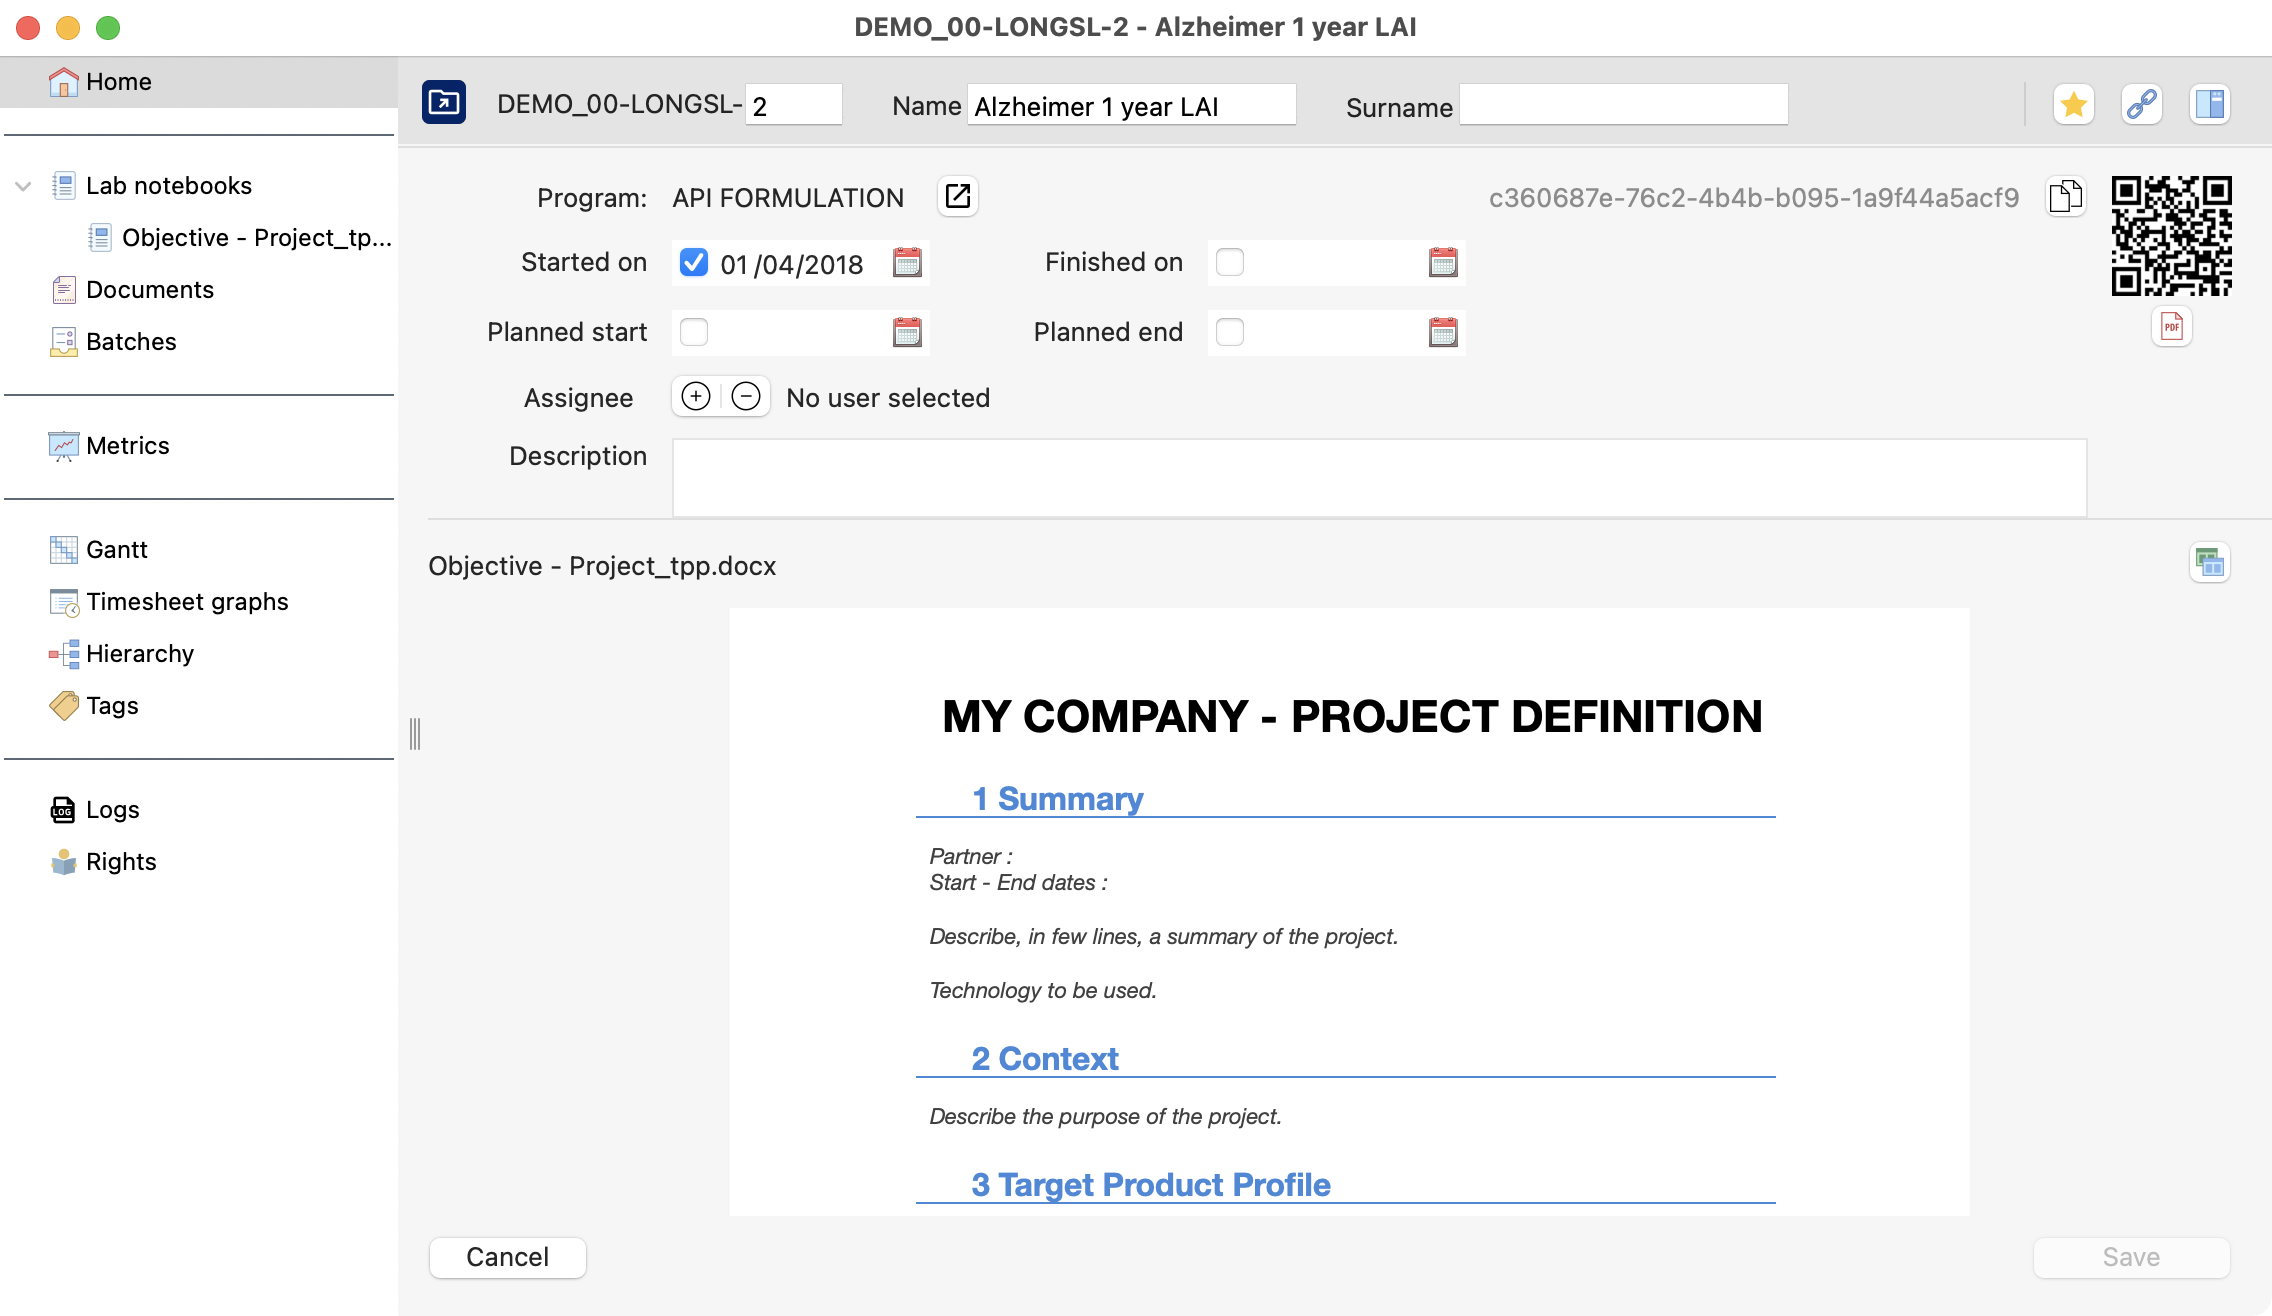
Project’s detailed view with all the available options.
Double-click on your project to open the hierarchy.
Tip
You can deploy each project level one by one. Or, click “expand” to see all levels at once.
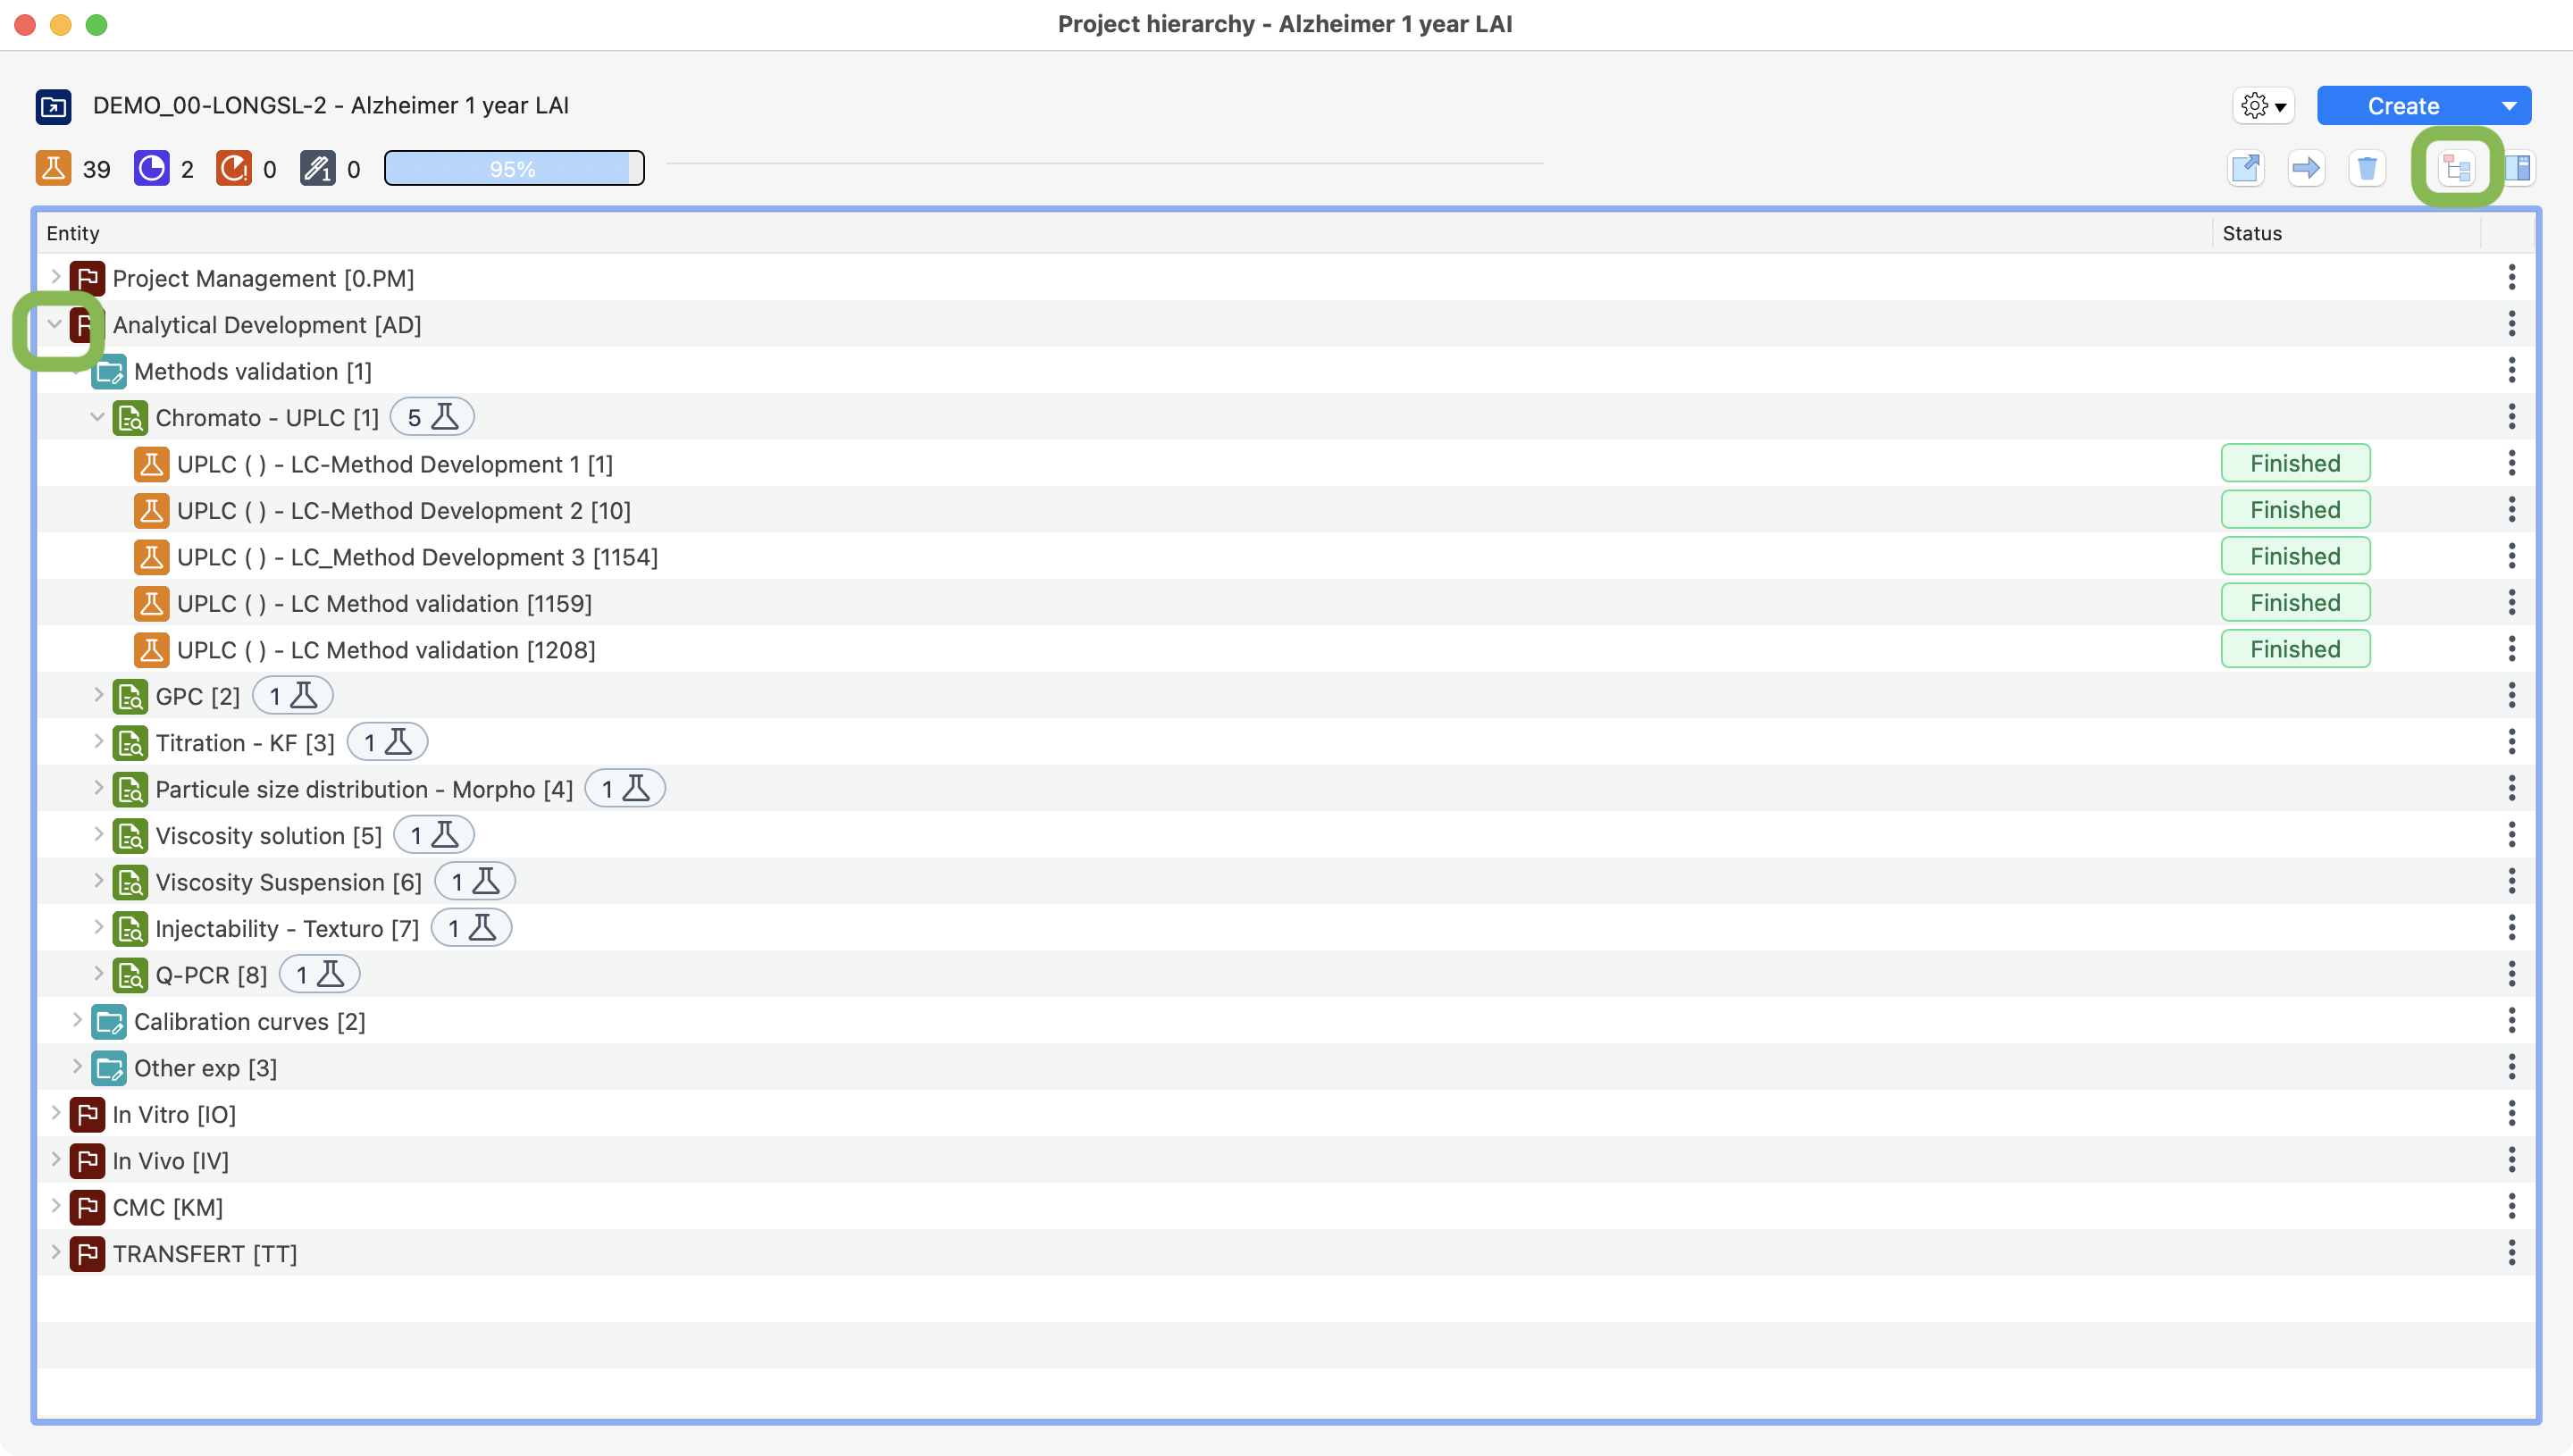
View of the project and all its entities, highlighting the ways to deploy the hierarchy.
Common functions for all project entities
Create
To create one project entity (step, study, experimen or test), use one of the 3 options available:
1: Click on the create button to directly create a new project entity attached to your selected row.
2: Click on the arrow
 in the button: Laby will offer the choice to create a project level depending on your selected row.
3: Right click or click on the
 menu.
menu.
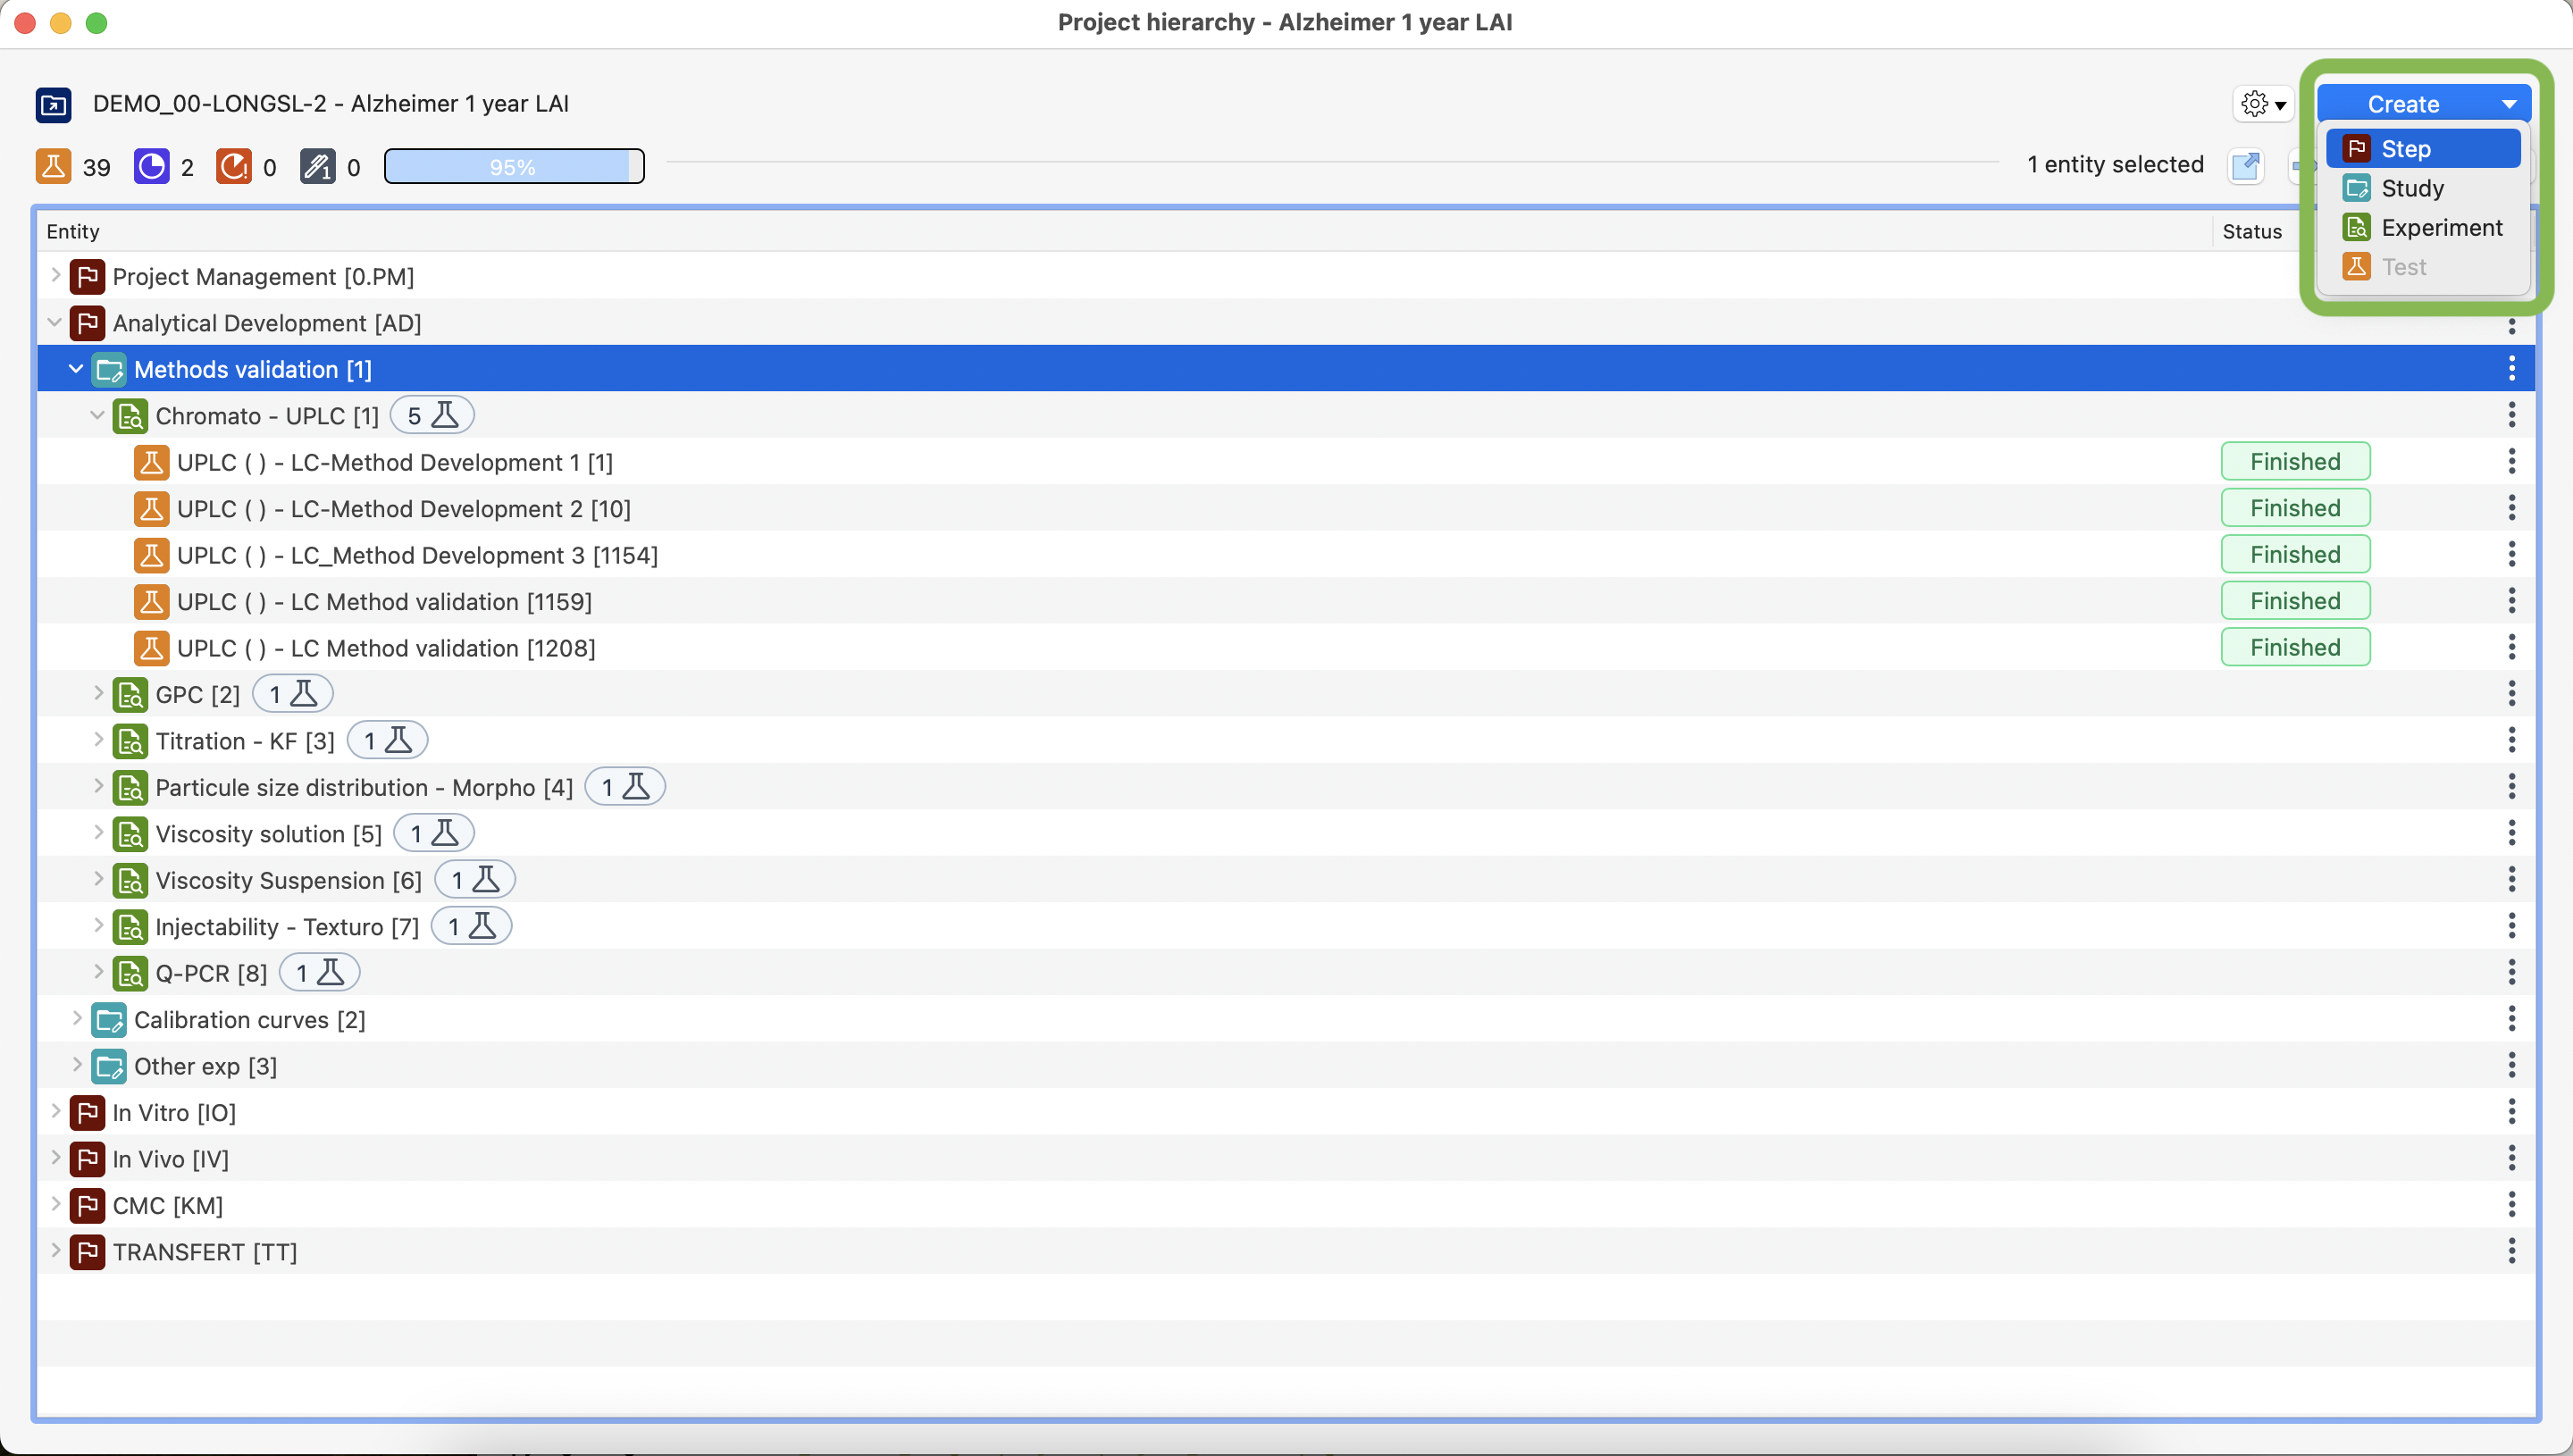
View of the project and all its entities, highlighting the dropdown button, used to create entities.
Move
You can move entities in a single action using the right click menu, clicking on the button  or on the option menu .
You can perfom the following movements:
or on the option menu .
You can perfom the following movements:
Project(s) to another program.
Step(s) to another project.
Study(ies) to another step.
Experiment(s) to another study.
Test(s) to another experiment.
Tip
You can move similar entities (ie: several experiments) during a single action.
Select the entity(ies) to be moved.
Right-click on the entity or click on the 3 buttons menu, then select “move”

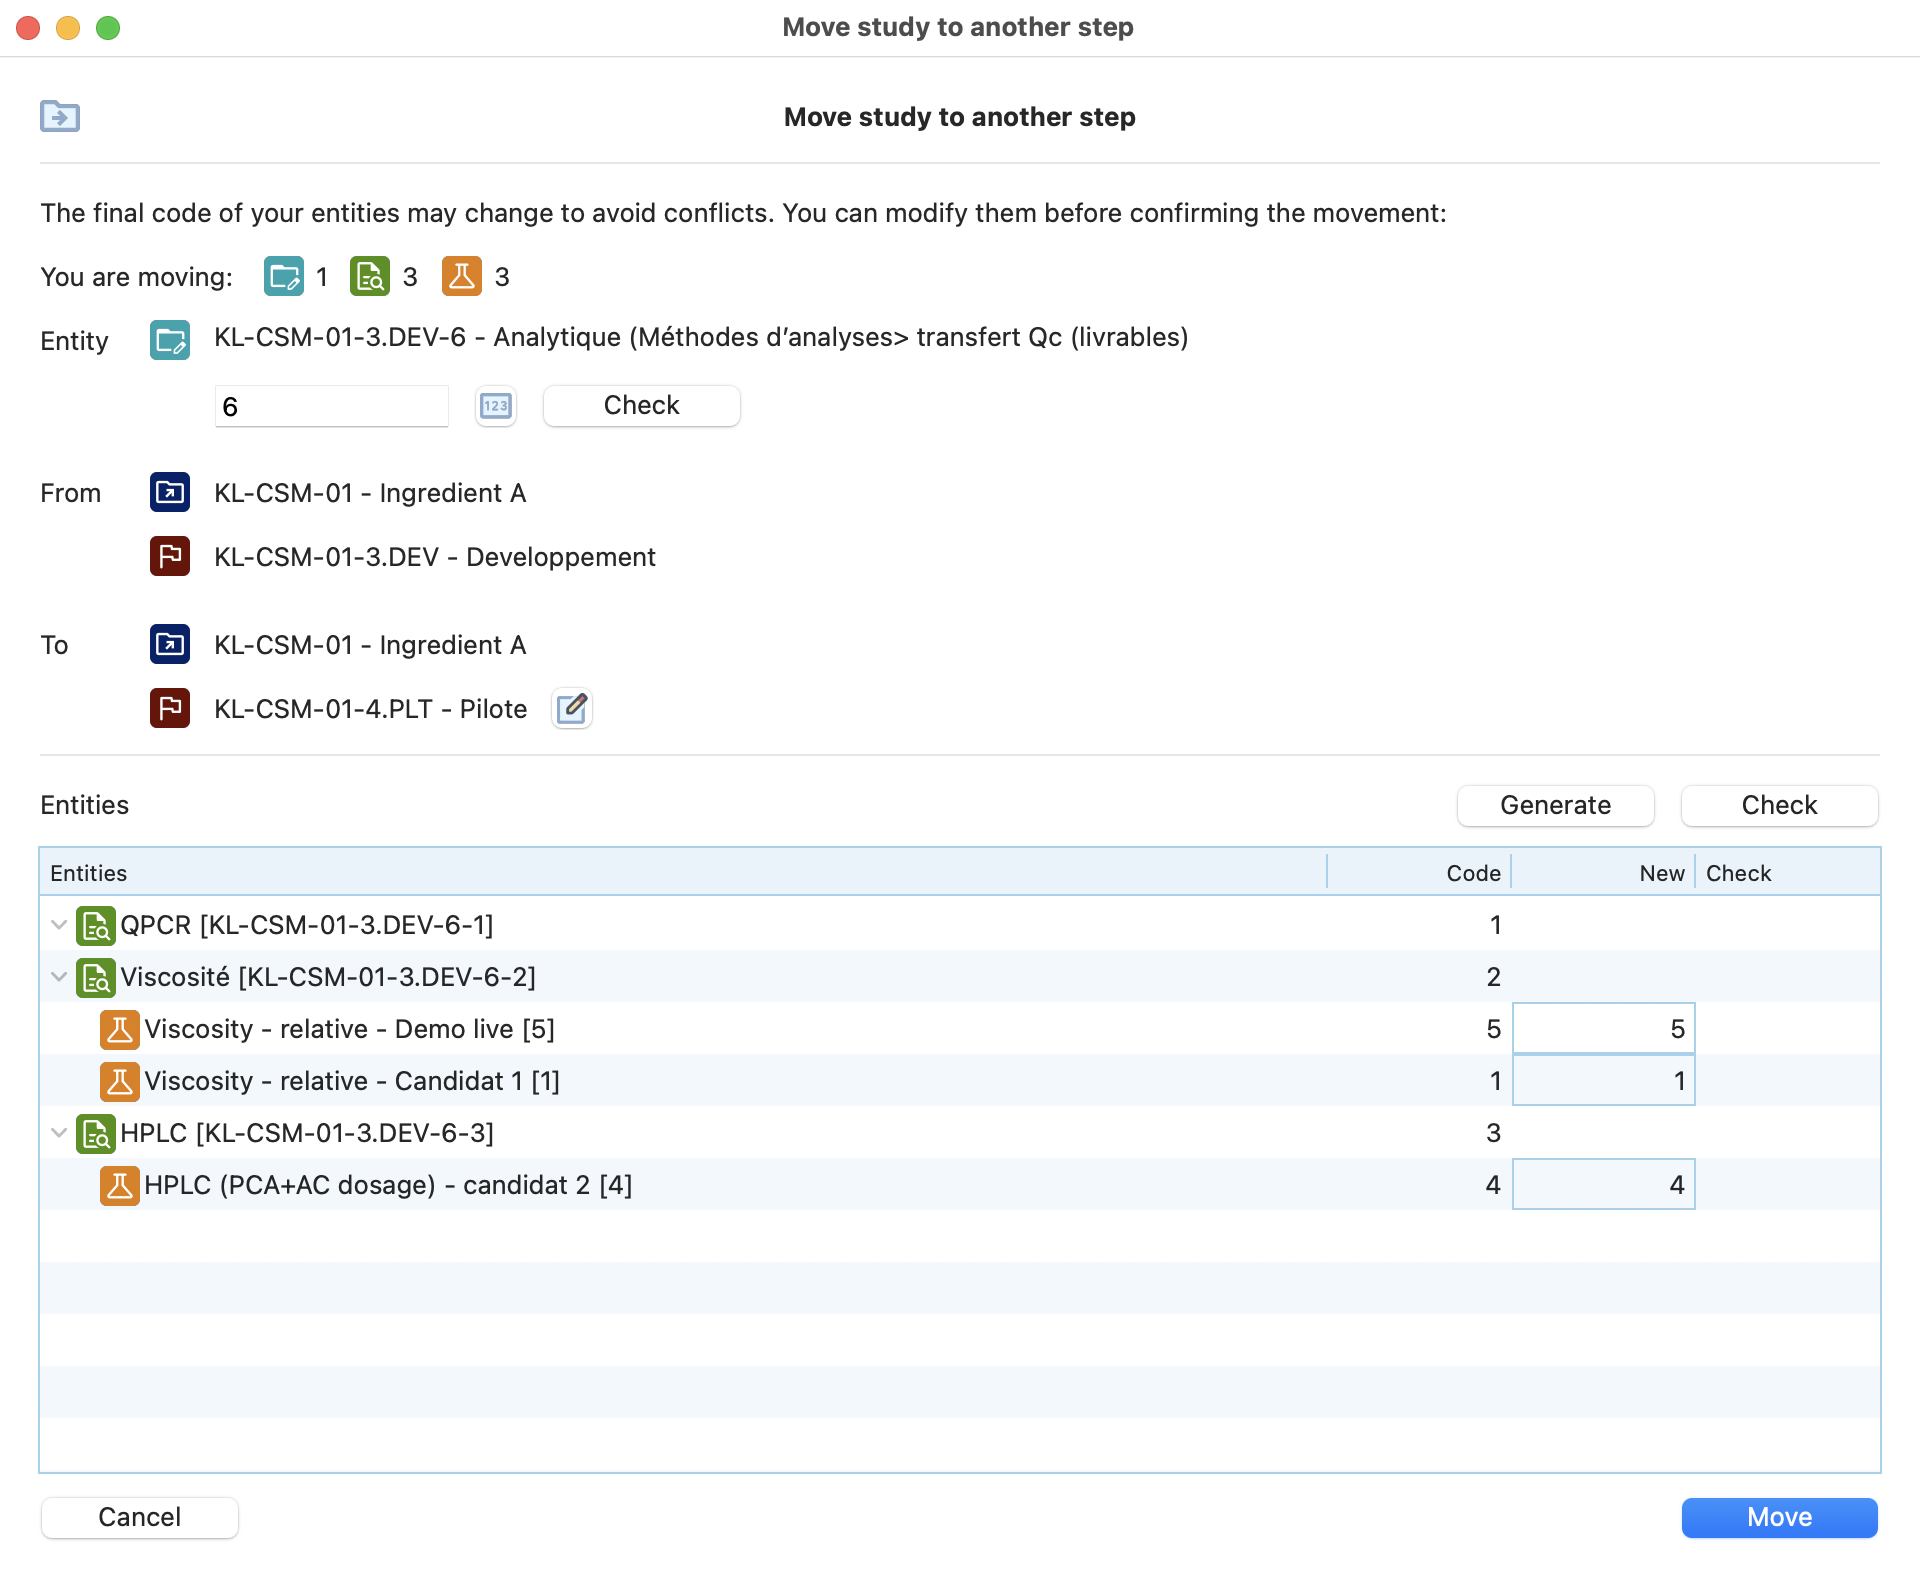
Optionnal : adjust the code(s), then click move
Rules
You can not move an entity that already has the same code on the target location.
You can not move an entity that was signed.
Delete
You can also remove entities in a single action using the right click menu, clicking on the delete button  or on the option menu .
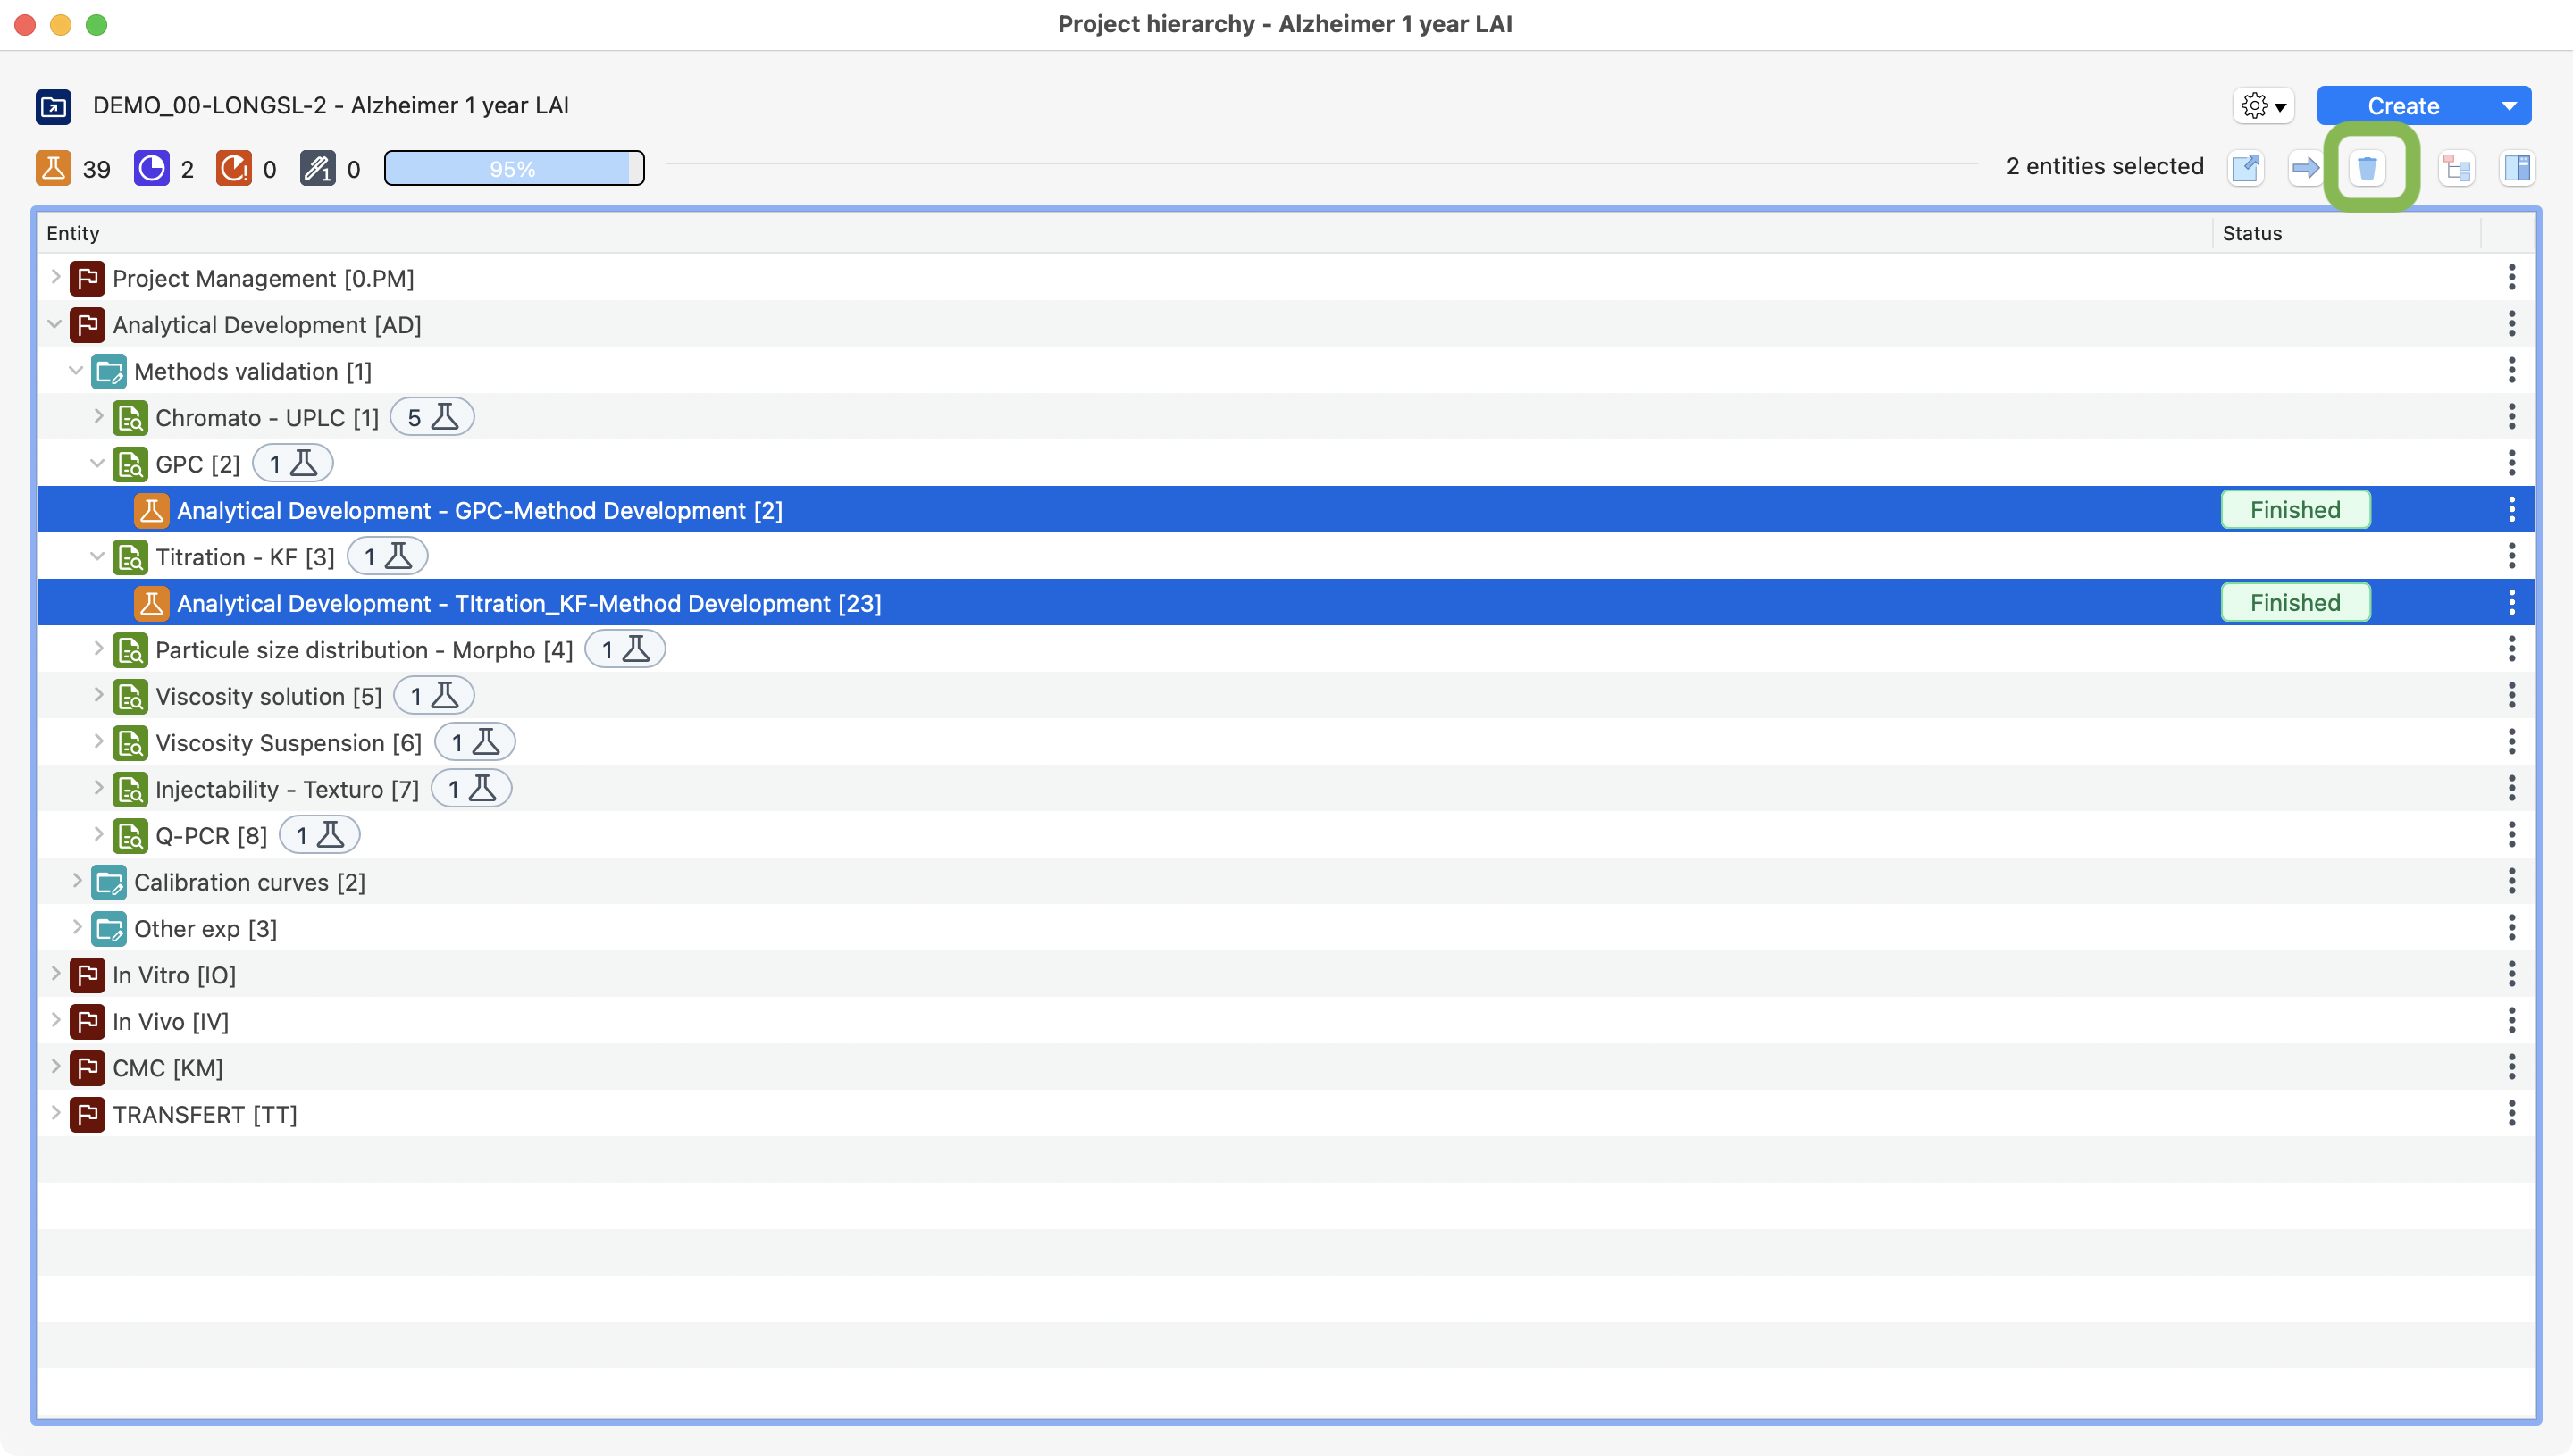
Two tests selected to be deleted on the project view.
Rules
You can not delete an entity that has items (if needed, you can enter in the test and remove the linked items).
You can not delete an entity that was signed.