
Batch preparation
This section is dedicated to create, follow, monitore and keep the data related to your lab batch preparation. After having specified your recipe, you can now start to produce a batch.
Step 1: Create a new batch preparation
To begin, you need to select the Batch prep section on the left menu, and then click on the create button.
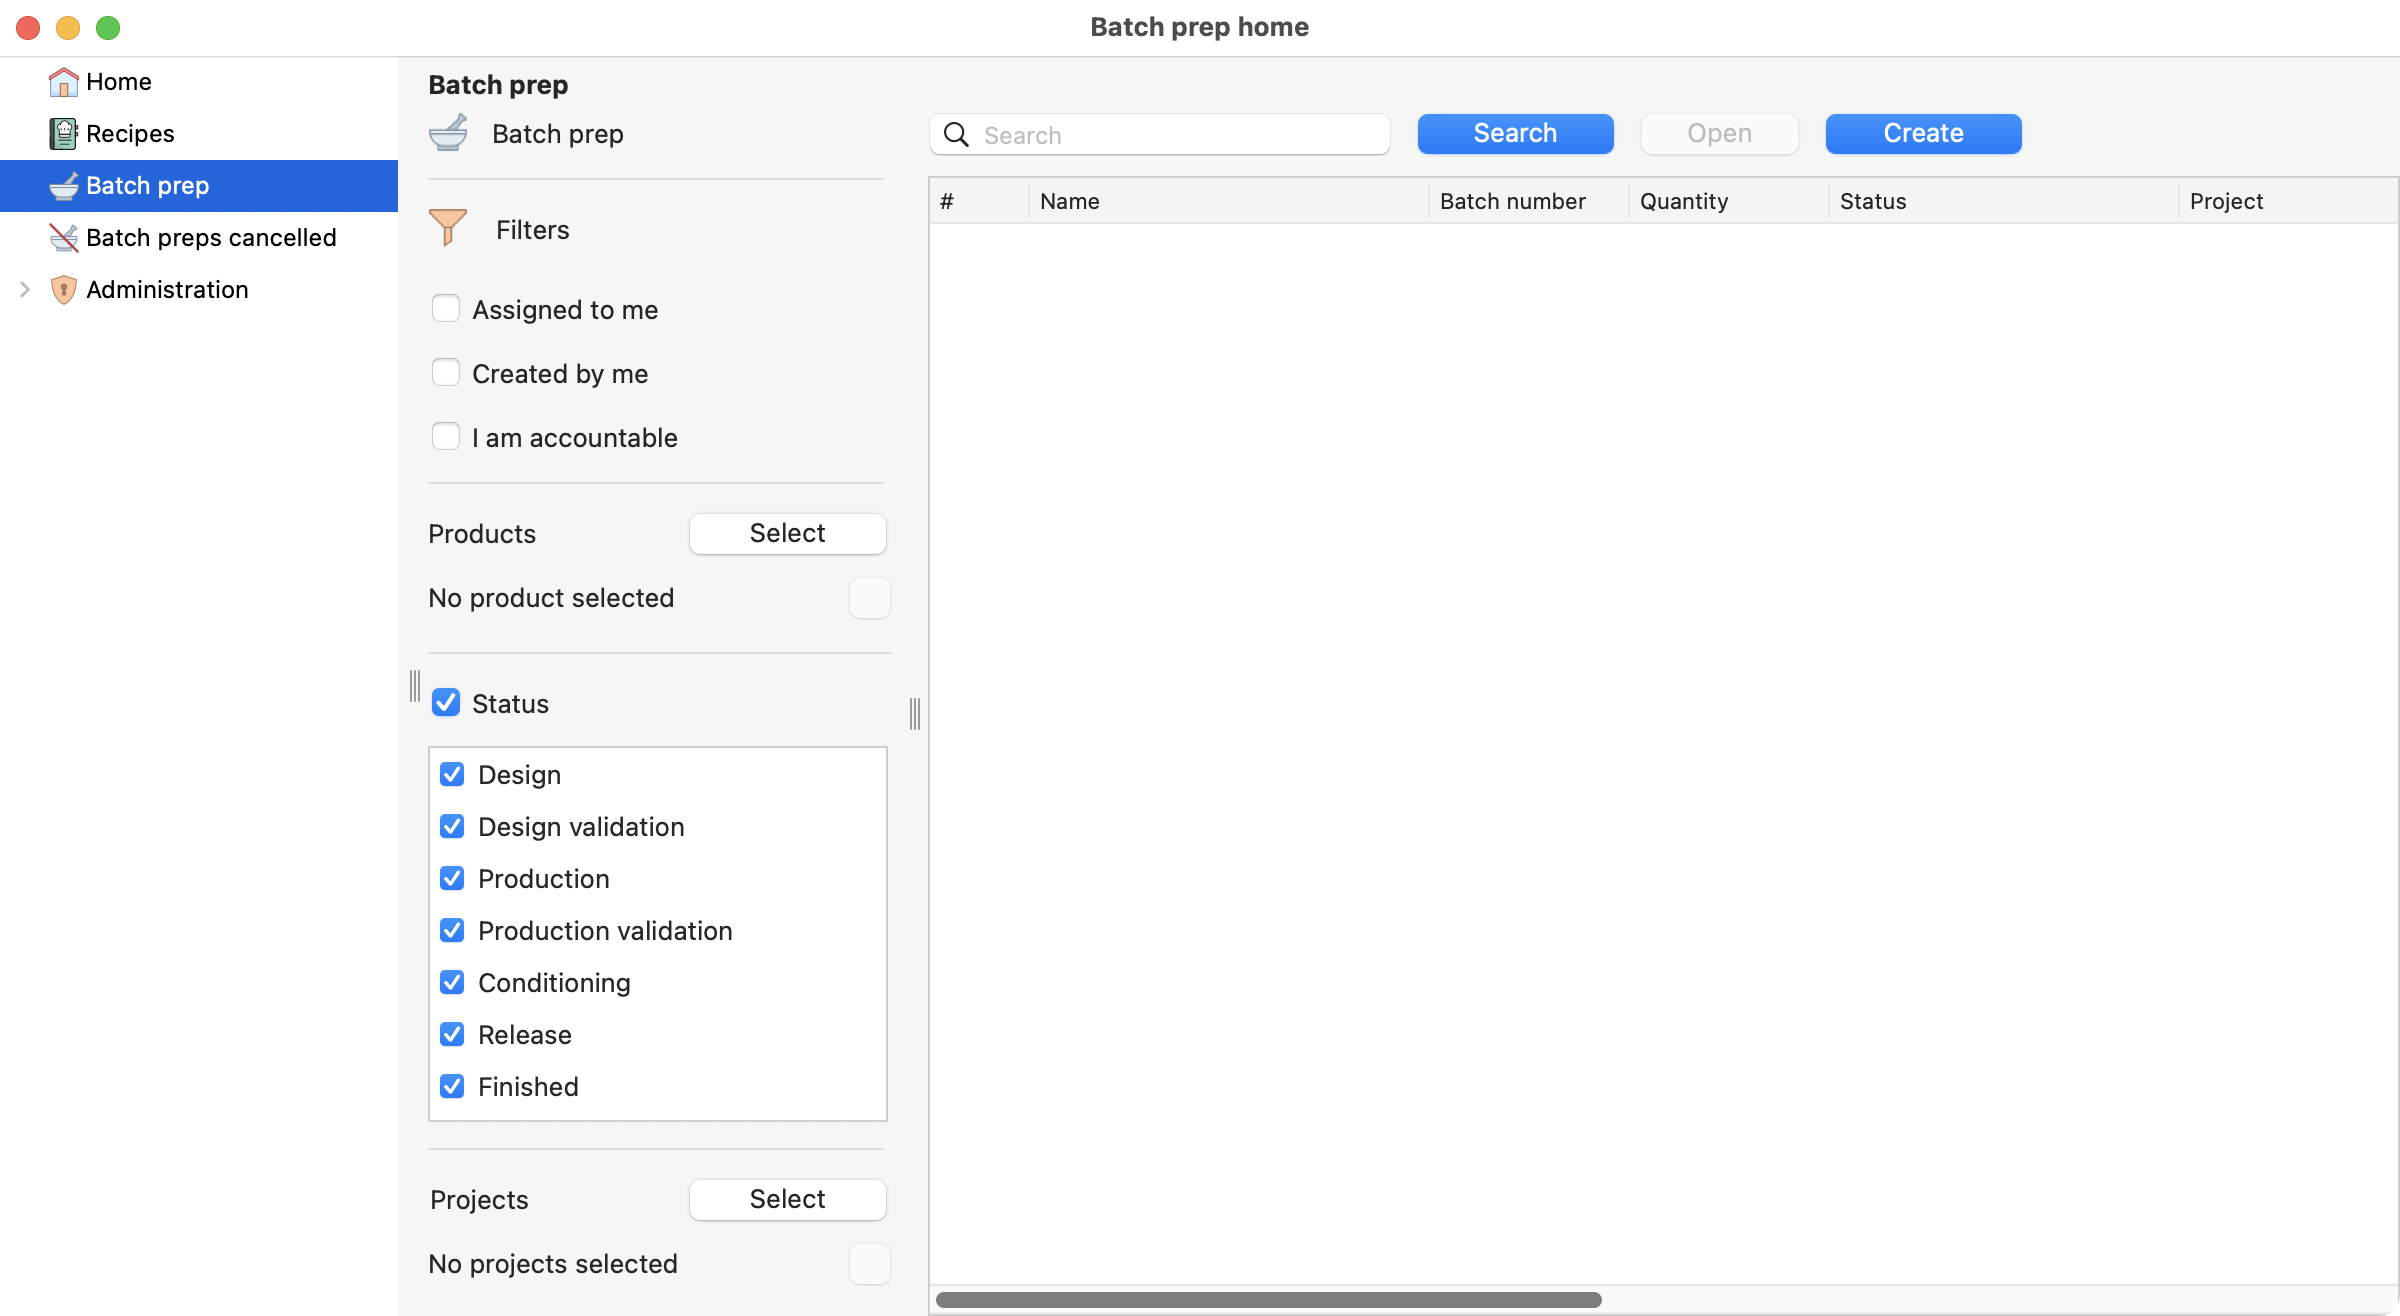
View of the batch prep section, on the batch prep module.
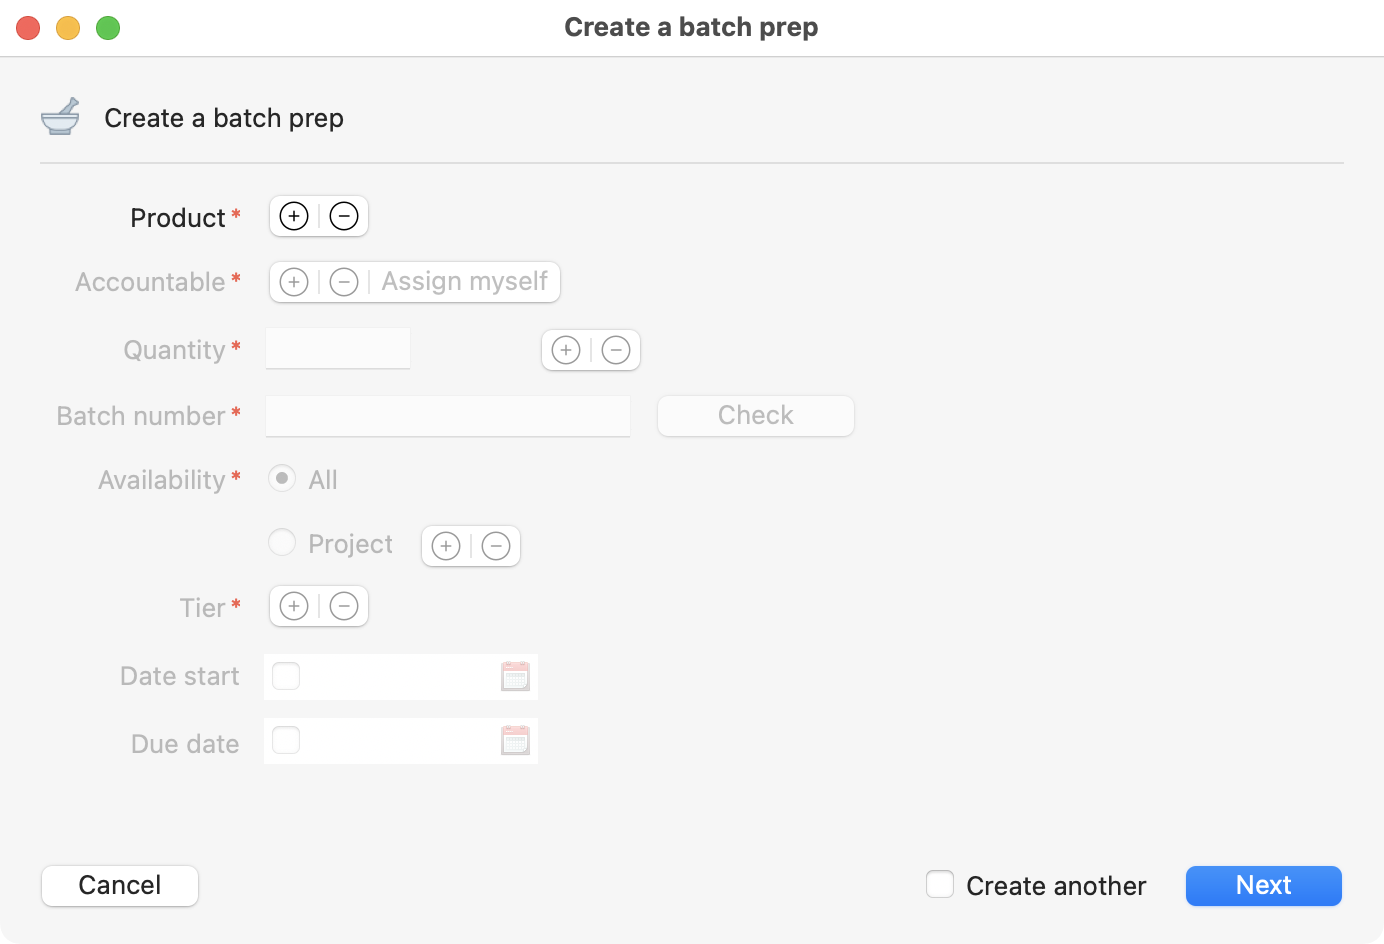
Batch prep creation page. Available after clicking on the create button.
Product specifications
Start adding the information about the batch you are creating. The mandatory inputs at that level are:
Product.
Accountable (responsible).
Quantity.
Batch number.
Availability.
Tier.
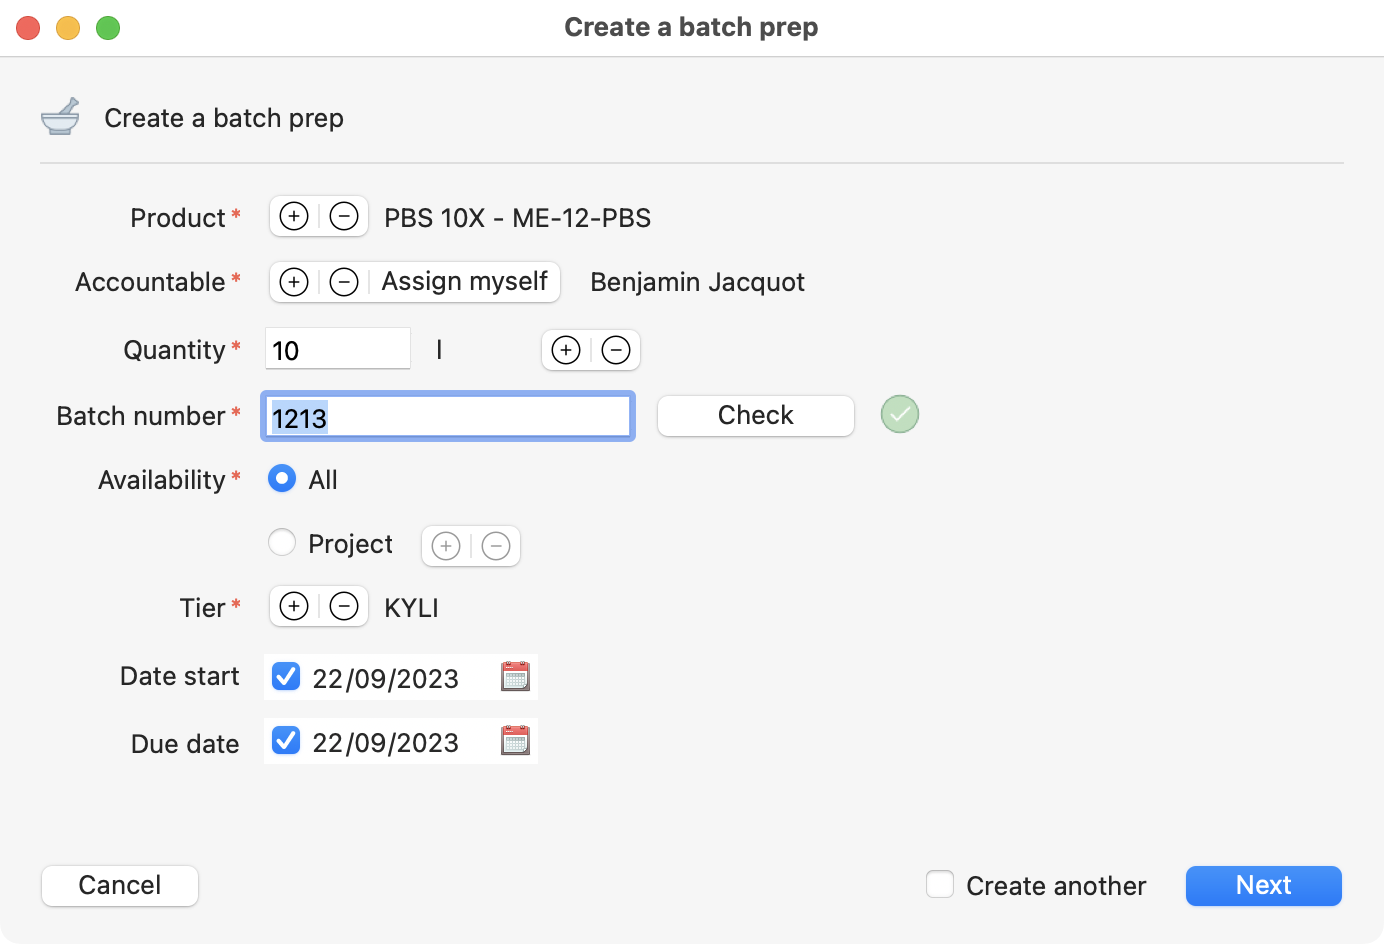
Filled Batch prep creation page.
Process type
Then, you need to specify the method that is going to be used on your batch preparation.

Type of process options, R&D and Production.
IMPORTANT
Both processes have the same structure and ensure data security. The R&D is very open and flexible, only one person can proceed until the new batch is in your stocks.
The production requires the intervention of authorized people (generally associated with Quality Control) to go through several steps.
You must enter a password at each step in the production process. But, you only need it at the release step for the R&D.
Step 2: Add design and assignee information
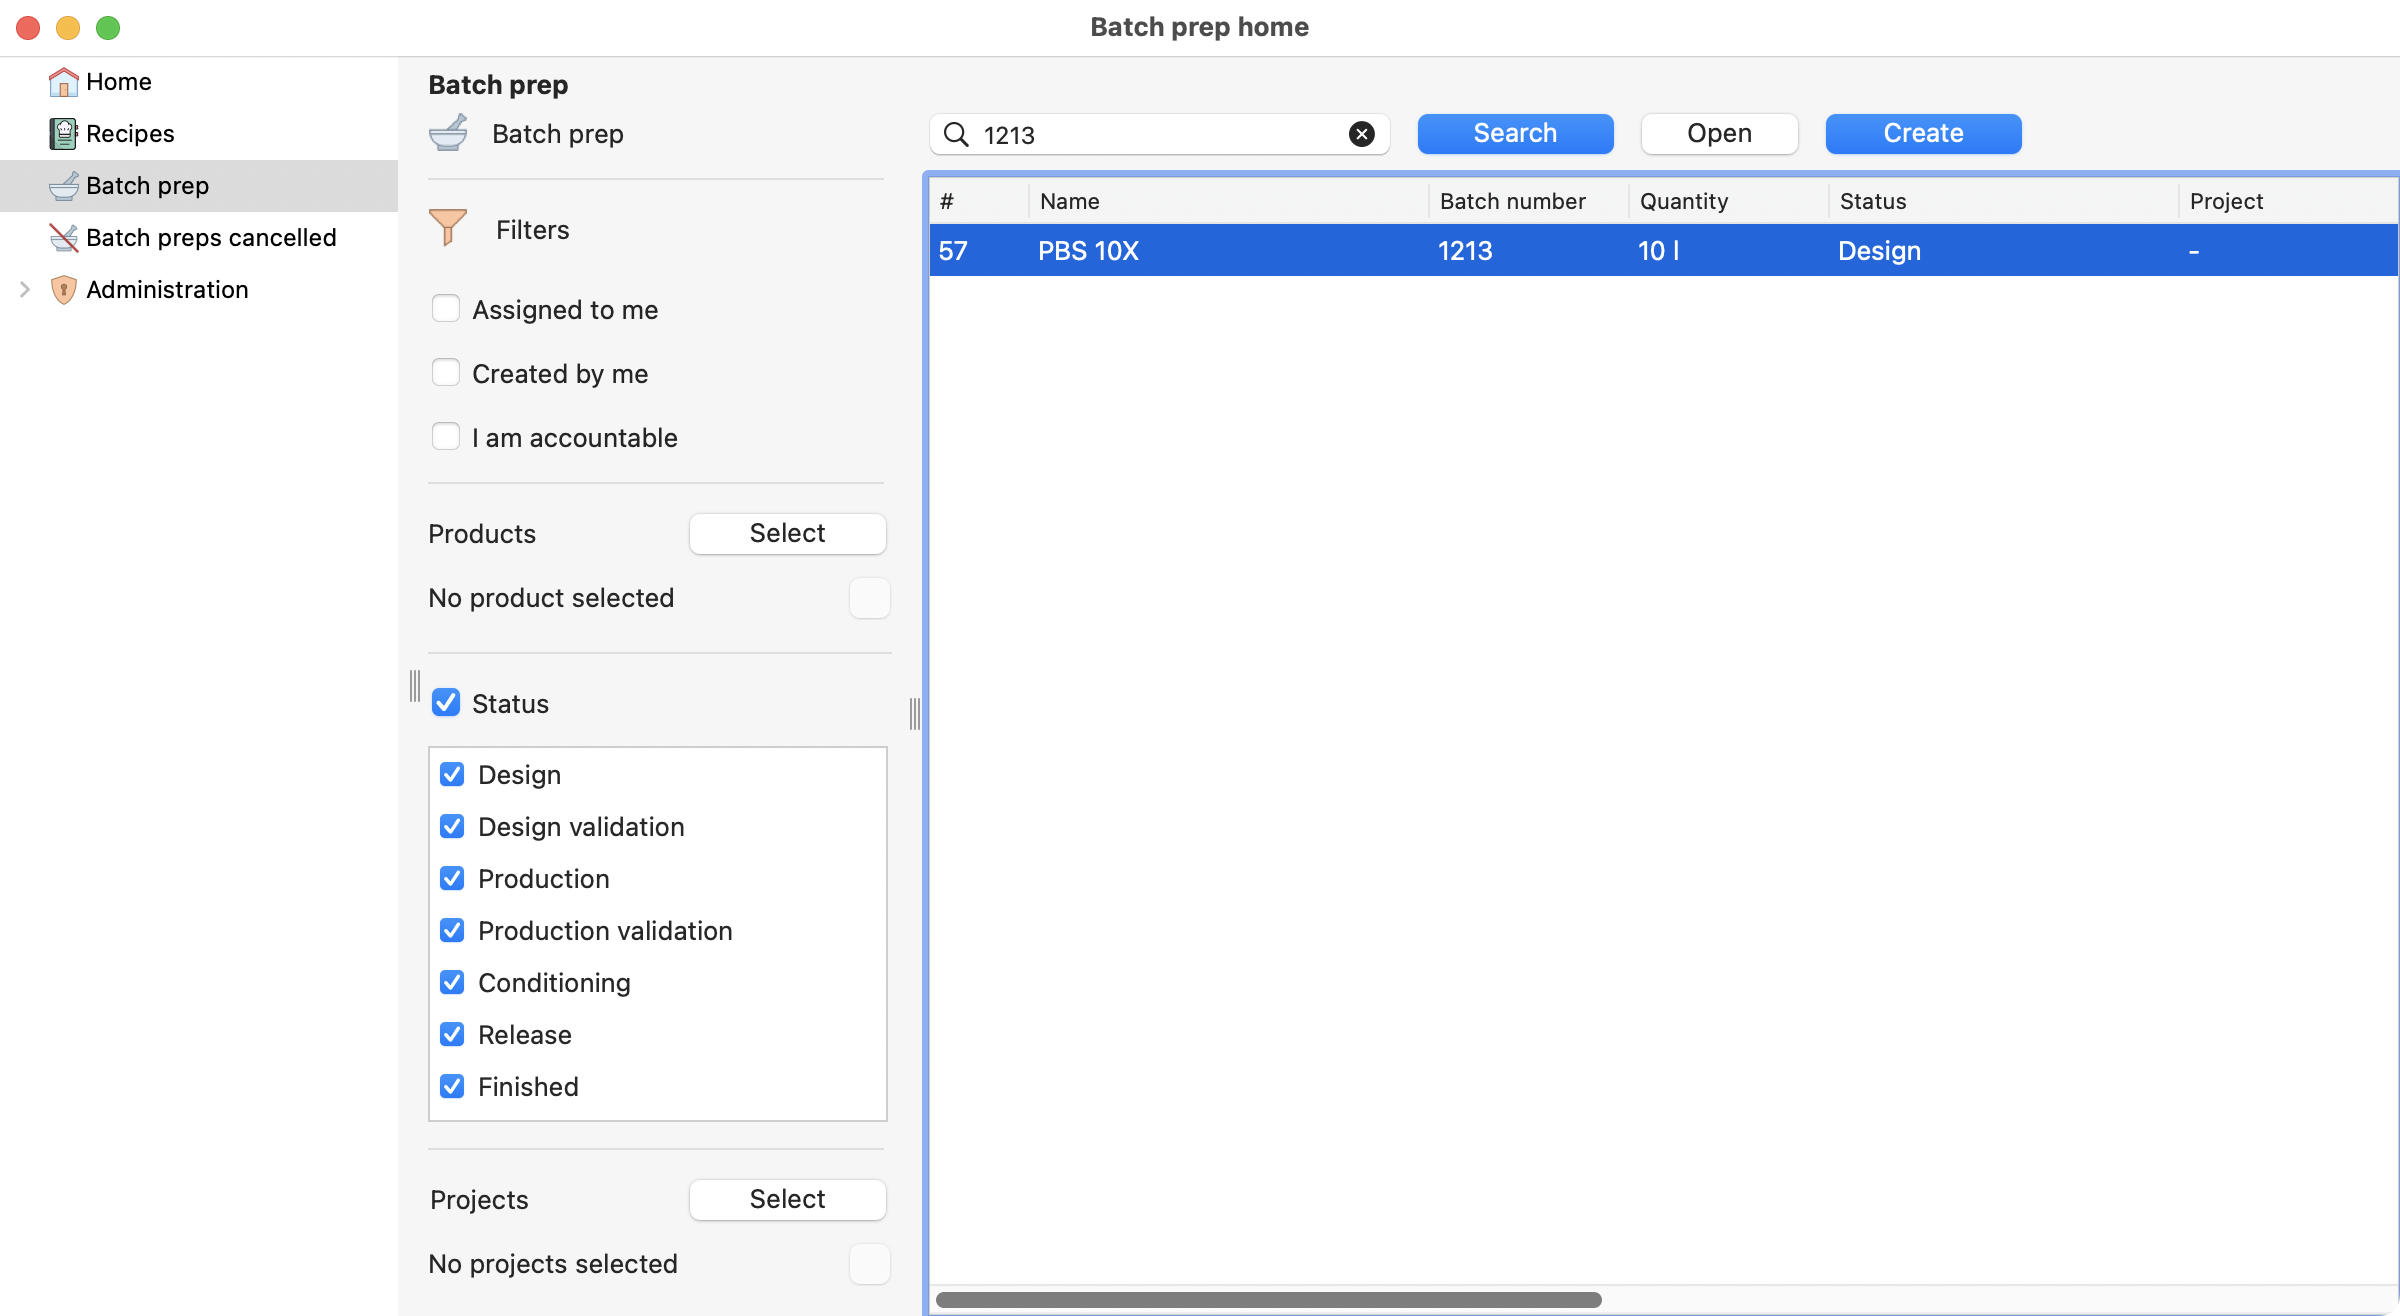
To start with, open the recently created batch prep.
Type of process options, R&D and Production.
Here is a table with the main batch prep process. In this moment we are going to fill the 2 first steps, Assignees and Design.
Step |
Description |
R&D |
Production |
|
|
Anyone |
Anyone |
|
Retreive automatically and adjust all the previously settings defined in your recipe. |
Anyone |
Anyone |
|
Validation step of your design before being able to start the production. |
Anyone |
Quality role related user |
|
Progress into your production by filling and validating step by step. |
|
|
|
|
Anyone |
Quality role related user |
|
Define the conditionning of your production |
Anyone |
Quality role related user |
|
Validate the release of the batch items |
Anyone |
Quality role related user |
|
Assign responsibles
Here is the moment to add responsible people to the steps on your batch prep.
Remember
R&D: The same person can goes through the differents steps and cover the whole process.
Production: It will require a quality responsible to goe through steps 2, 4, 5 and 6.
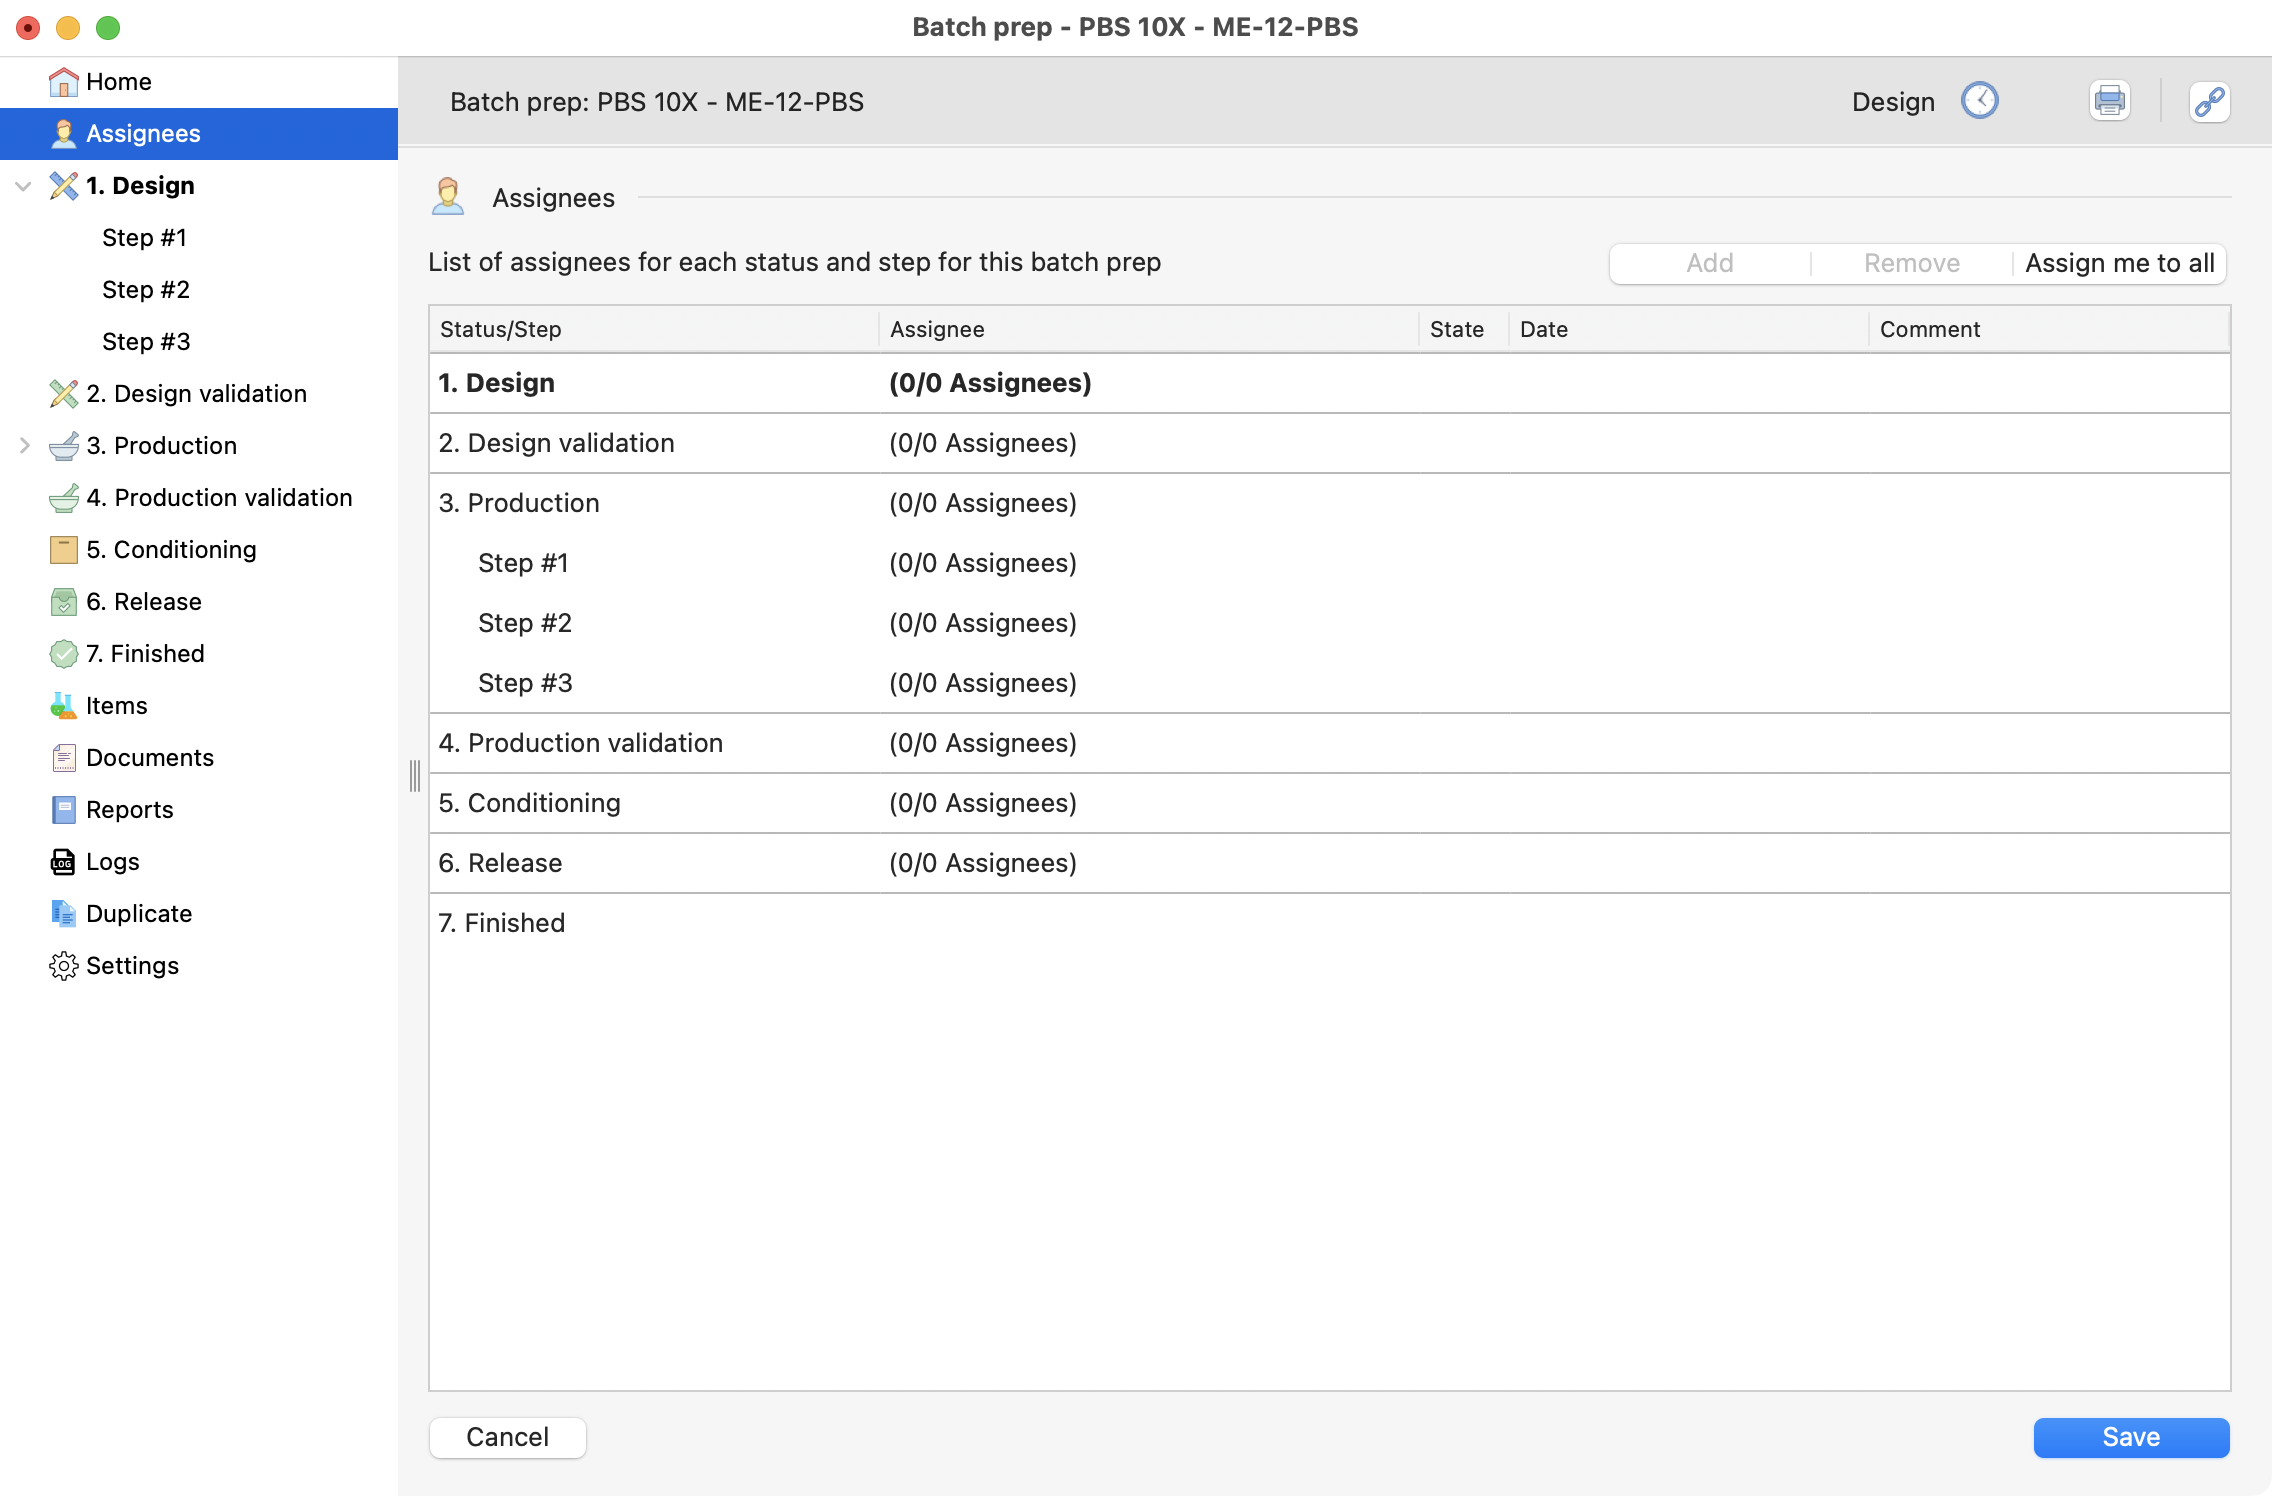
View of the assignees page, inside the batch prep.
Tip
If you are in a “R&D” process, you can click on “Assign me to all”.
Add additionnal user
You can have more than one responsible in each step. By selecting the step that have already a responsible, and clicking on the add button again.
The additional user can be seen below:
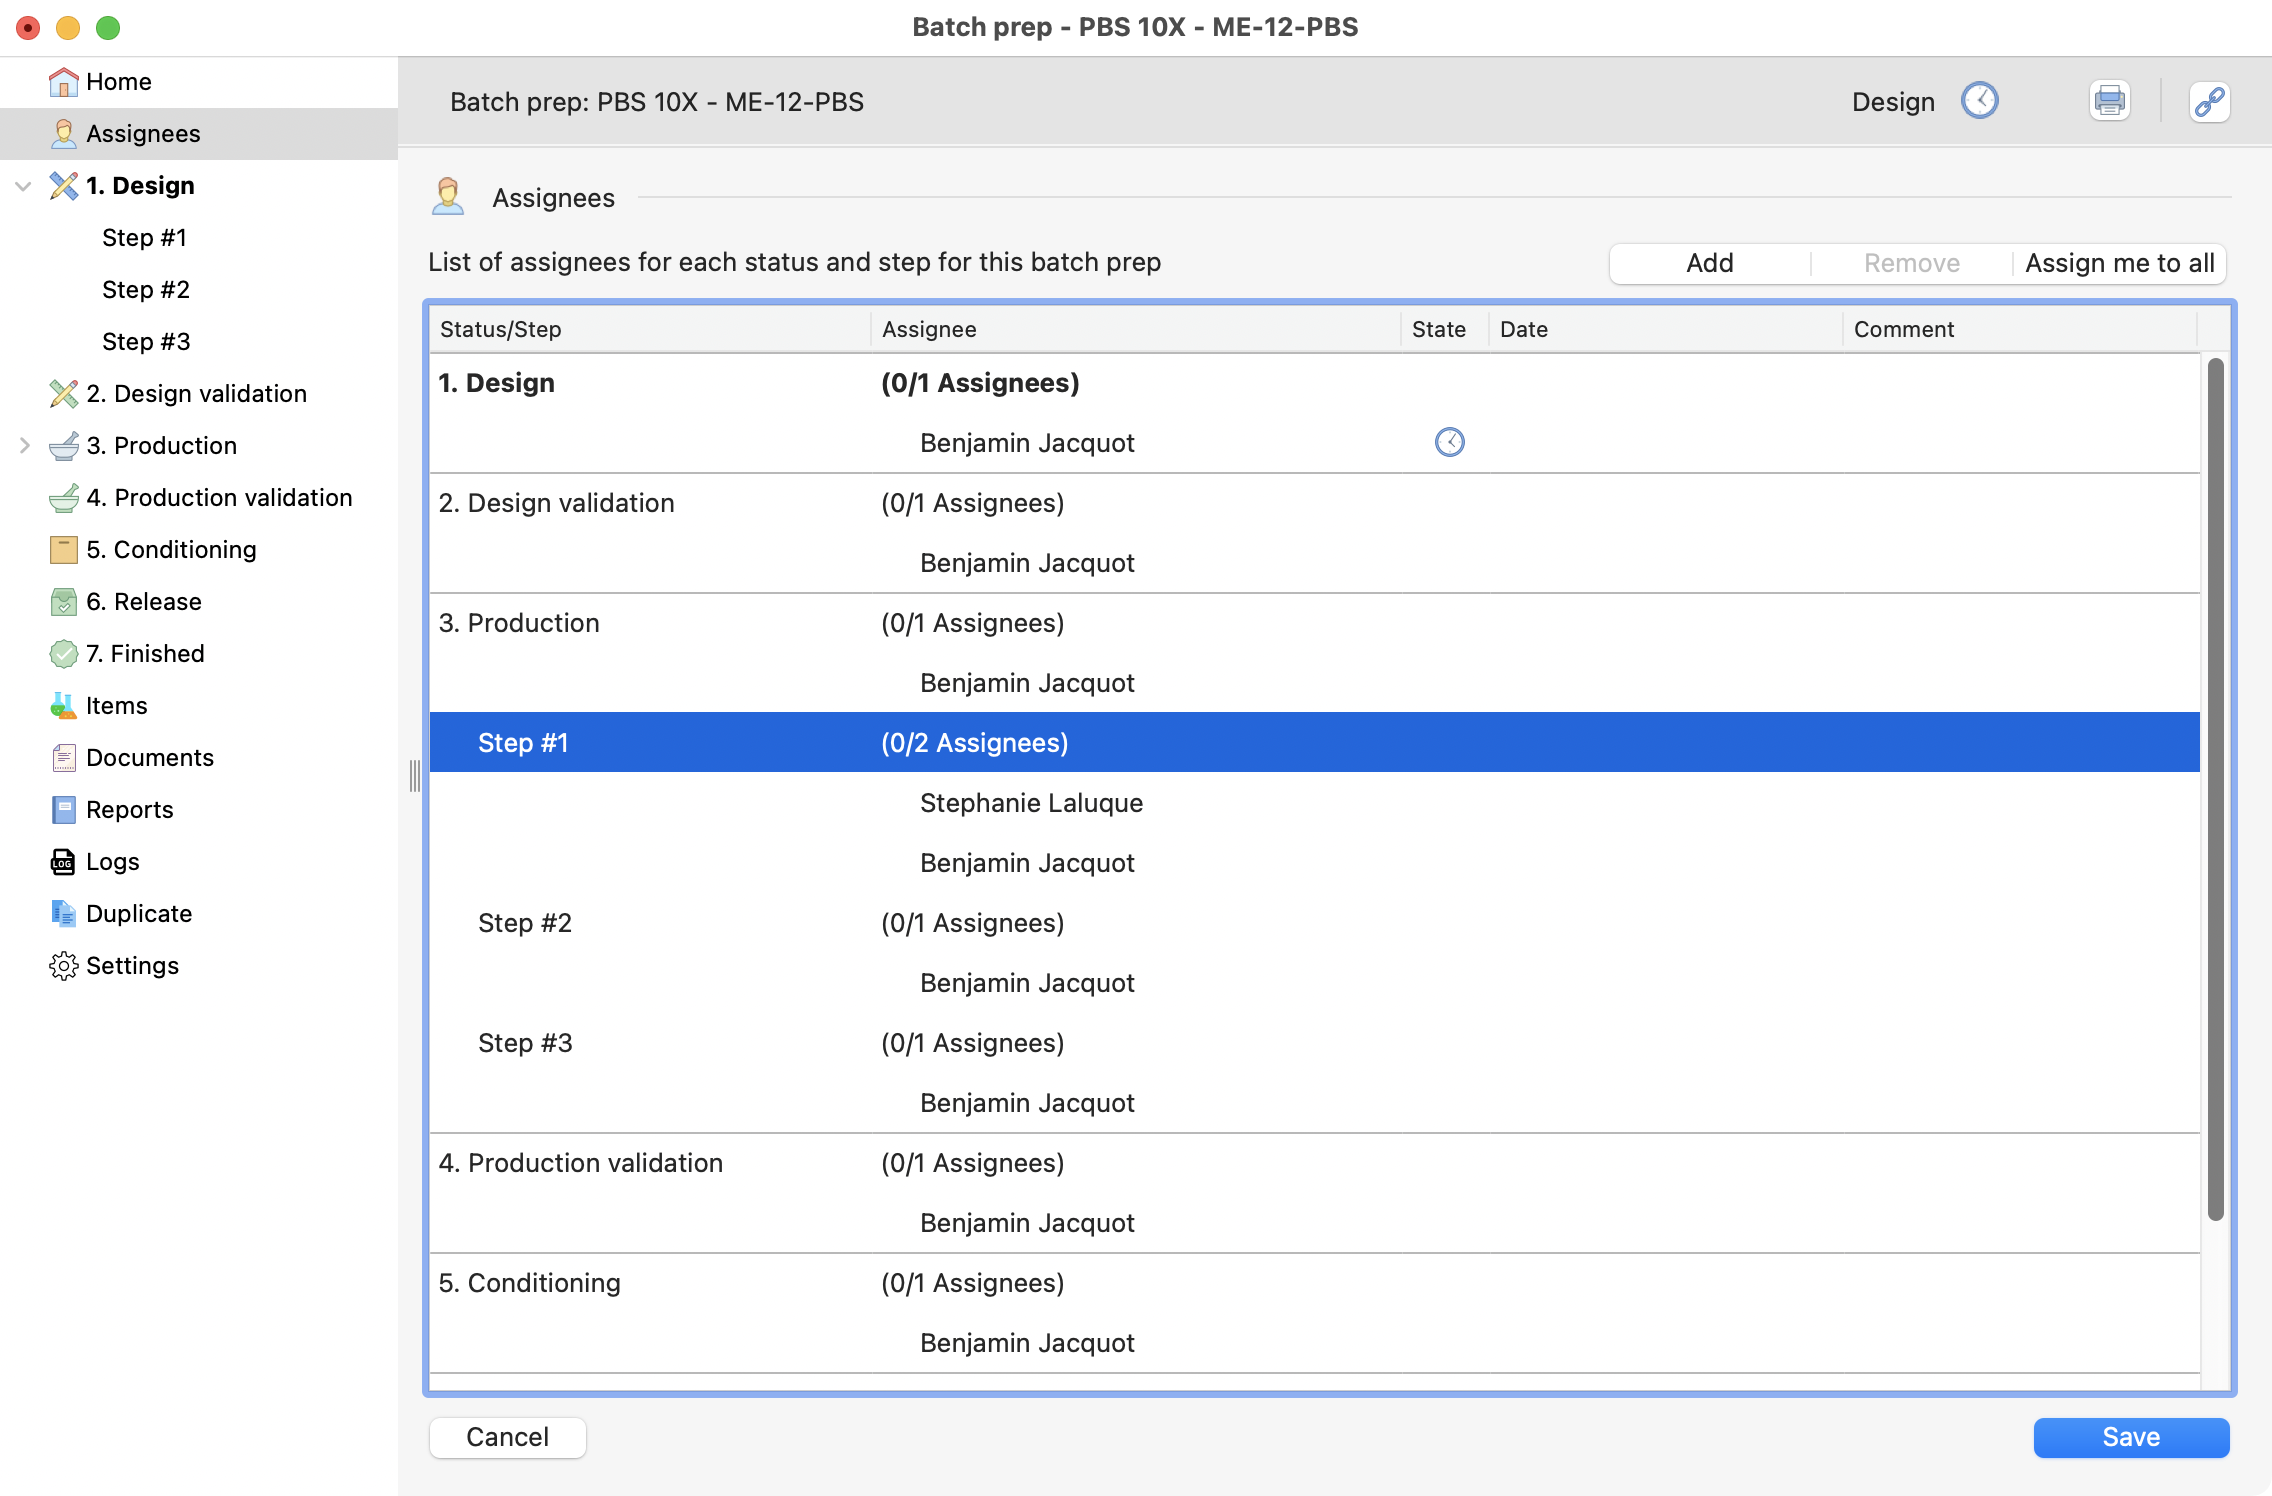
View of the assignees page, inside the batch prep.
Review the design steps
The design steps were defined on the recipe (we did that together here). But you can make some modifications and complete your recipe with the:
Planned start and end dates.
General description.
Eventually specify the items and equipment to be used.
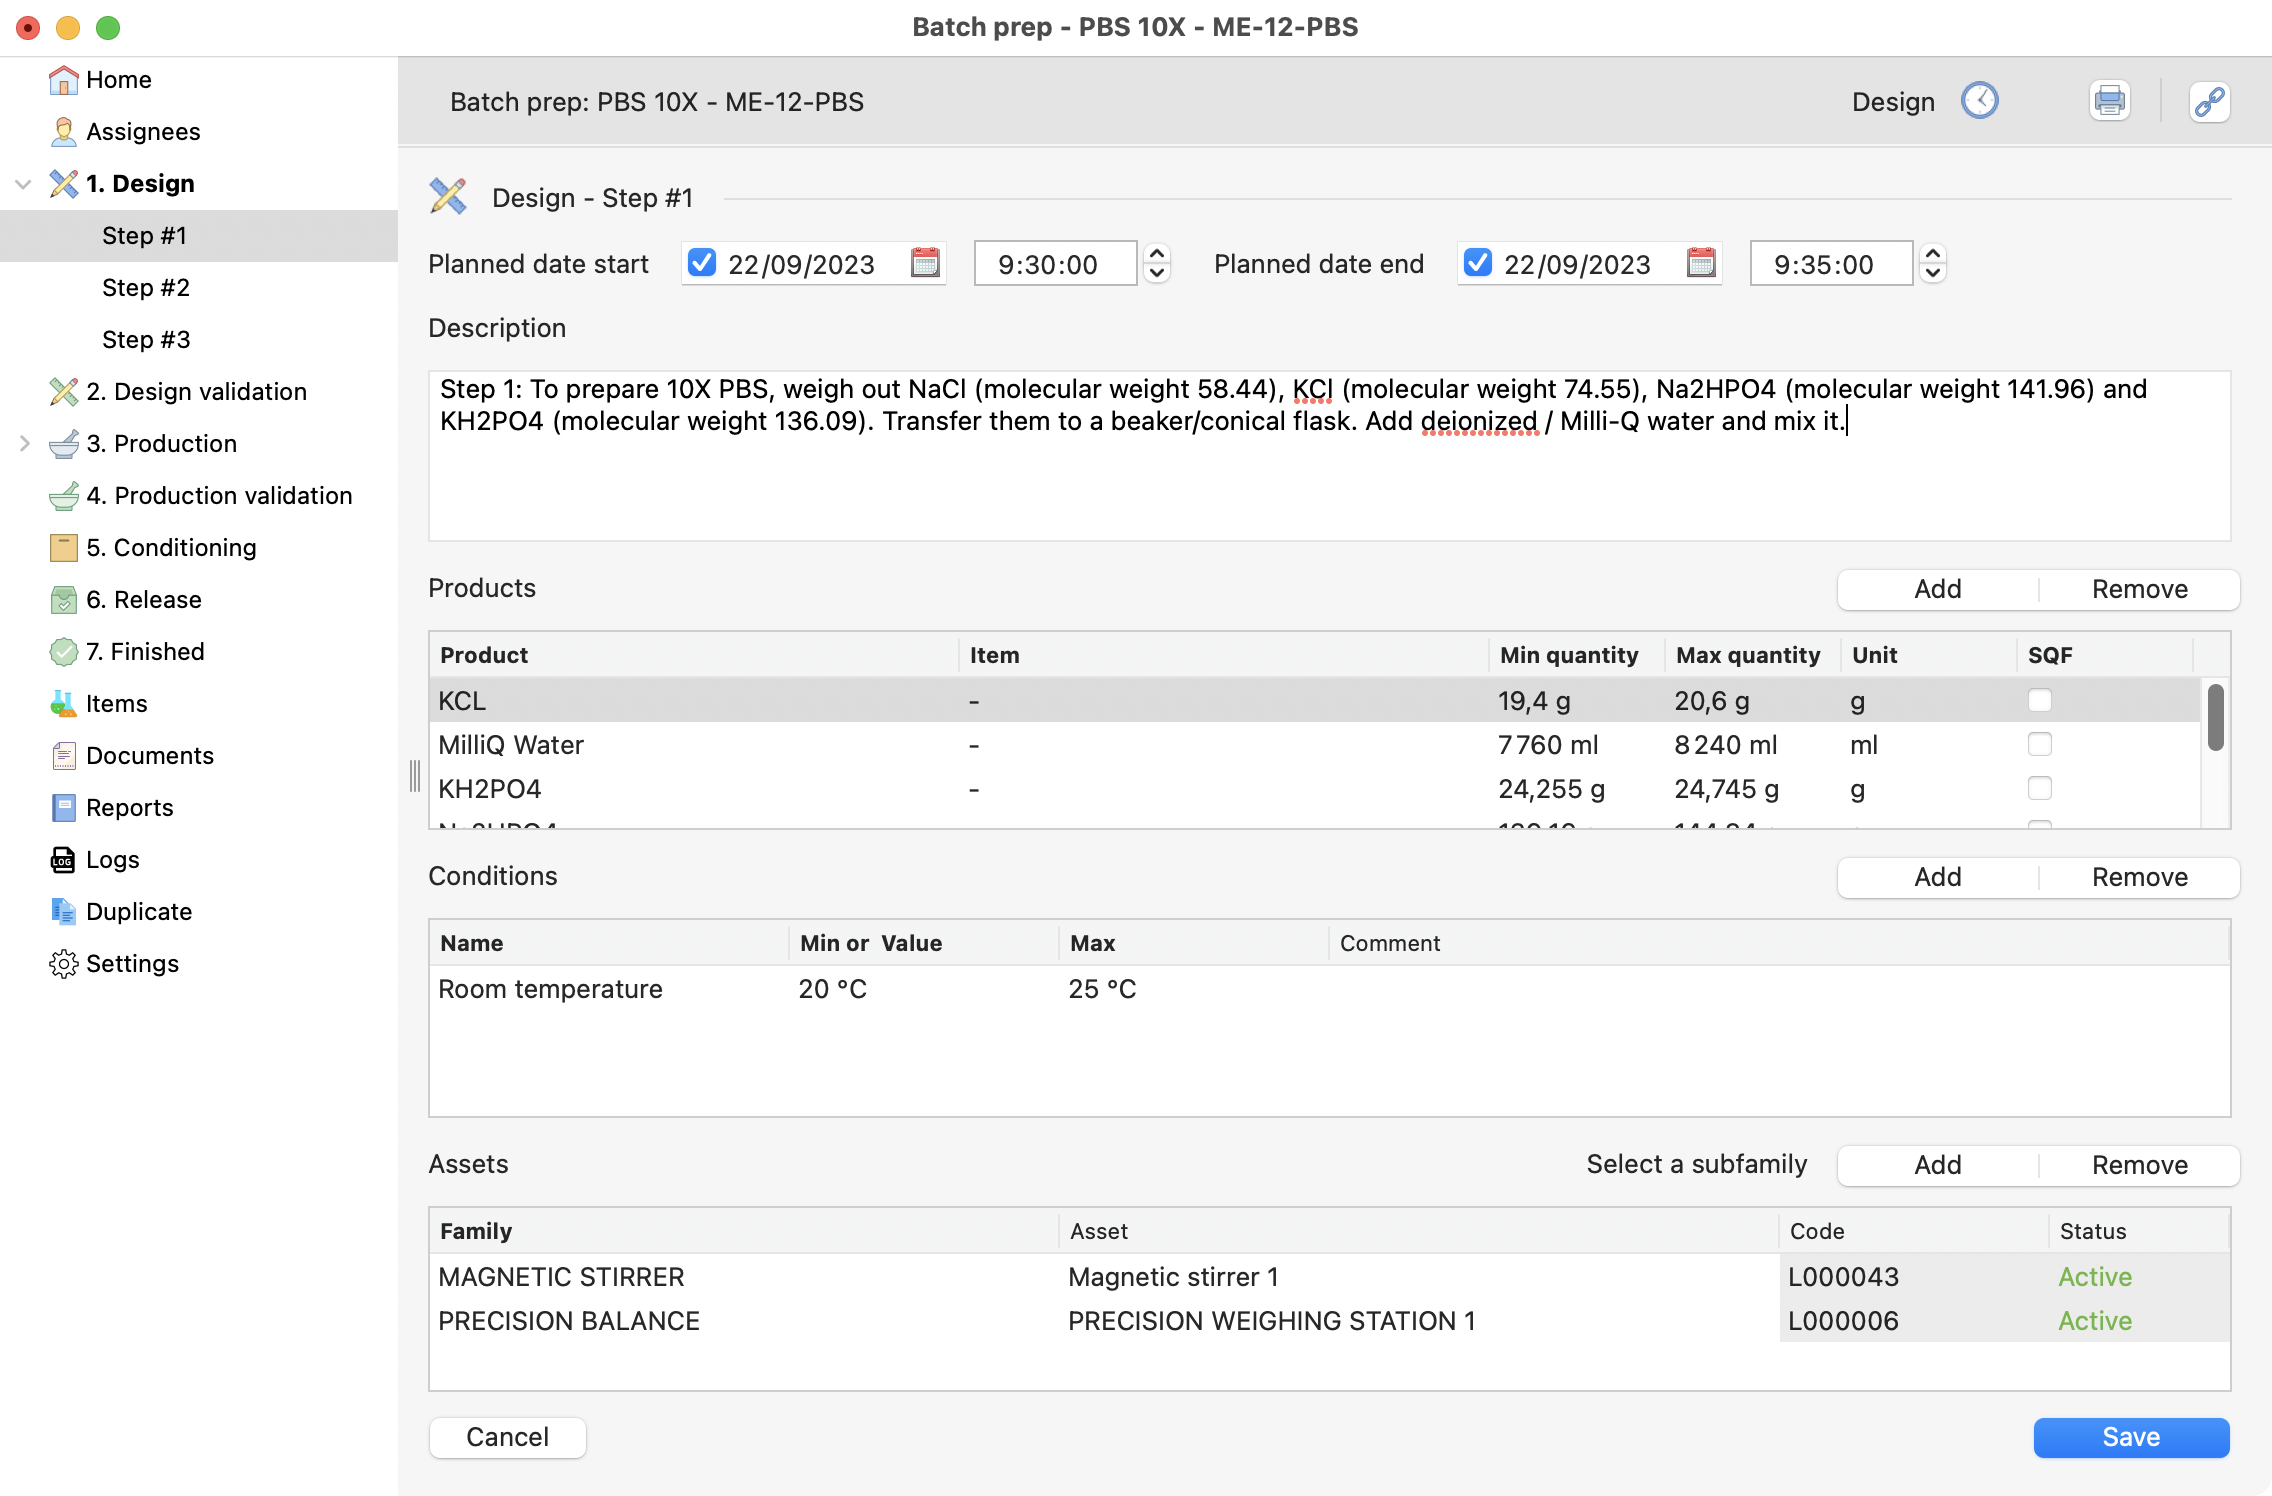
Step 1 on the design process, with dates and description filled.
Attention
If you do not specify the item, the production step responsible will be able to select the batch he want without deviation.
If you precise the item(s) to be used, the production step responsible may be able to modify the item, but it will be considered as a reported deviation.
Step 3: Validate the design
Then, you can simply confirm the design by pressing the validate button.
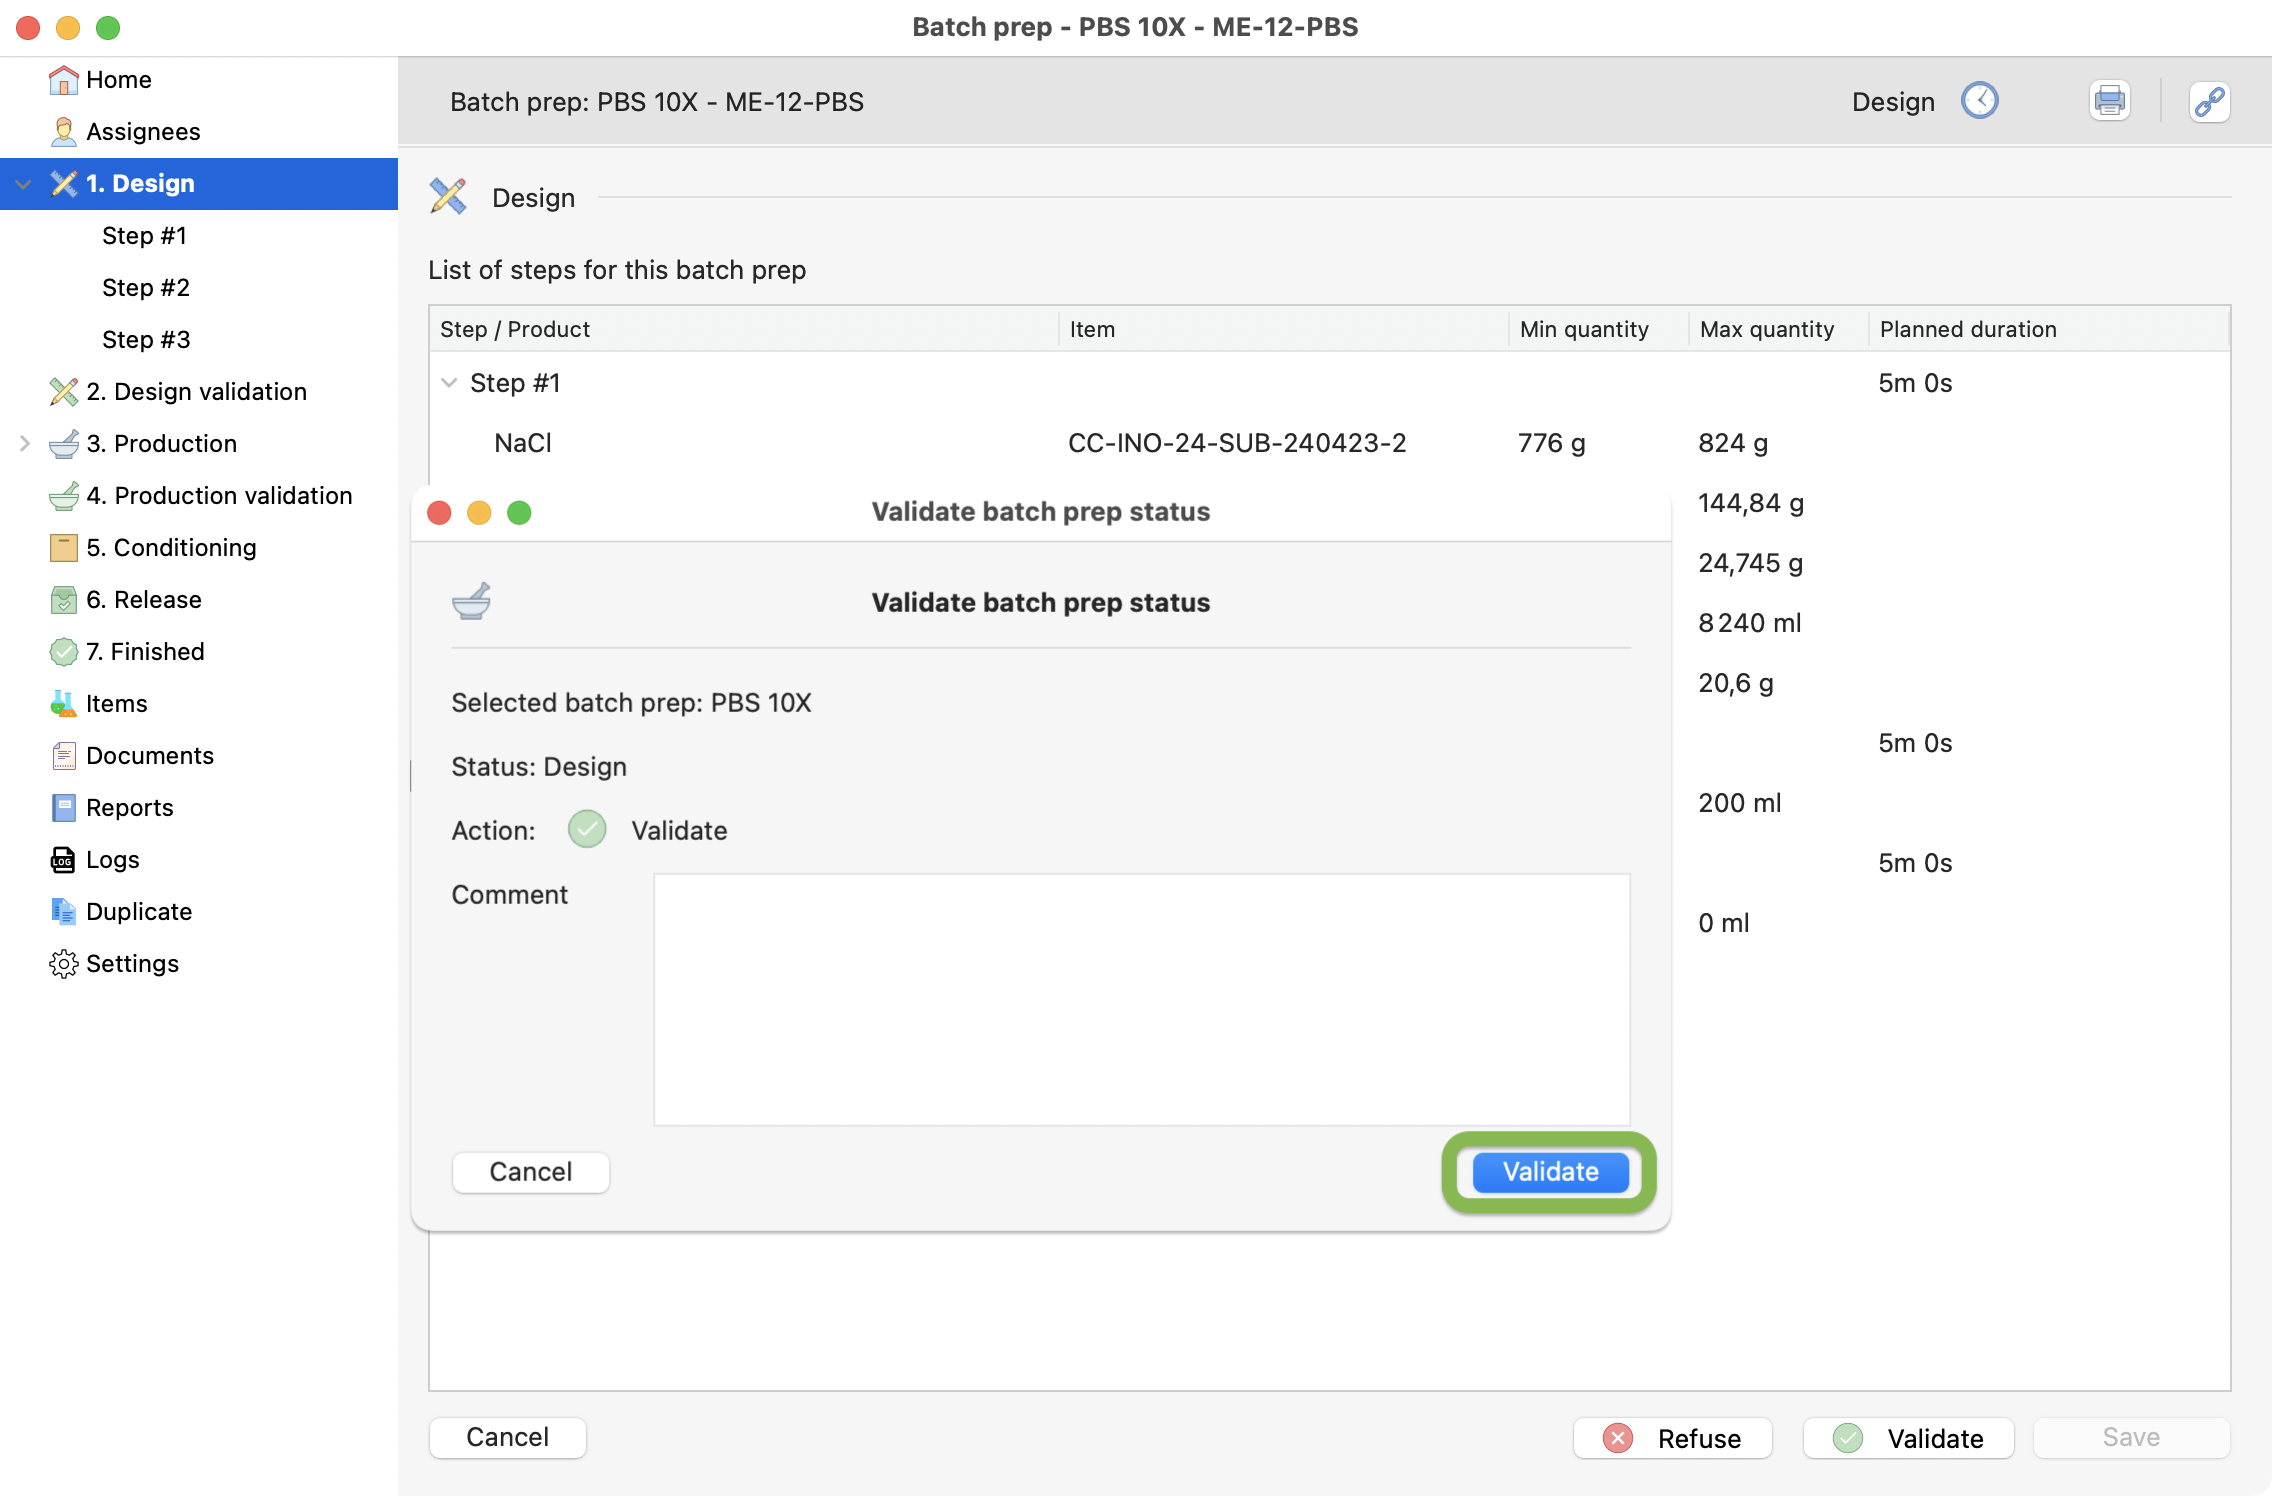
Validation of the first design step.
Double design validation
On the production process, this step is only manageable by a quality-role related user.
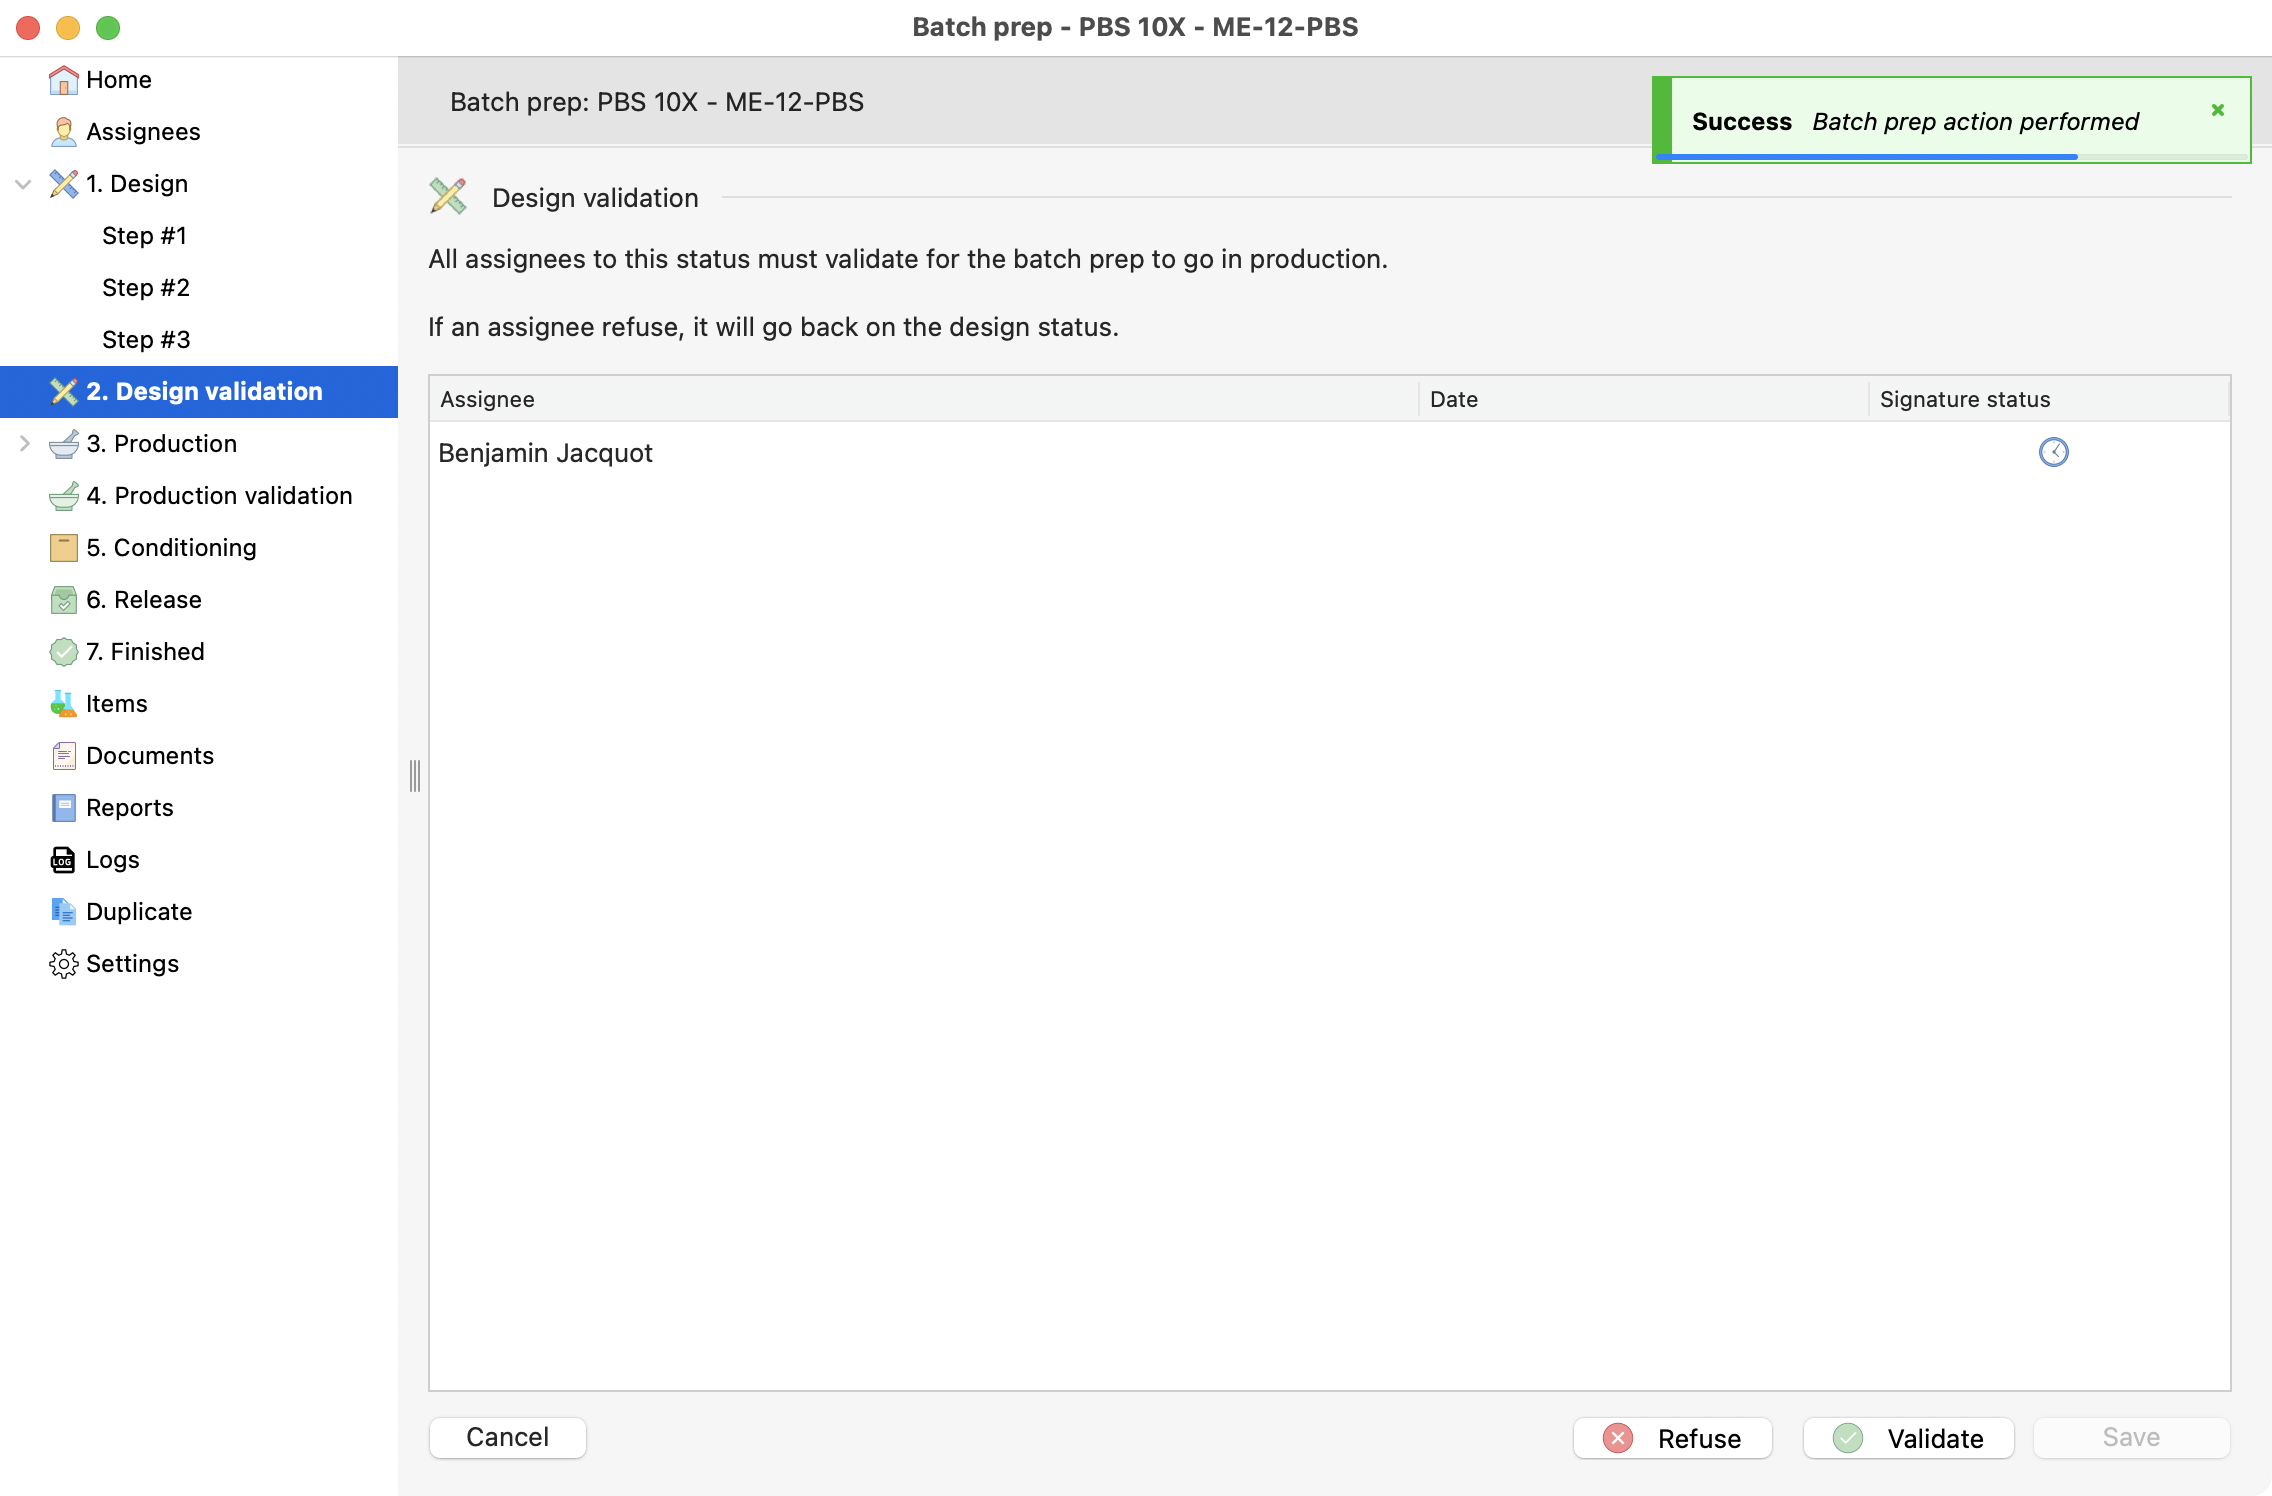
Validation of the last design step.
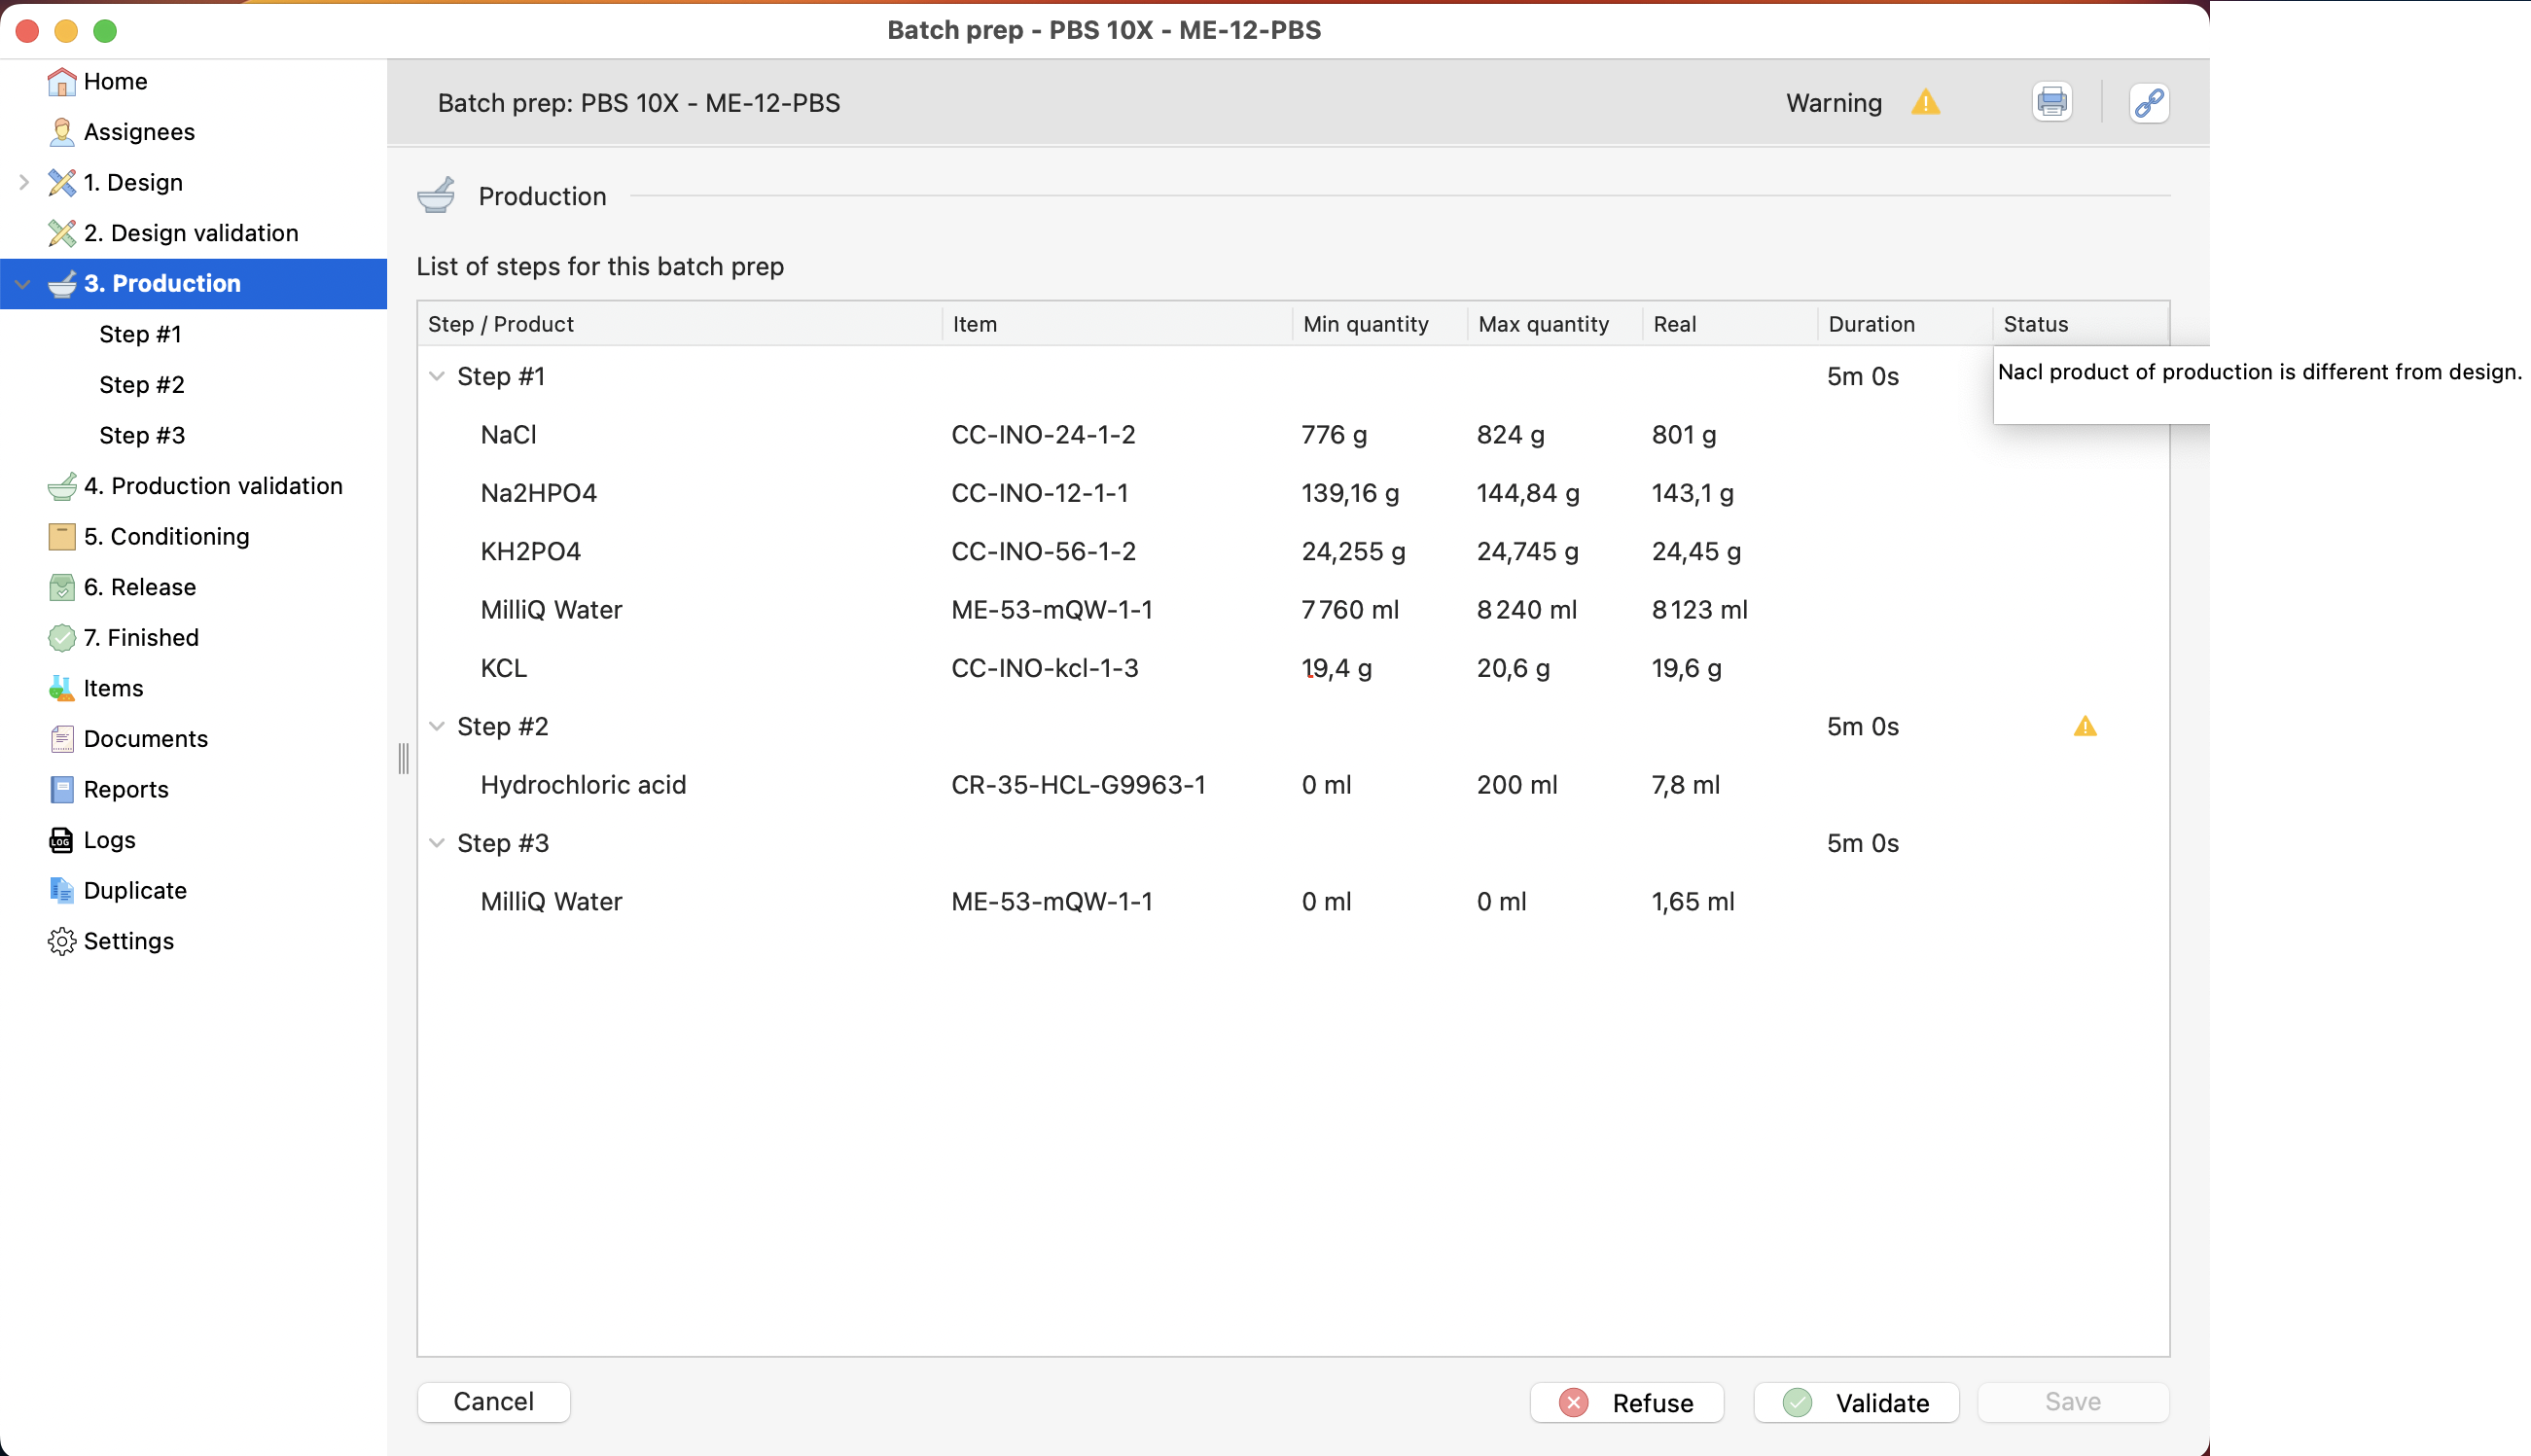
Step 4: Start production
Next Click on the first production step, you will retrieve the specifications predefined on the design step.
During your production, inform the following:
Quantitie(s).
Condition(s) validation.
Equipment.
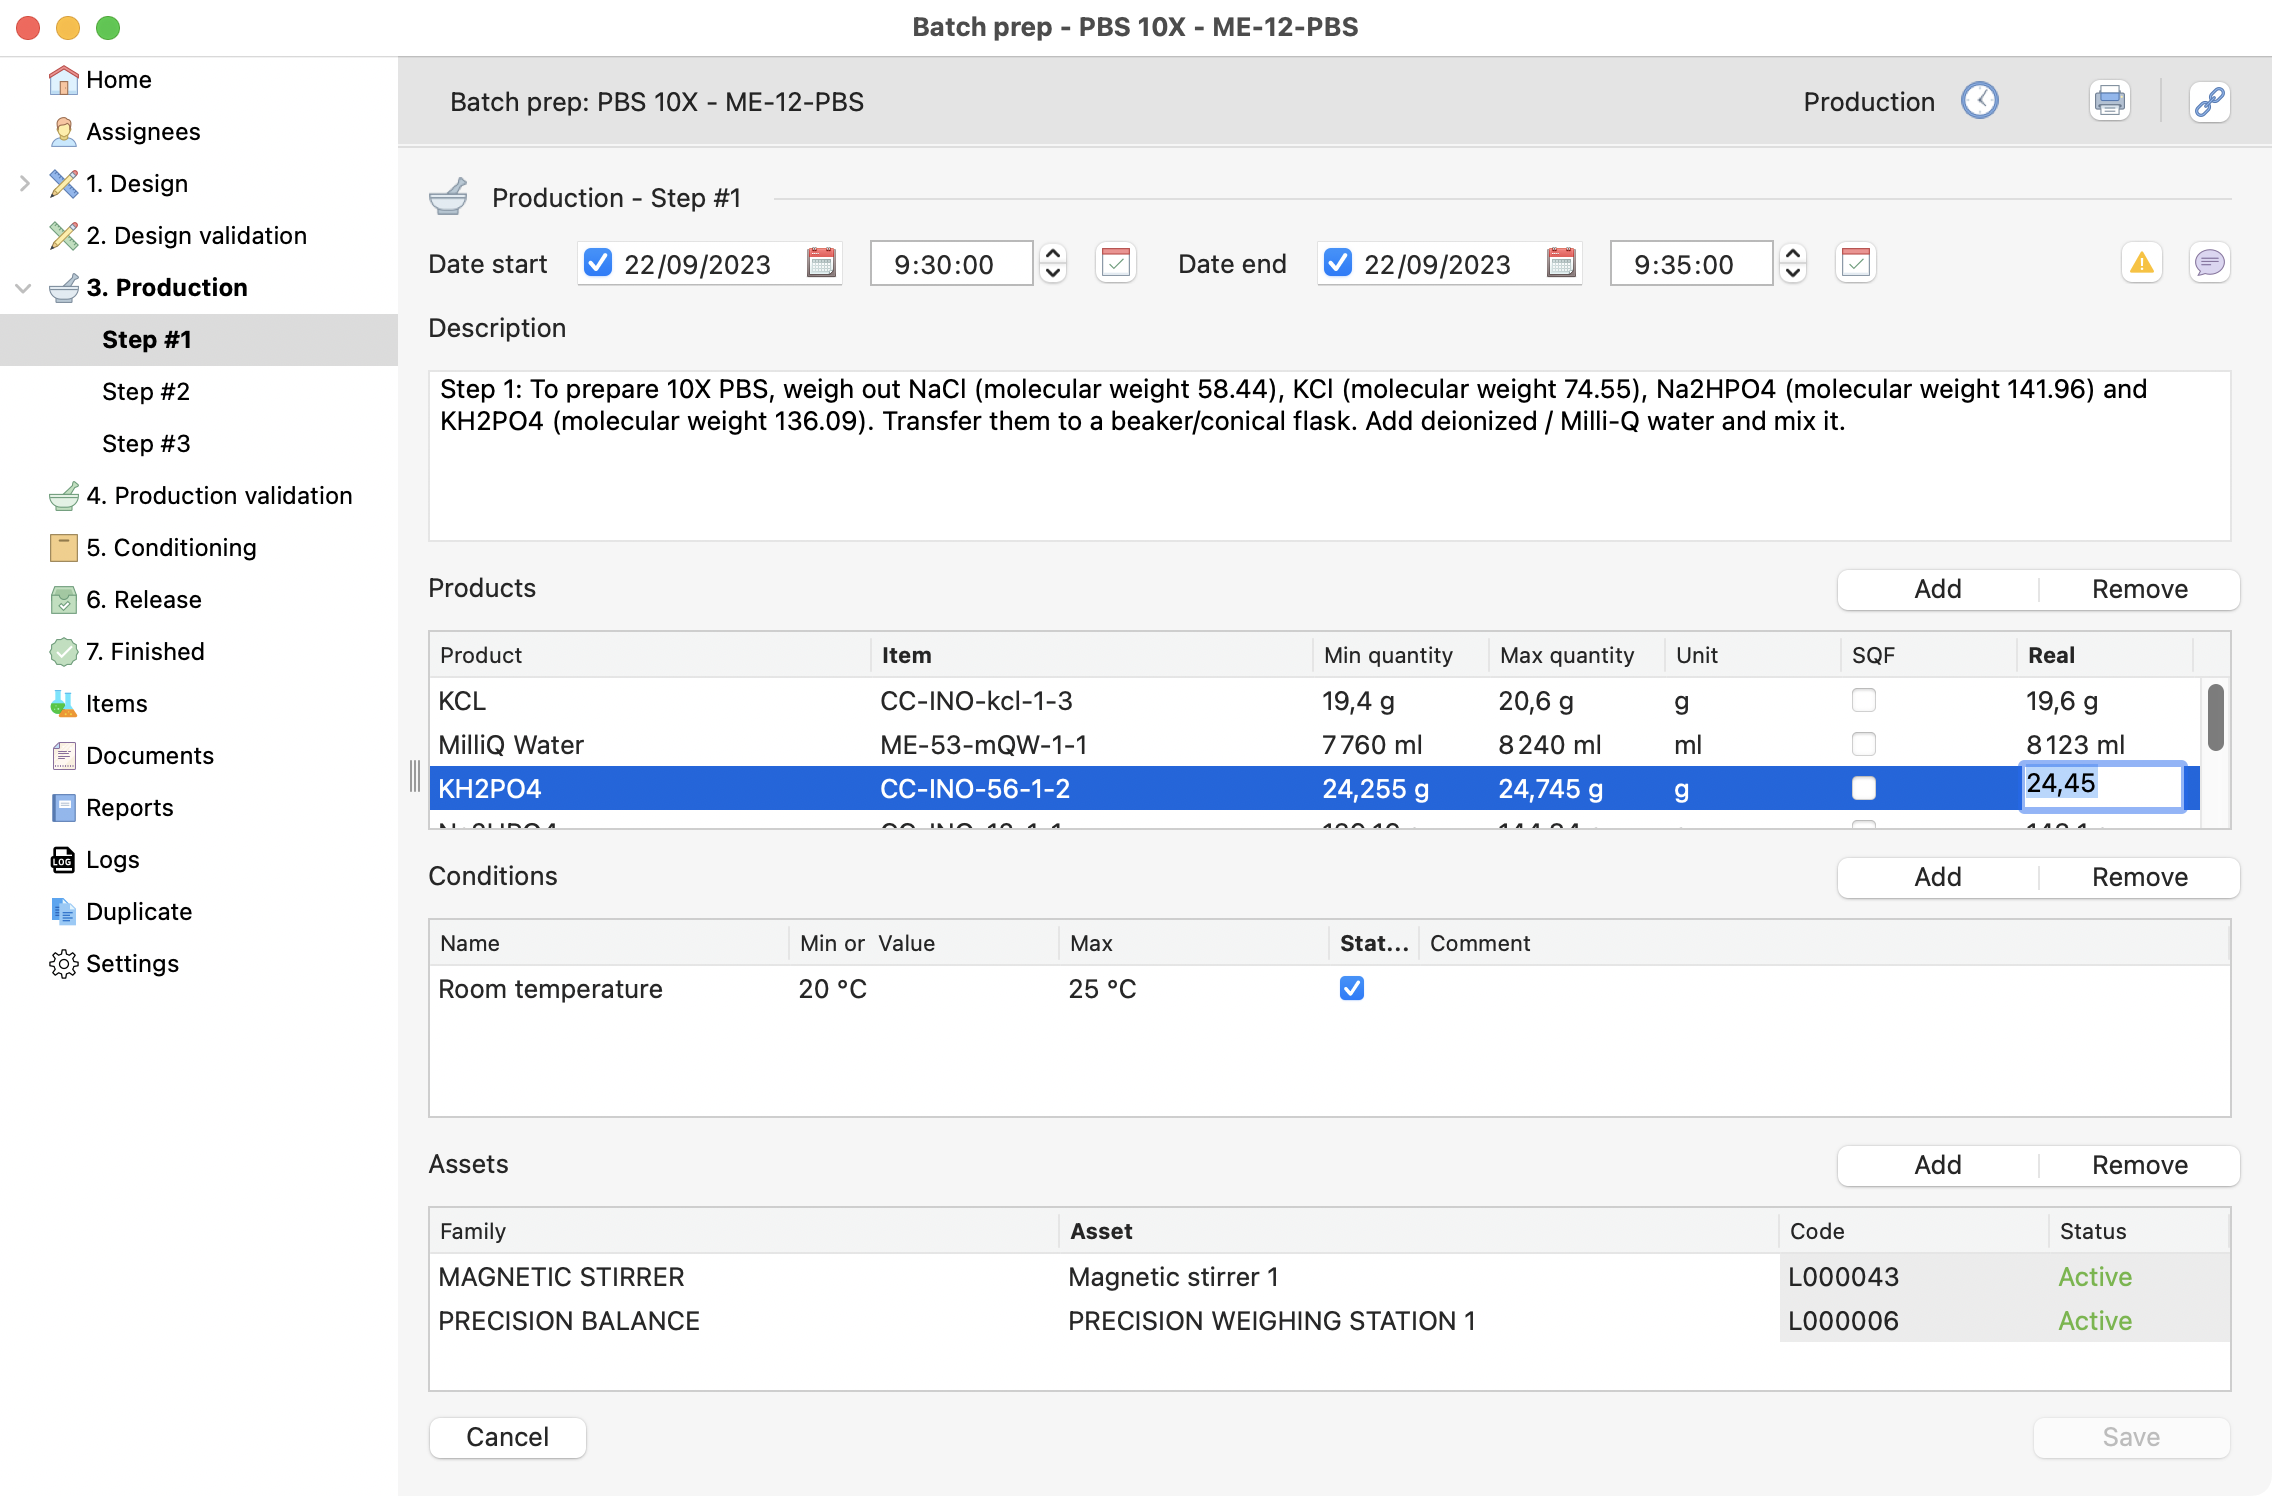
Production step, with quantities being filled.
Optionnally add a comment to the step:
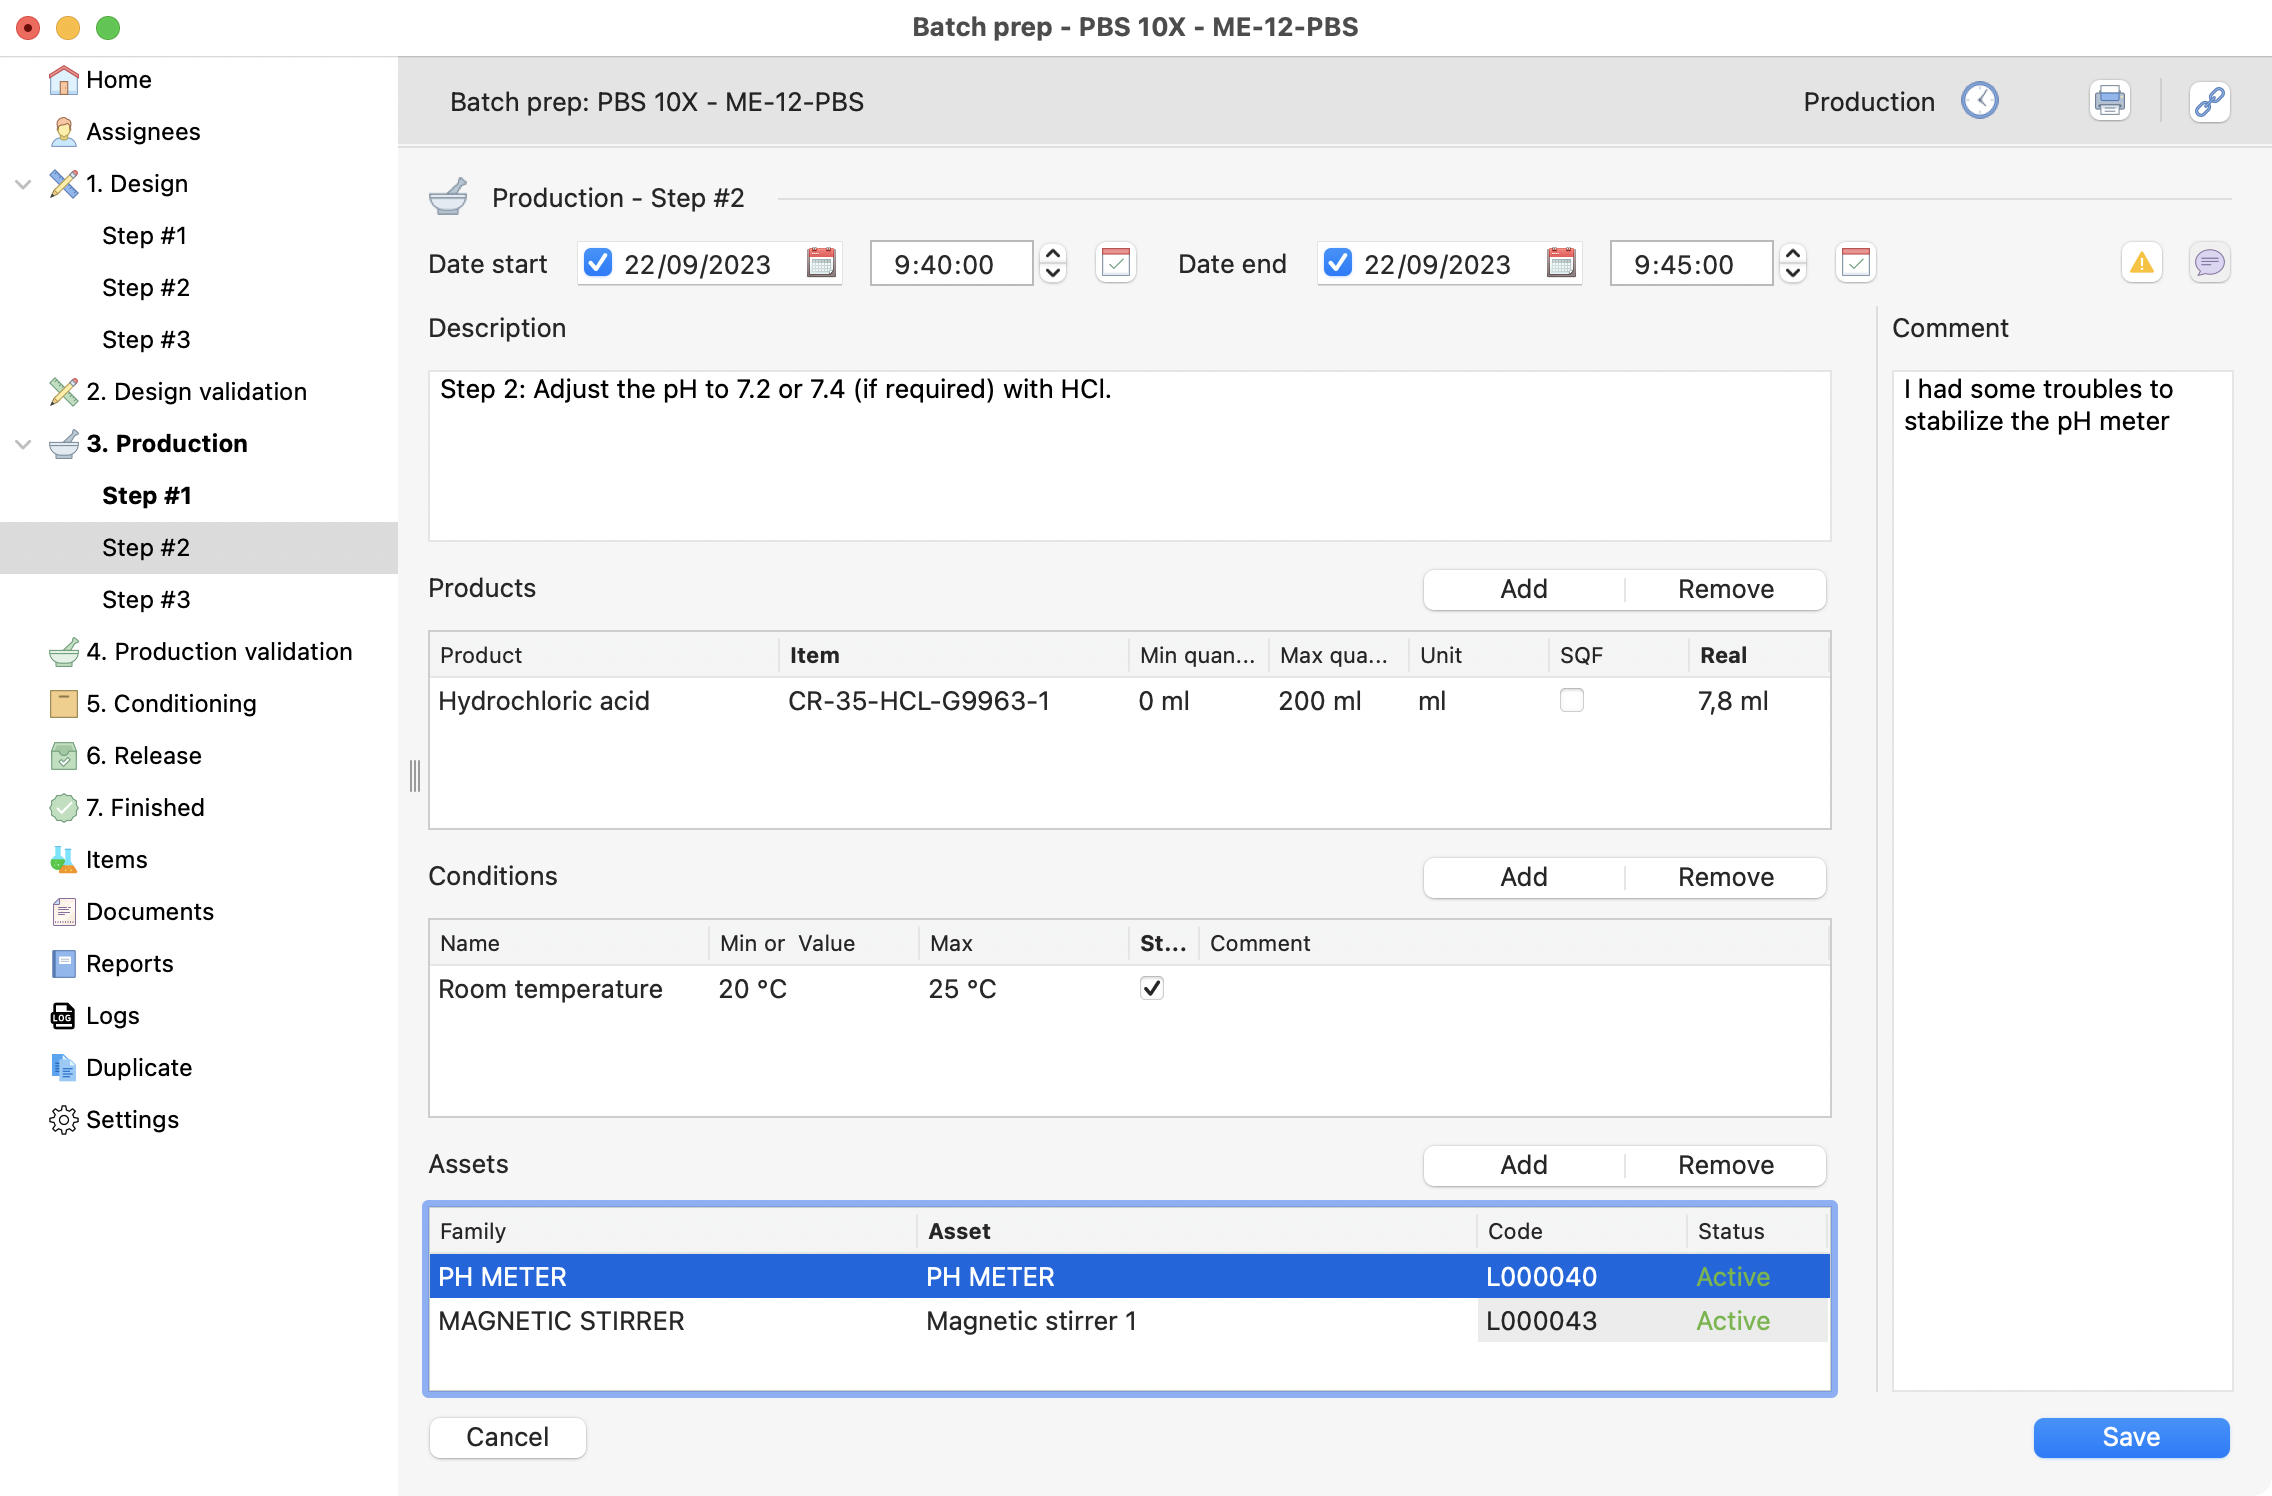
Comment section on production step.
Step 5: Validate the Production
After performing the production, the next step is to validate it. For that, the process is the same as the one did before, by clicking on the validate button.
Validation of the first production step.
Double Validation of the production
Like the design, if you are in the production process, this step is only manageable by a quality-role related user.
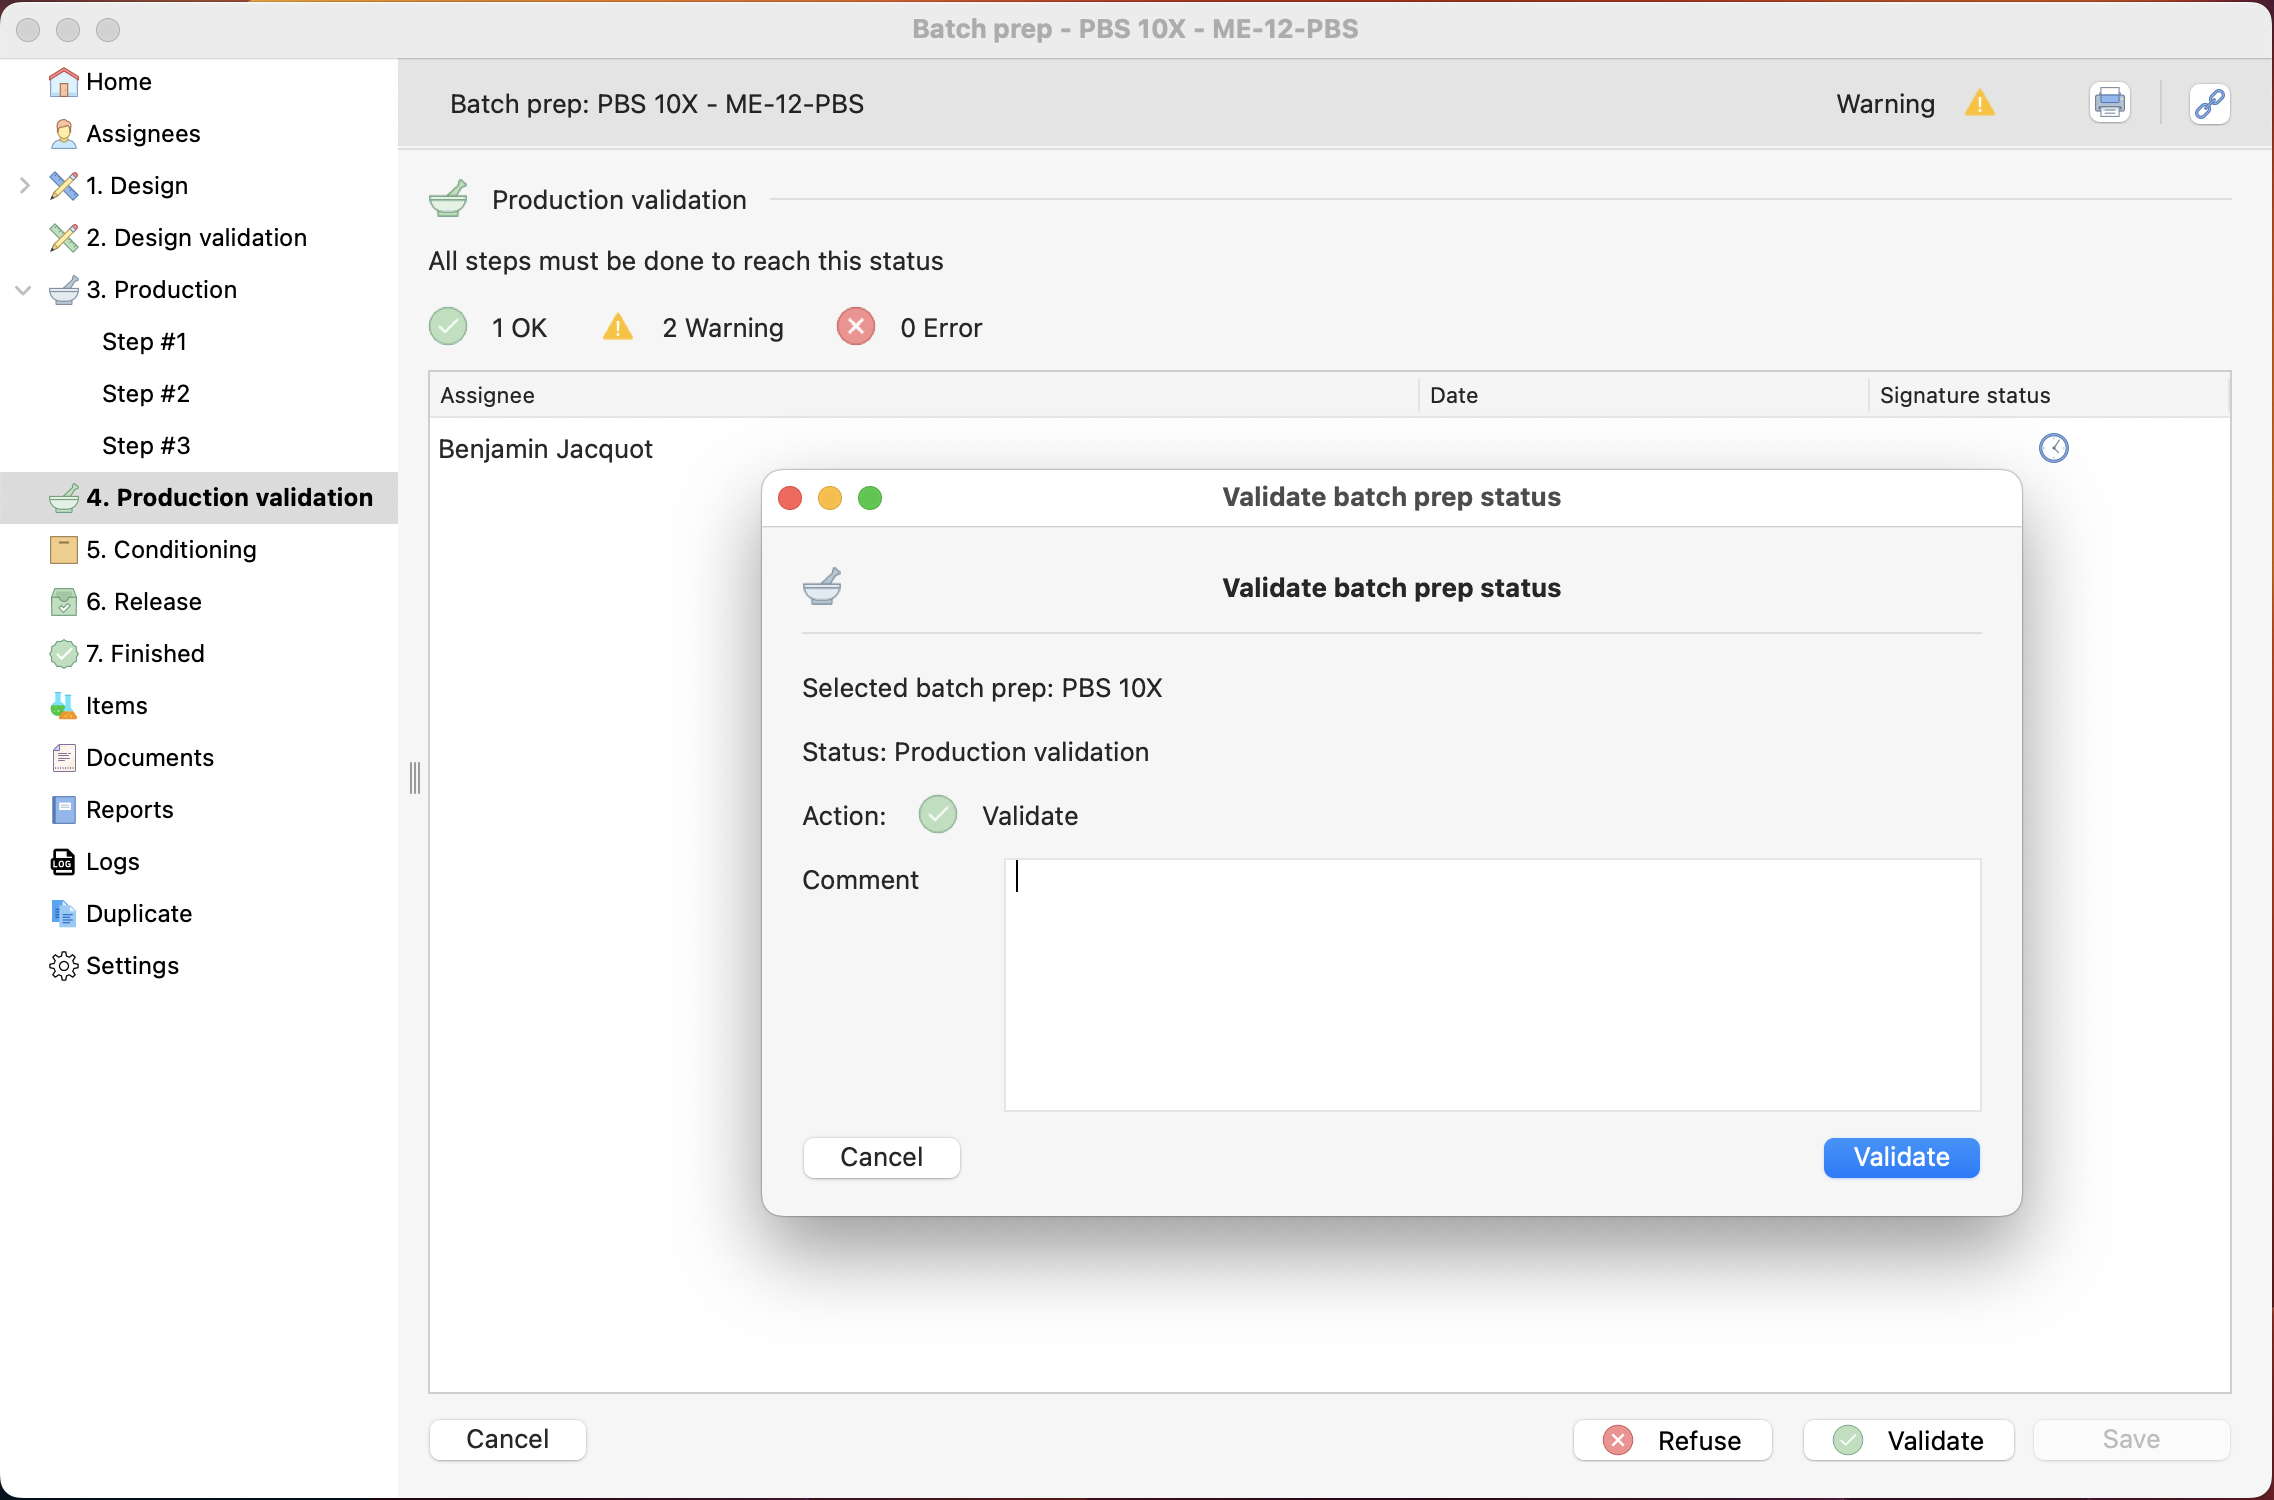
Validation of the last production step.
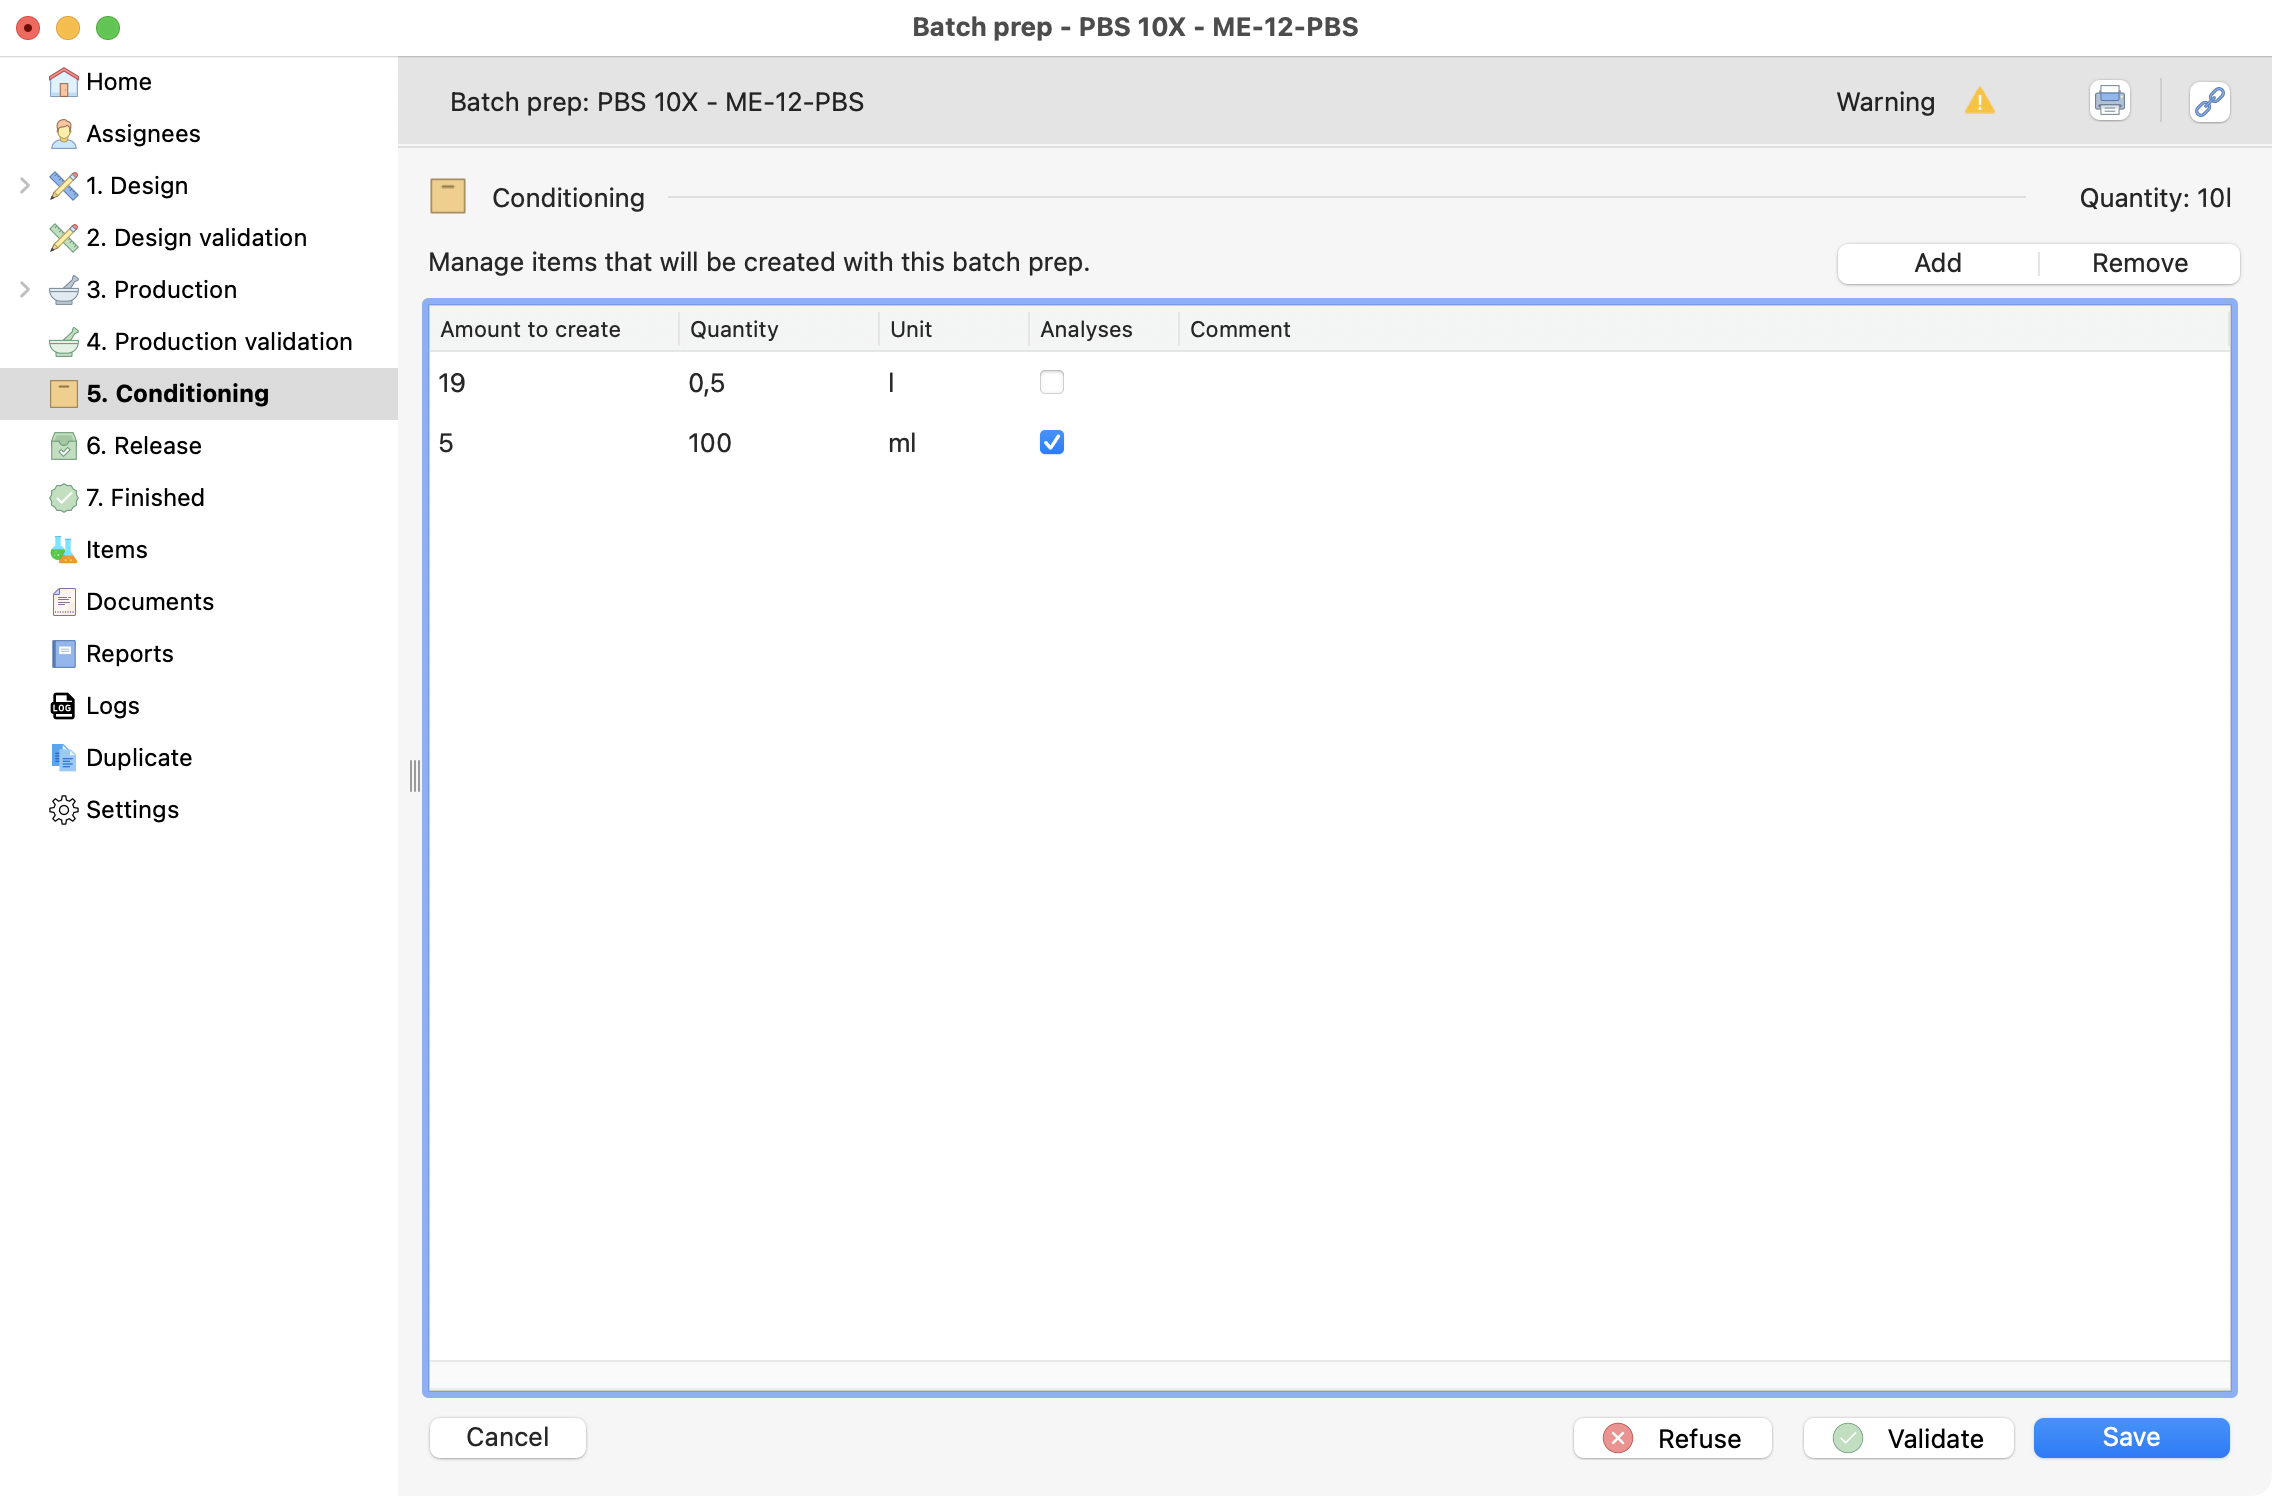
Step 6: Condition and review of items
Specify the conditioning
Here is where you can specify the items to be created in the stocks.
Remember
On the production process, this step can be validated only by a quality-role related user.
To start, click on “Add” button and fill the line. Then, you can specify different types of conditioning
Conditioning screen, with two differente types.
Warning
The items created with “analyses” box selected will be reserved for analyses and set with 0 as remaining quantities in stocks.
Review items
Before the release, you can review all the items that will be created:
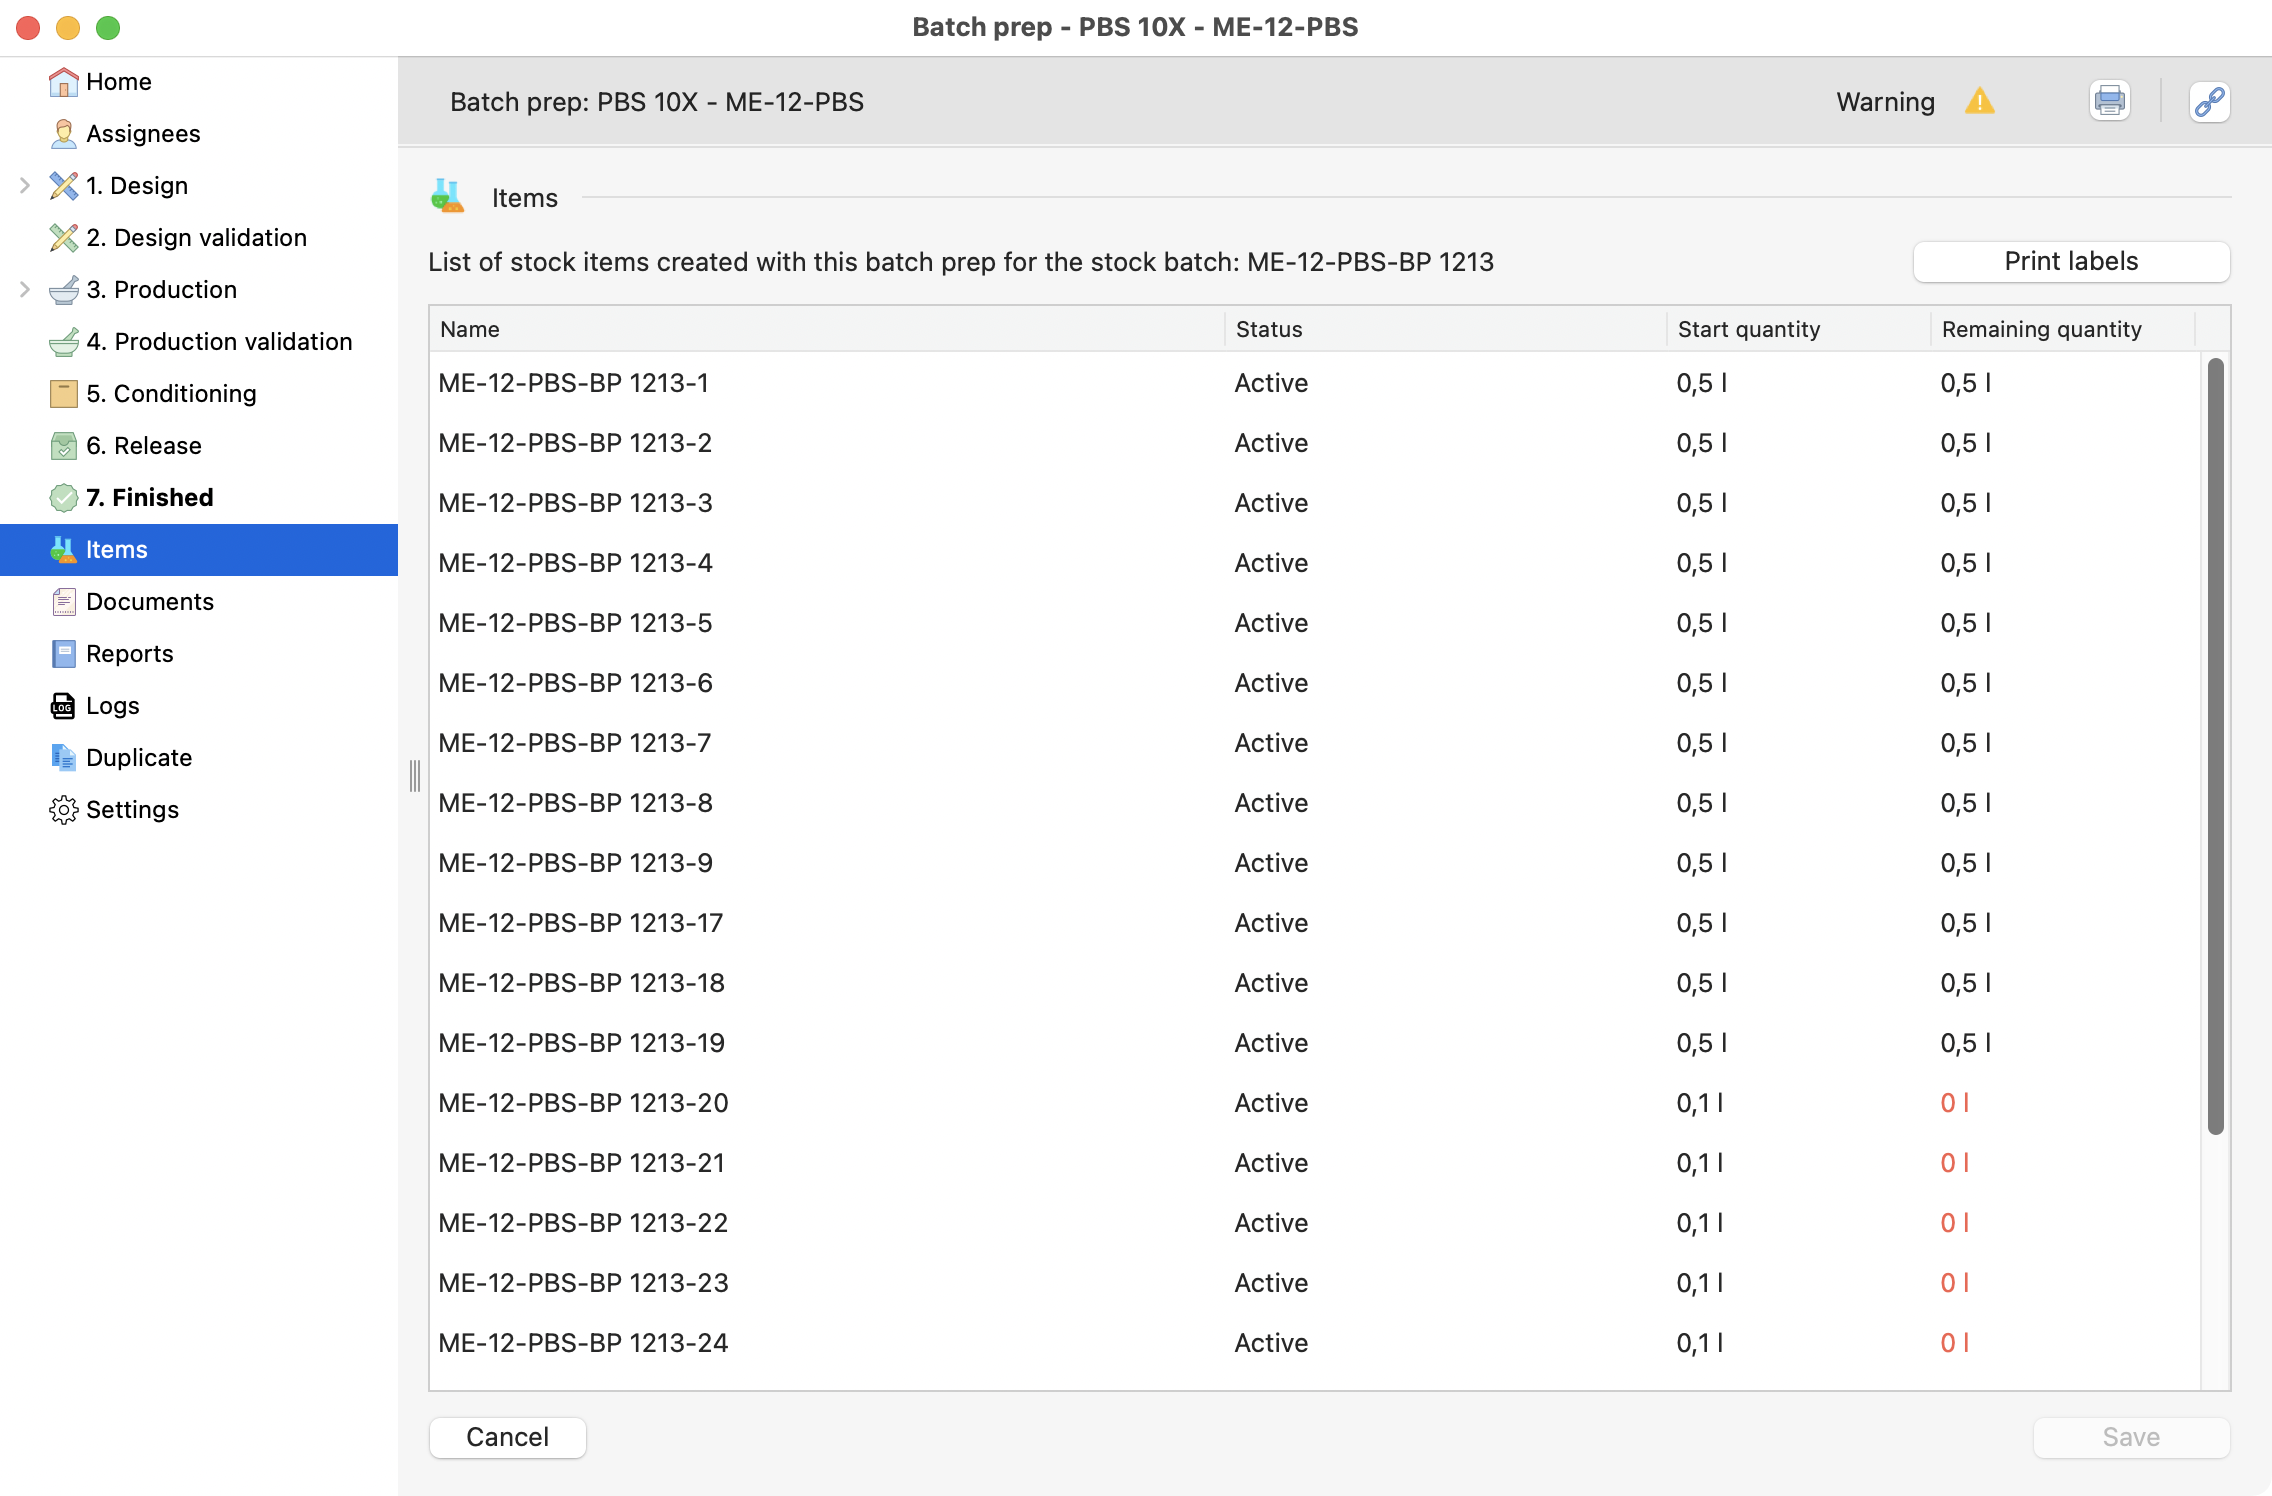
List of items conditioned before.
Also, you can generate your labels (after selecting a label template).
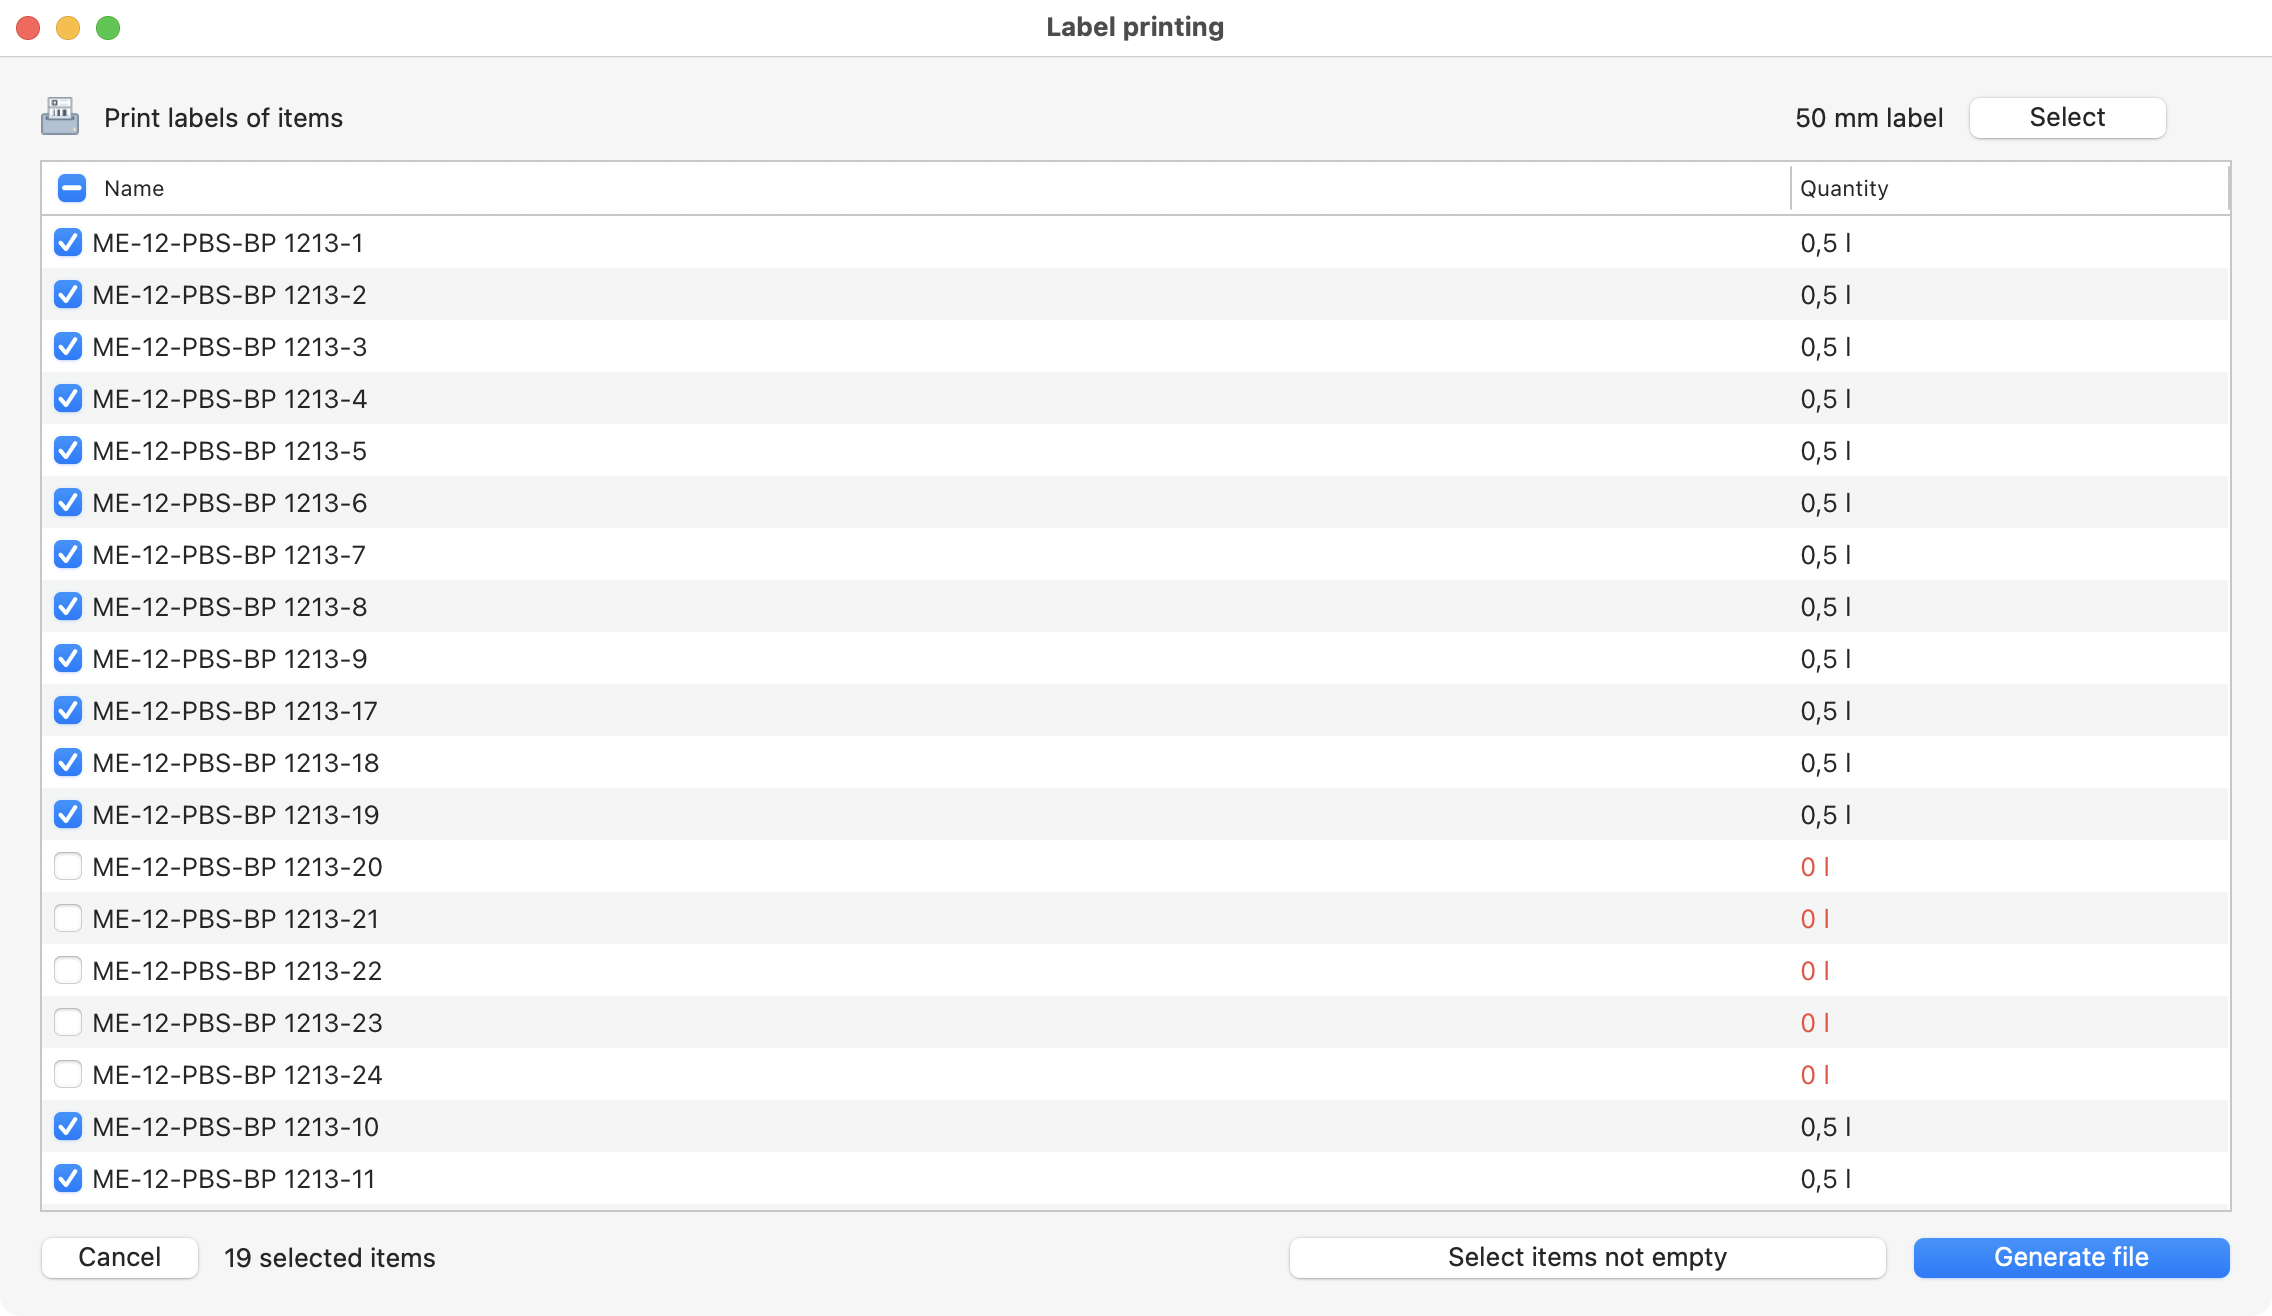
Labels selected to be printed.
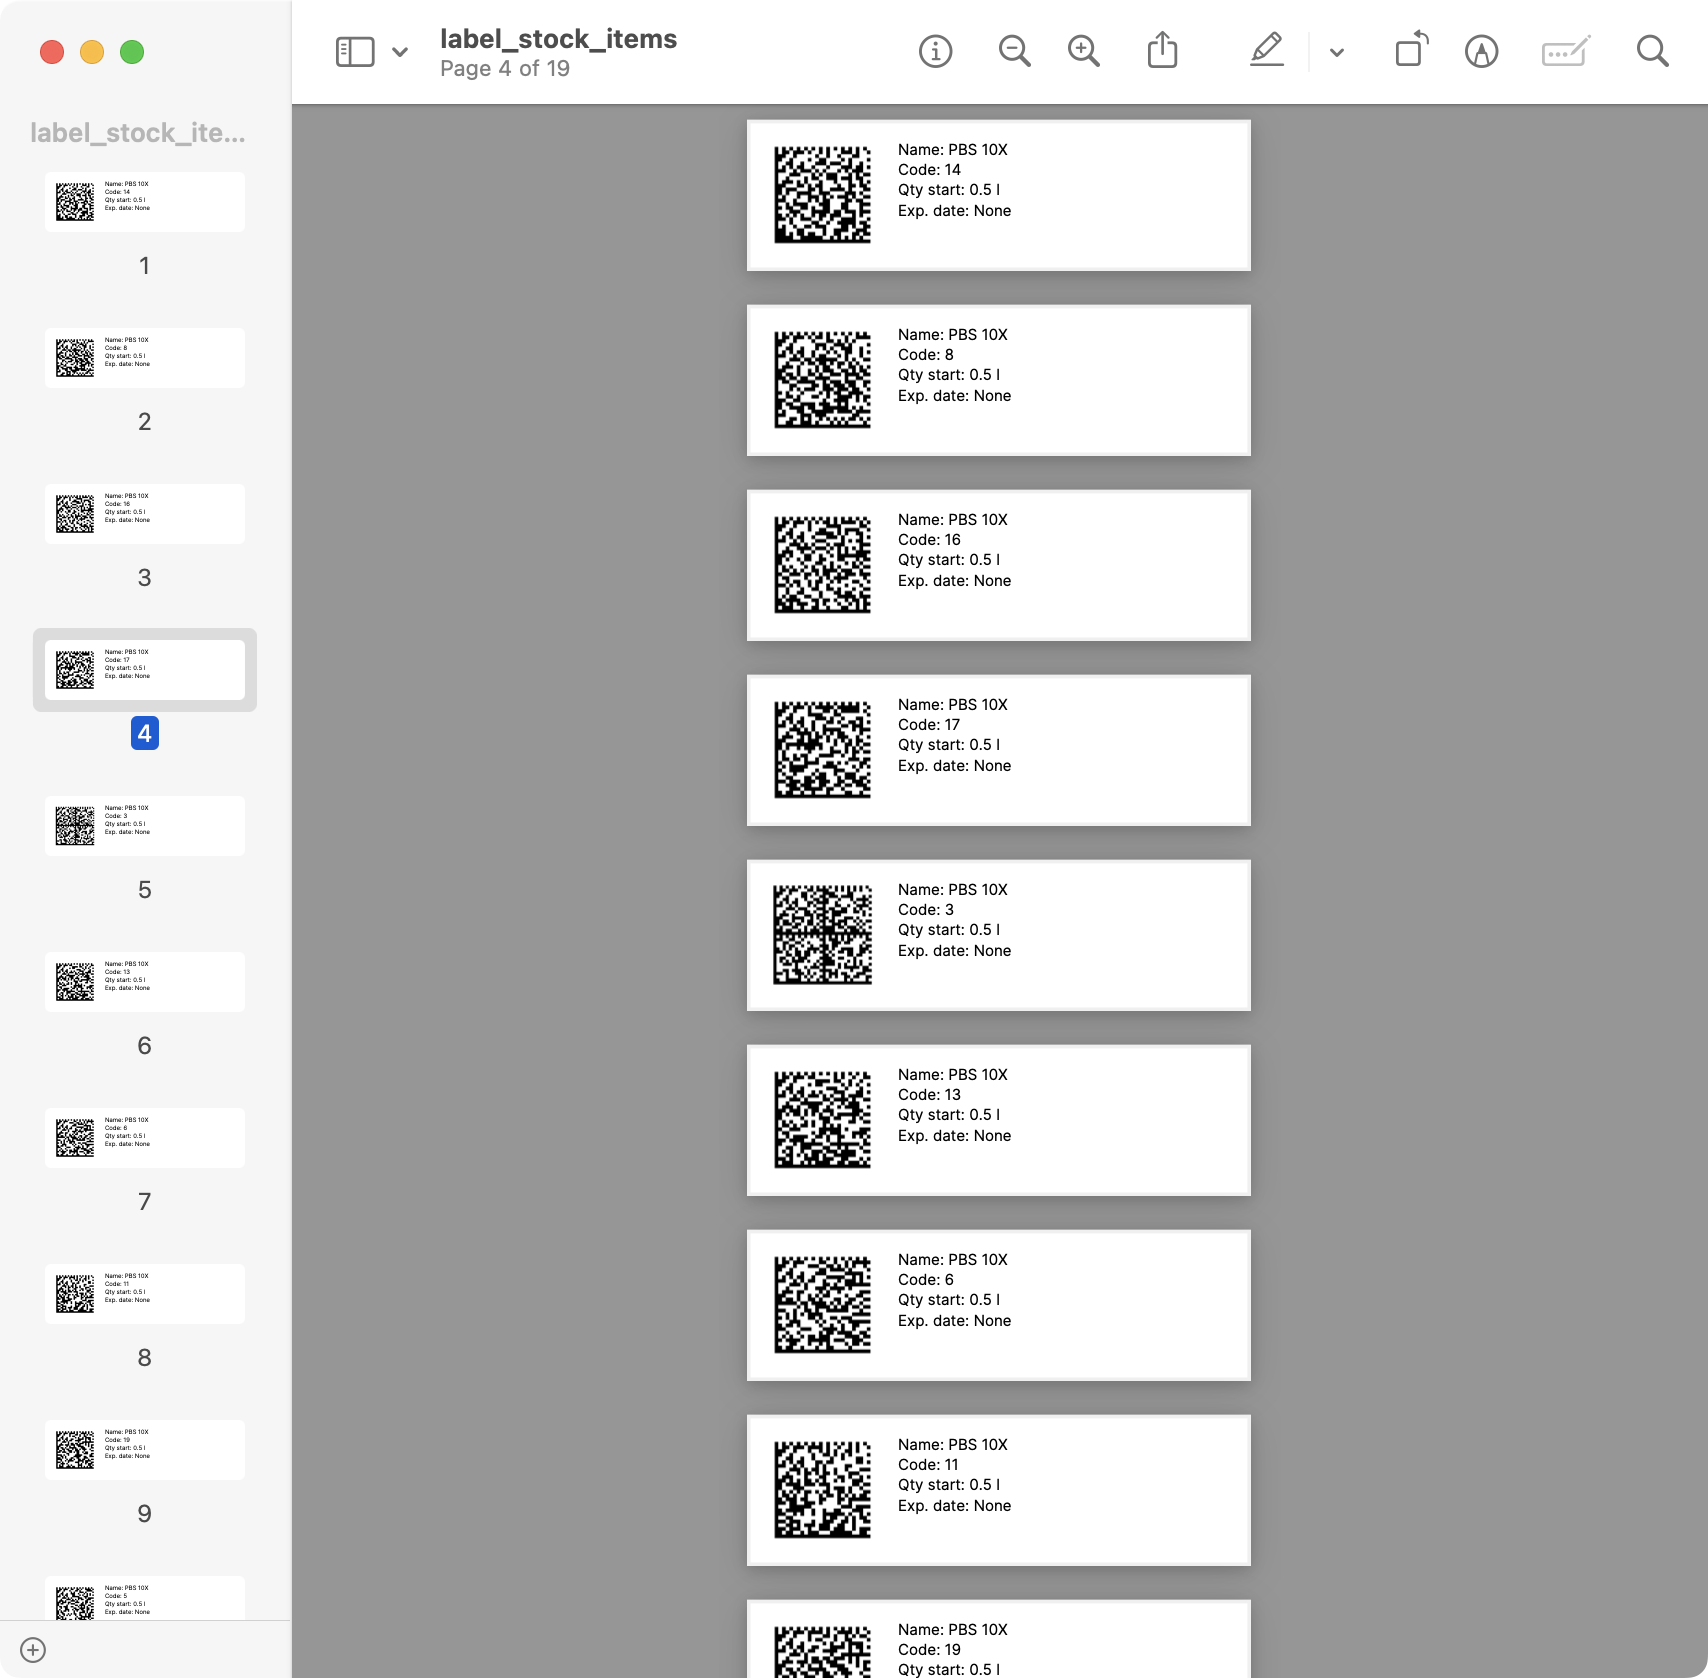
Example of labels generated.
Step 7: Release
When releasing the items that you conditioned before, they will be visible and available for others in stock.
Remember
On the production process, this step can be validated only by a quality-role related user.
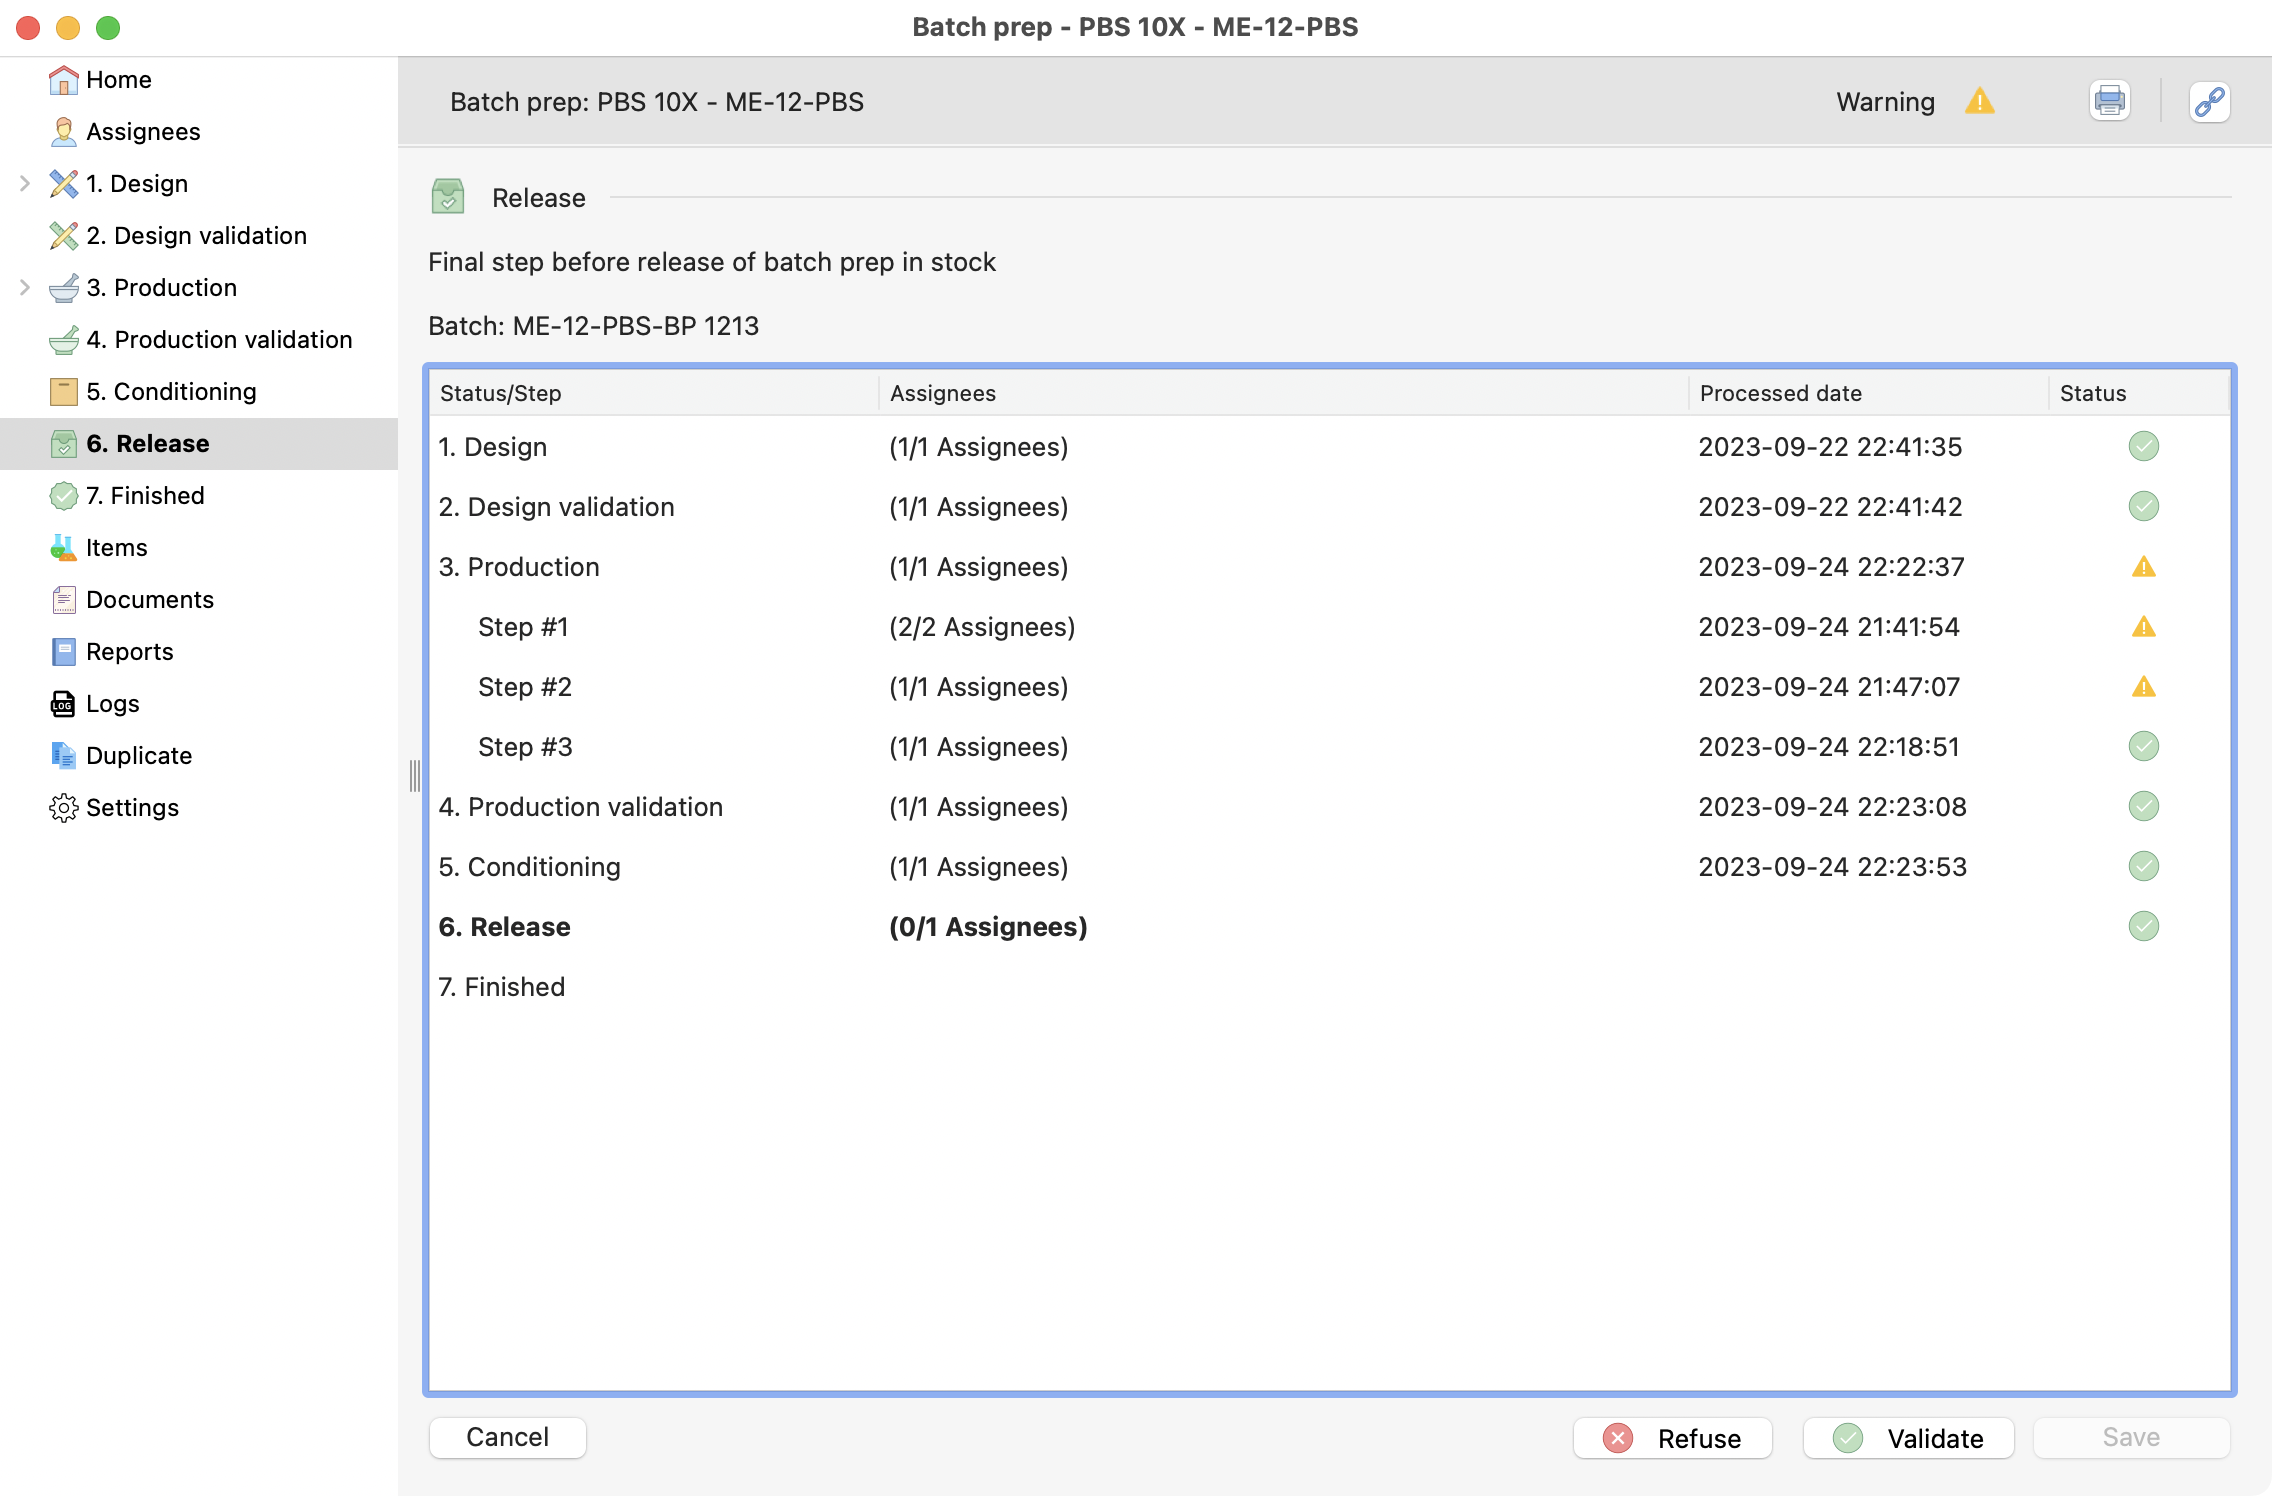
View of the release step.
This is the only step requiring your password in R&D process type.
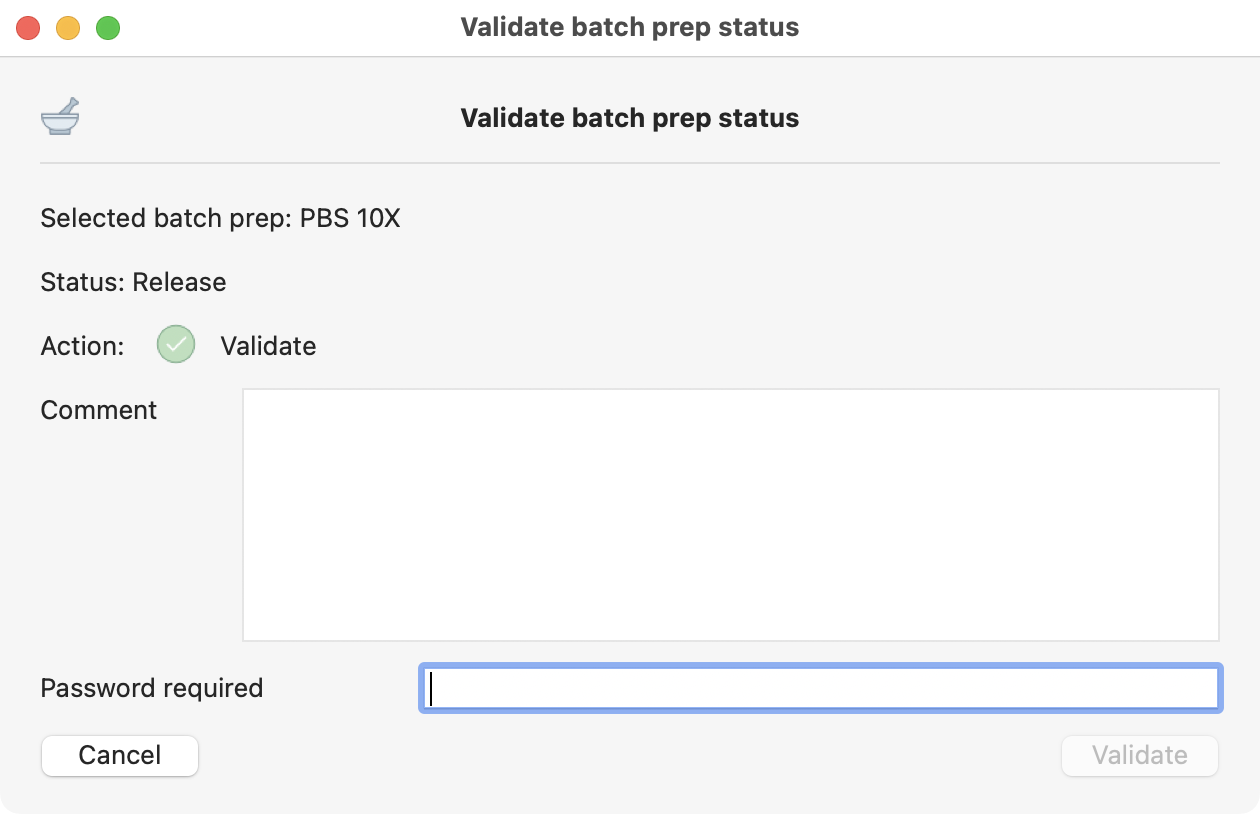
Last release confirmation, where you need to include your password.
Additional actions
Reports
You can generate an automatic report here, by clicking on create.
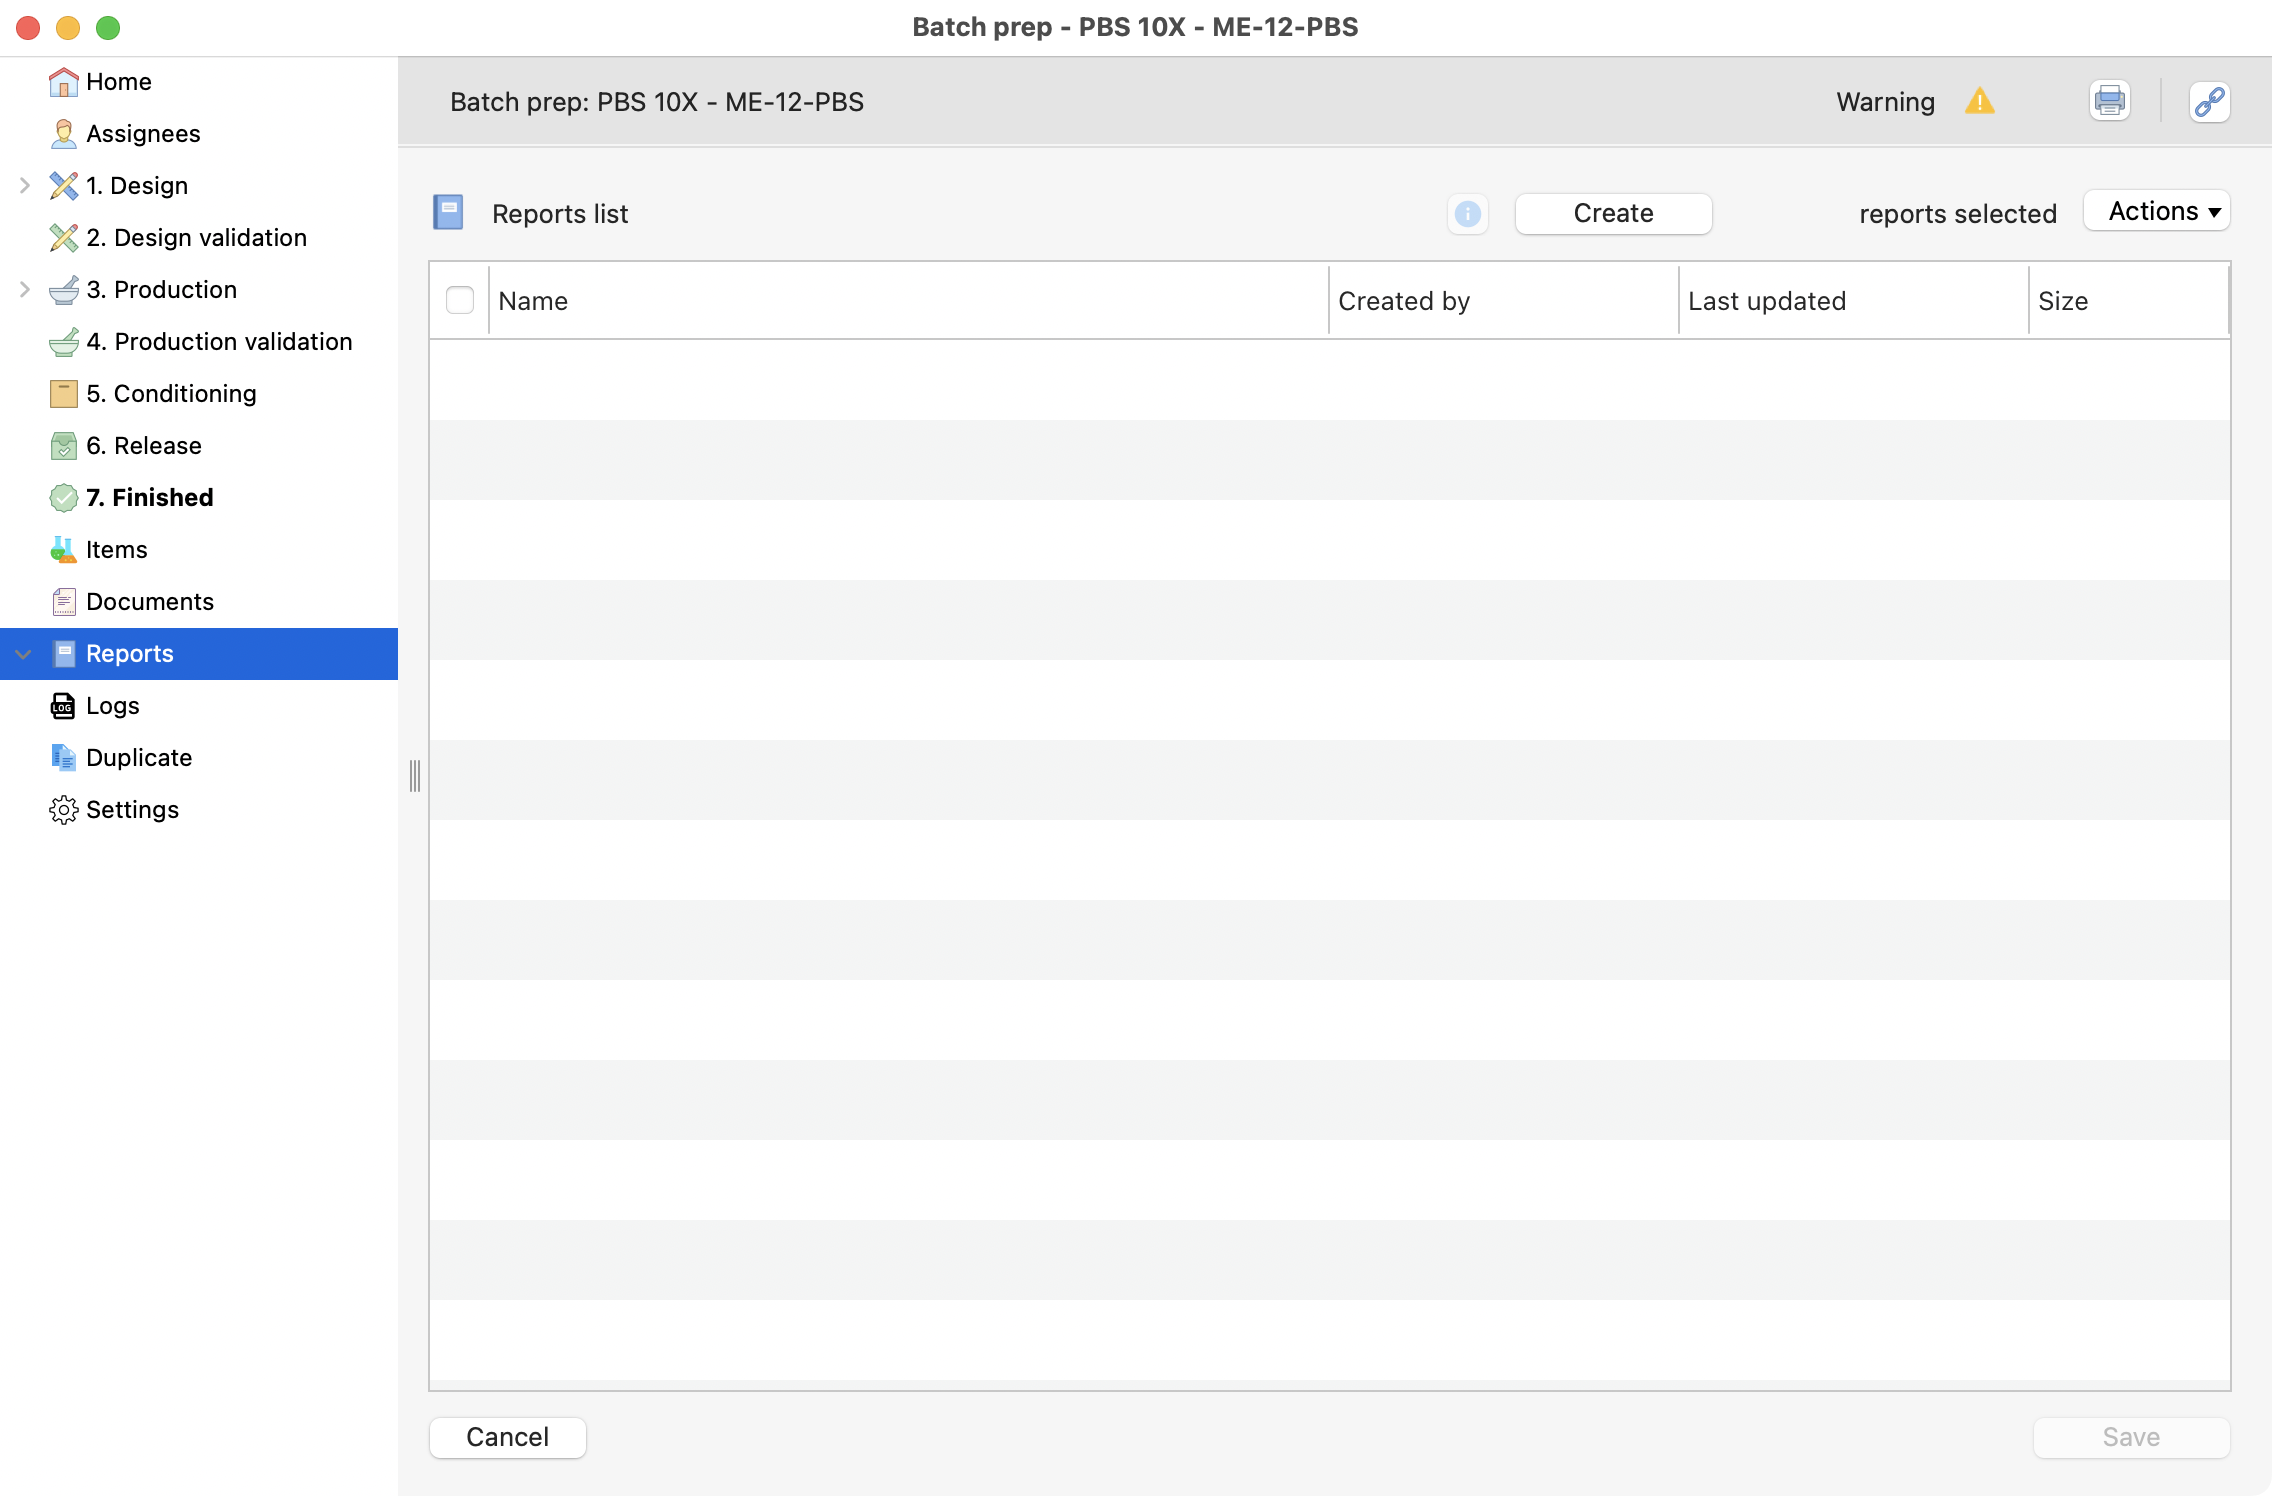
View of the reports section.
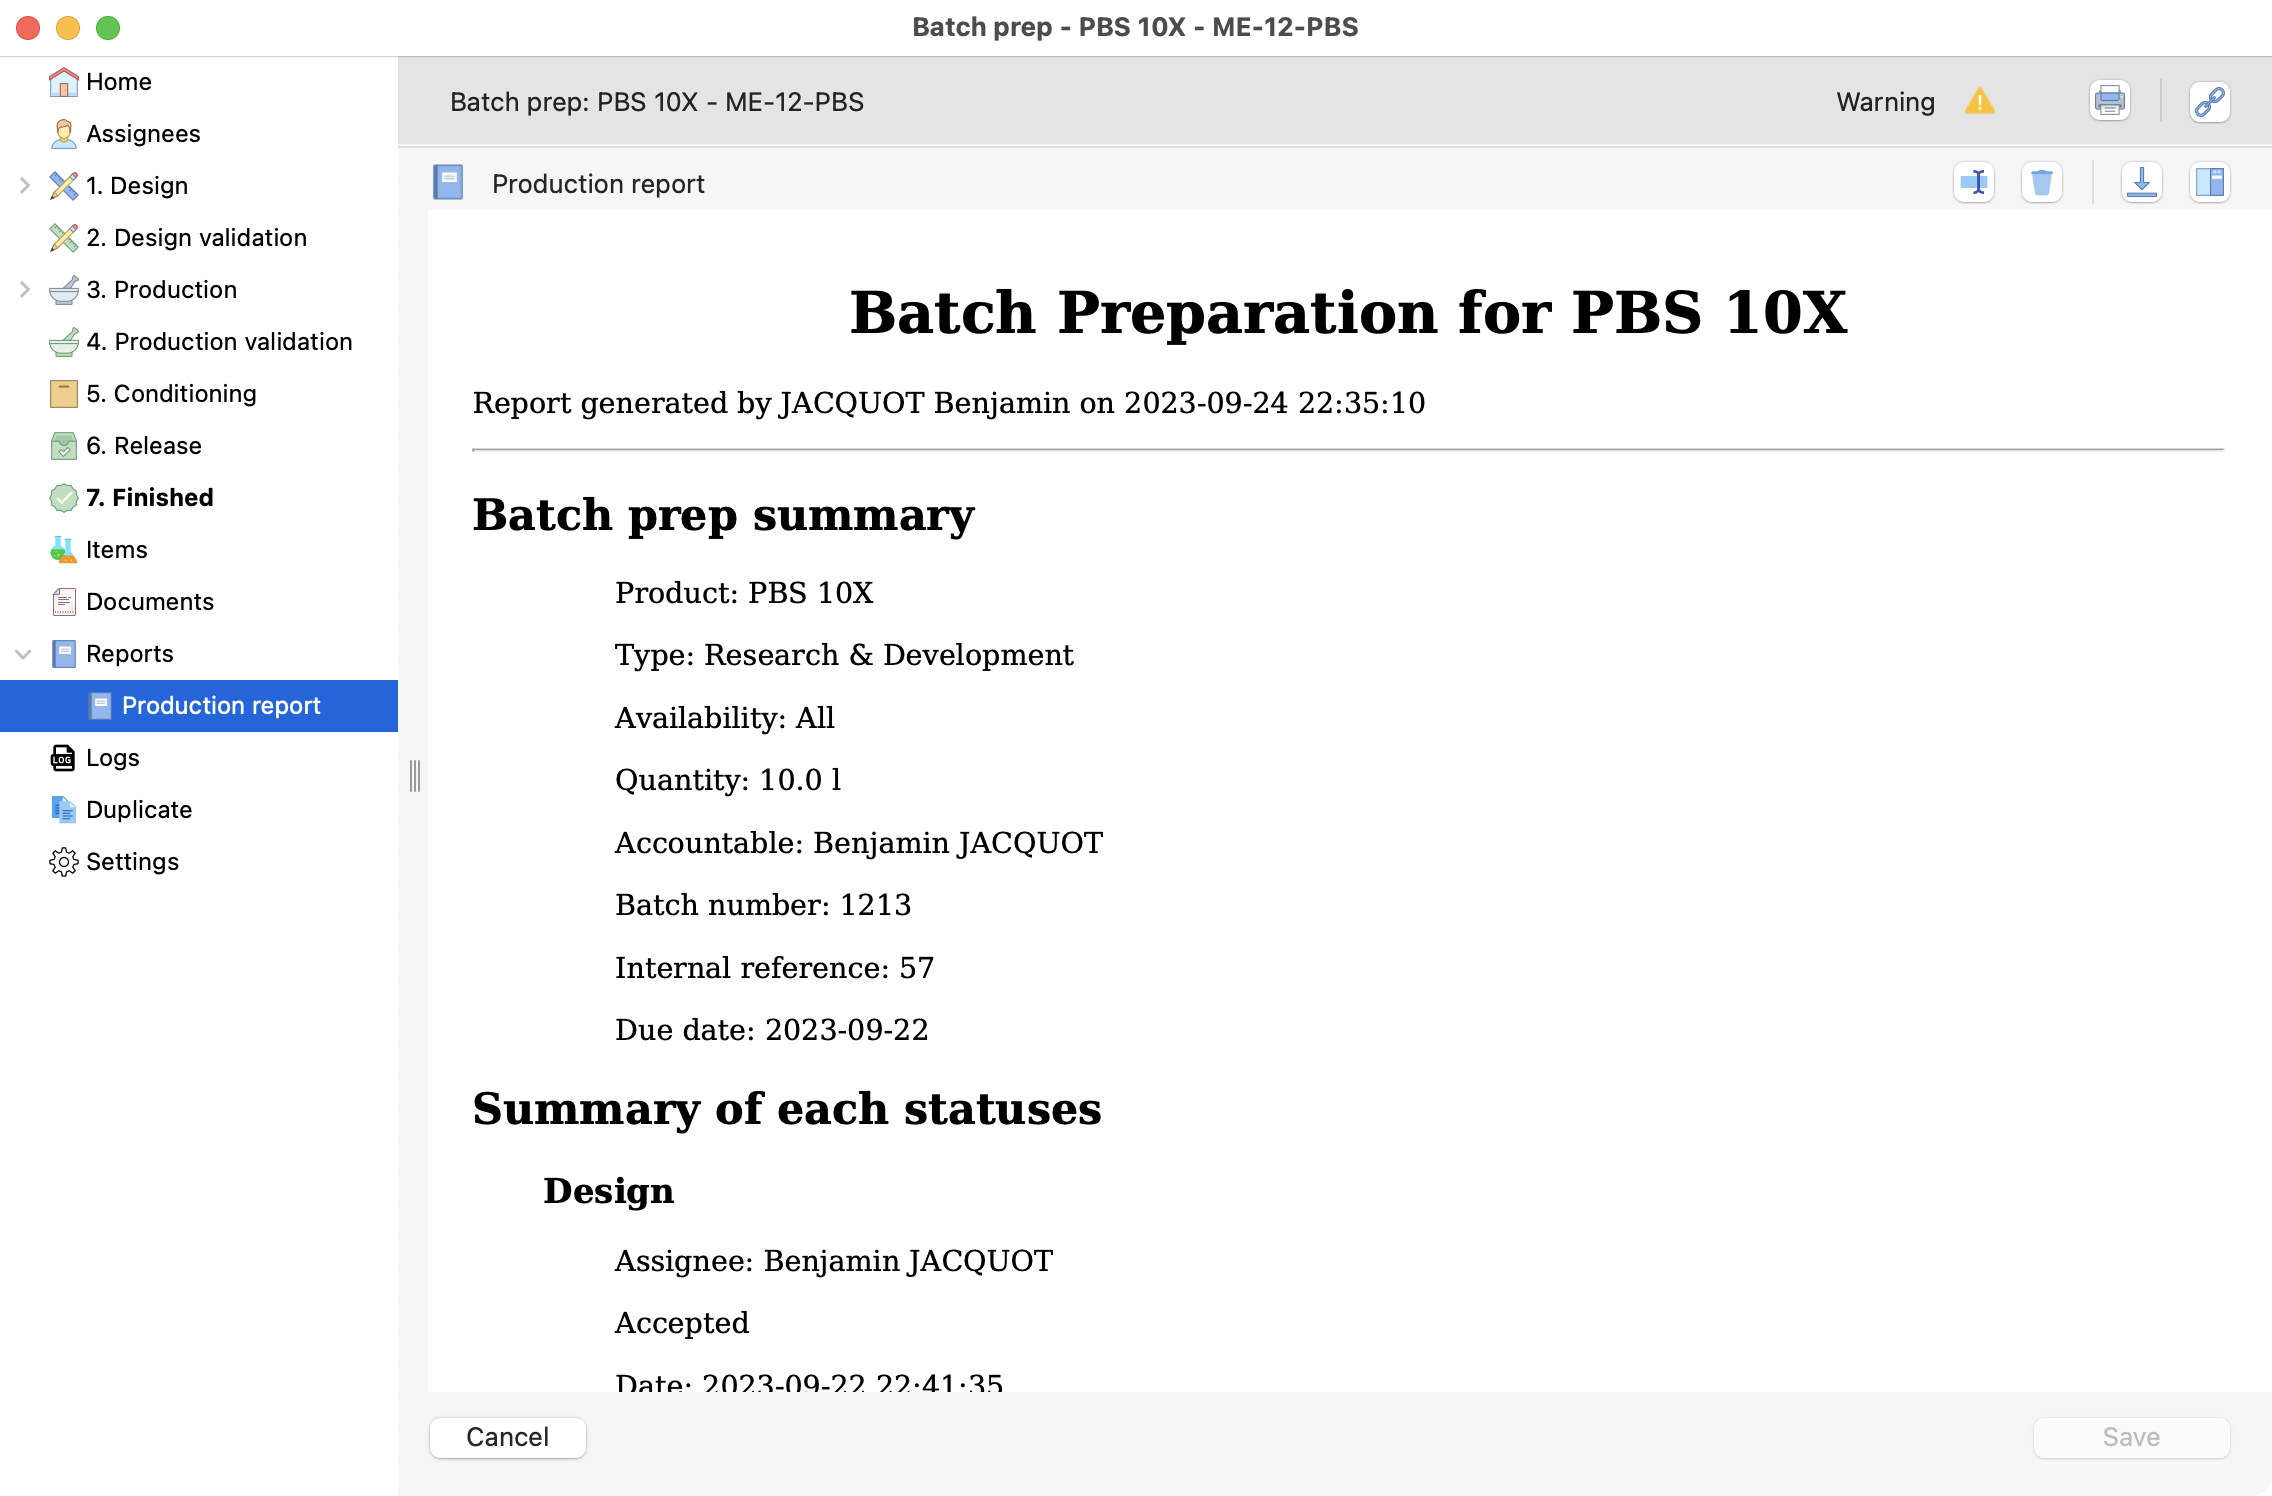
Example of a generated report.
Logs
In that section you can see all the modifications made, and who did it. It’s your tool for traceability in batch preparation.
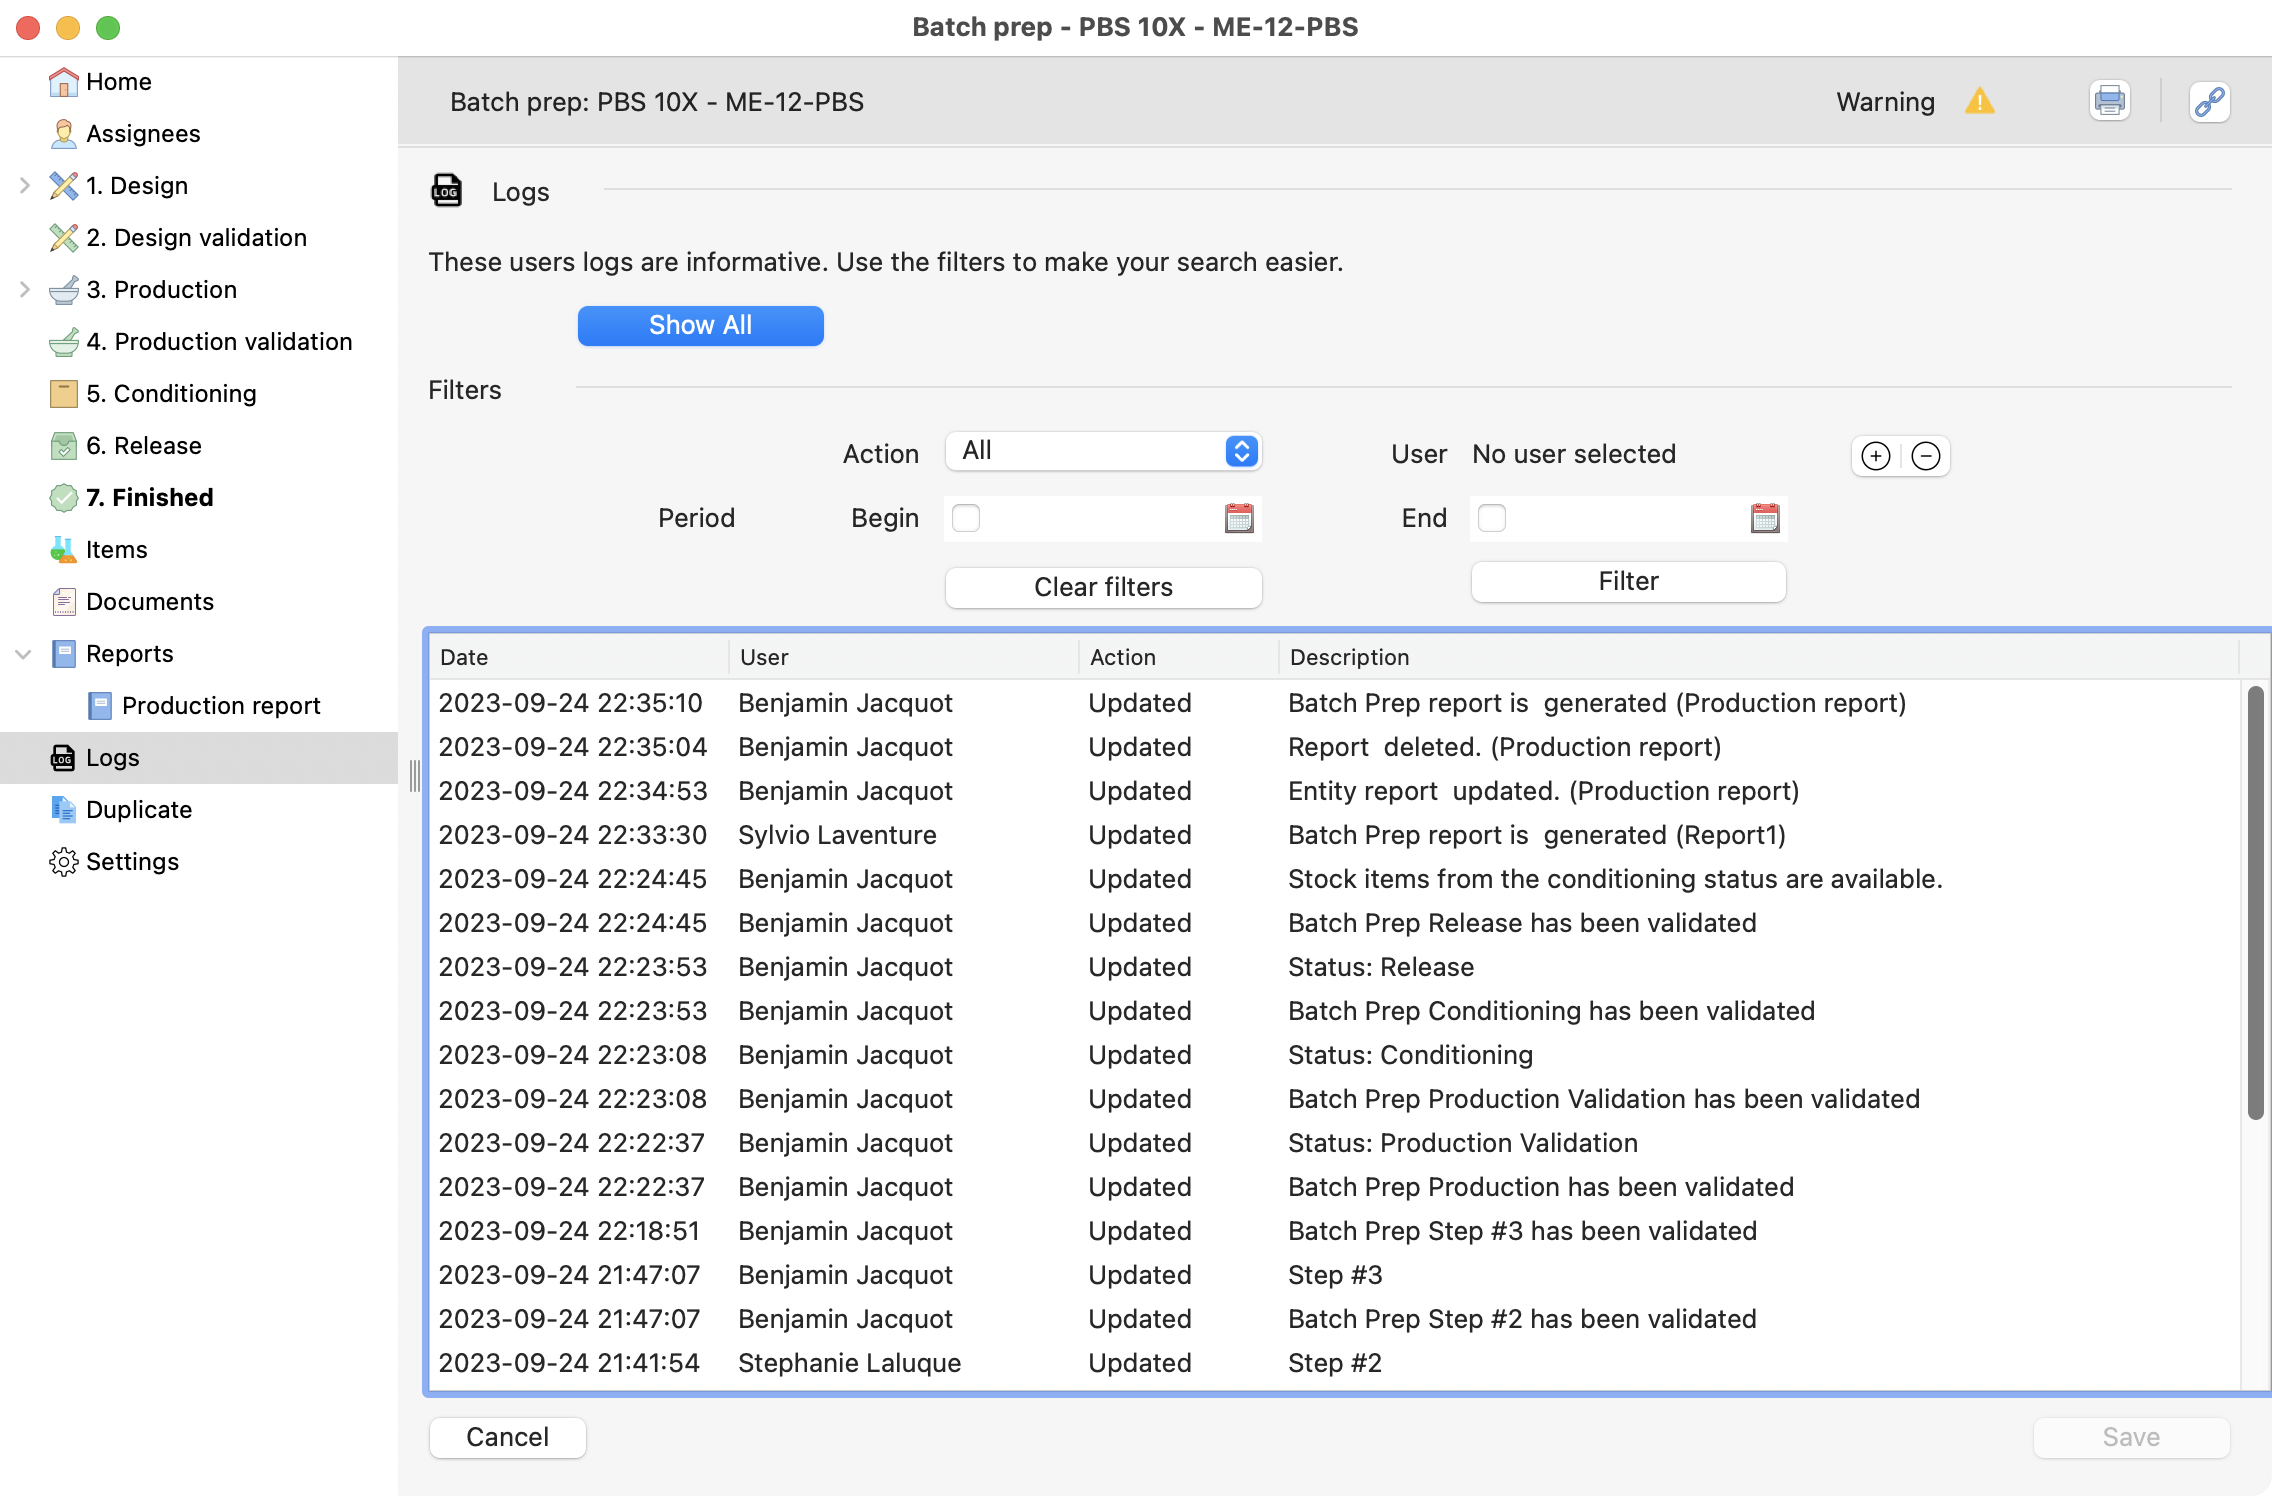
View of the logs section, with all the modifications displayed.
Duplicate
By clicking on duplicate, you can speed up your next production. The newly created batch will be set on the design phase with the same information, such as:
Assigned users.
Items.
Conditions.
Equipment.
But you can still change key informations like:
Dates.
Process type.
Accountable.
Settings
The last section on batch preparation is the settings. Here you can delete or cancel a preparation, respecting the conditions seen in the image:
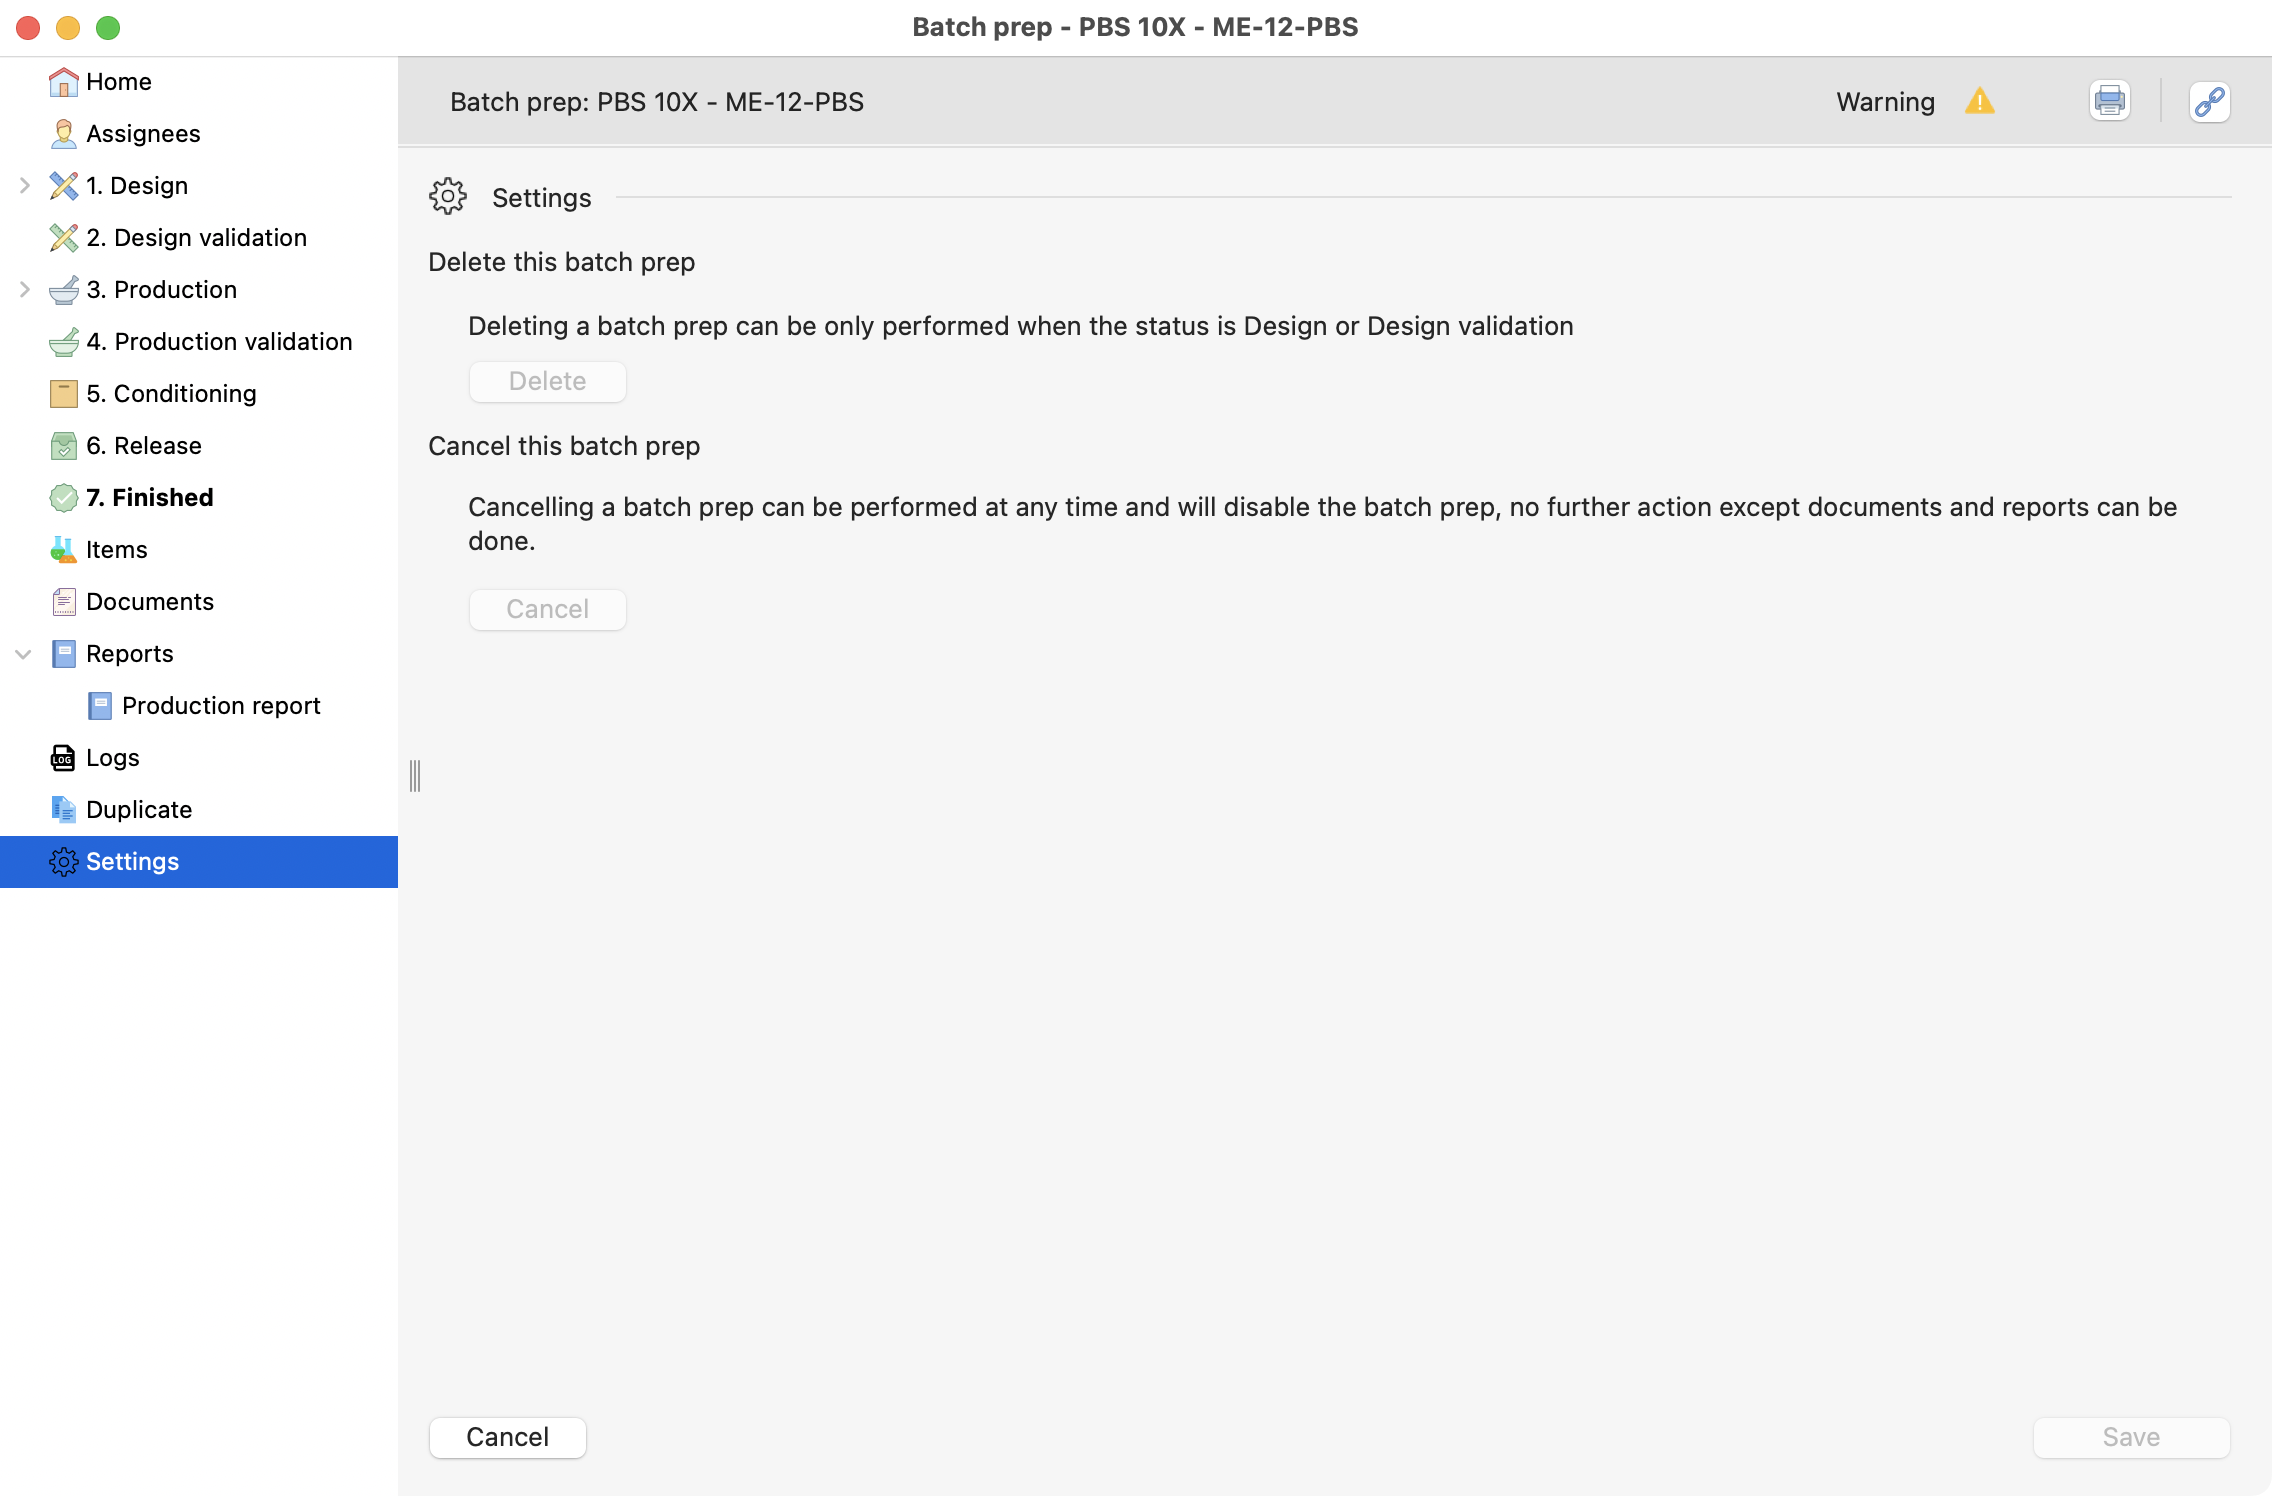
Settings page, inside a batch prep.